RAM disk device is an extremely fast virtual disk that completely resides in the random access memory. Generally, RAM disk devices are used to store temporary/cache files. Such an approach allows for drastic improvement of the system performance. In many applications, data is copied to a RAM disk from other media for much faster access. With RAM drive emulation, these virtual drives can be more than 1000 times faster than the local hard drive. They appear to your system and applications as a standard disk volume where you can read and write files.
Note: The content of a RAM disk will be lost in case of a server shutdown, reboot or deletion of the RAM disk device.
To create a RAM disk device and export it over an IP network:
1. Open Add Device Wizard in one of the following ways:
- Right-click a StarWind server and select Add Device (advanced) from the shortcut menu.
- Select a StarWind server and click the Add Device (advanced) button on the toolbar.
2. The Add Device Wizard appears. Please follow the instructions to complete the creation of a new RAM disk device.
3. Select Hard Disk Device as a device type to be created.
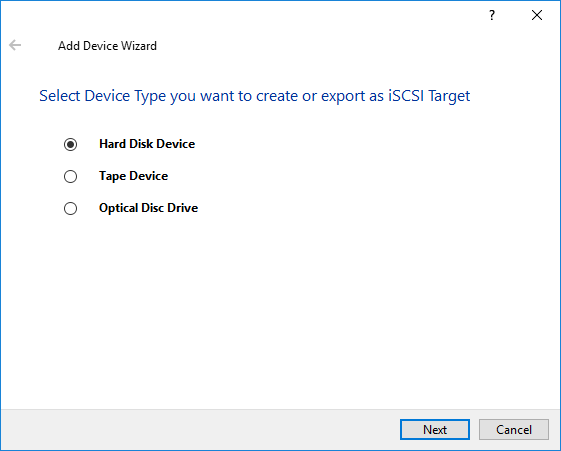
4. Click Next to continue.
5. Select RAM Disk as a disk device type.
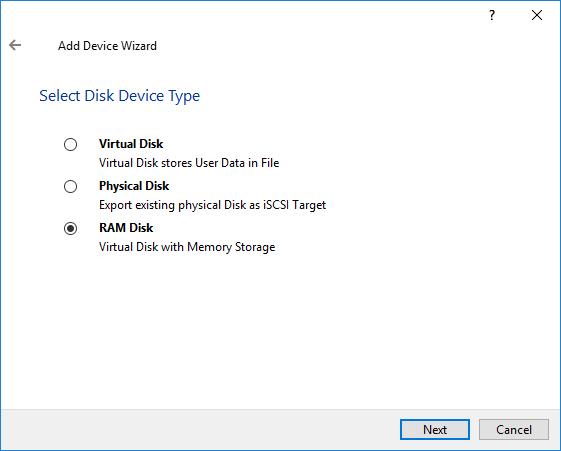
6. Click Next to continue.
7. Specify the Size of the RAM disk device.
Note: The size of the RAM disk device cannot exceed the free RAM capacity that is available at the moment of creation.
You can select the Single Partition Drive Format checkbox to use FAT16 or FAT32 file system. If you format the RAM disk, it will appear as a ready-to-use logical volume for the remote users. However, some applications work with unformatted drives or may use other file systems. For such purposes, do not select the specified check box. Note that an exported RAM drive can be formatted in the usual way.
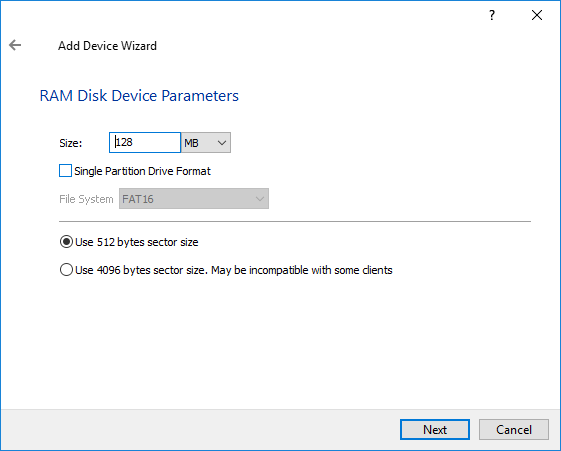
8. Click Next to continue.
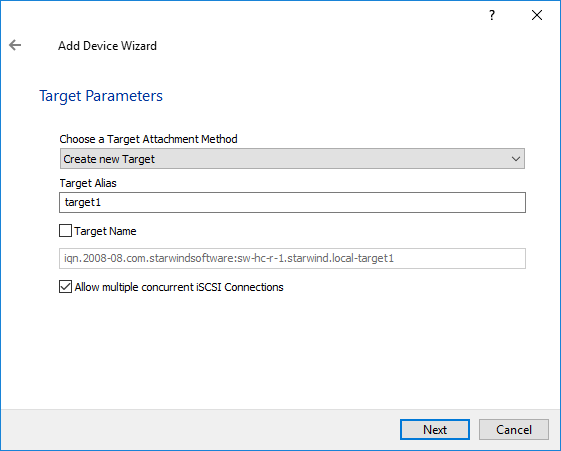
9. Select a method of target attachment and fill in the Target Alias text field.
Select the Target Name checkbox to enter a custom name of a target. Otherwise, the name is generated automatically in accordance with the specified target alias.
Note: Specifying a reasonable name and alias simplifies navigation through the available iSCSI targets.
Select the Allow multiple concurrent iSCSI Connections checkbox if you want to enable several clients to connect simultaneously to the target.
10. Click Next to continue.
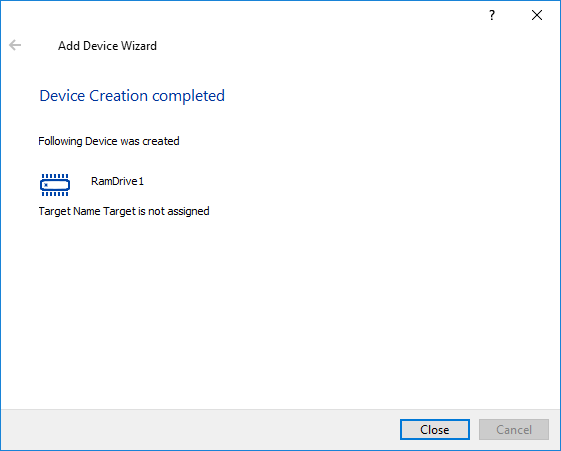
11. Click Create to add a new device and attach it to the target.
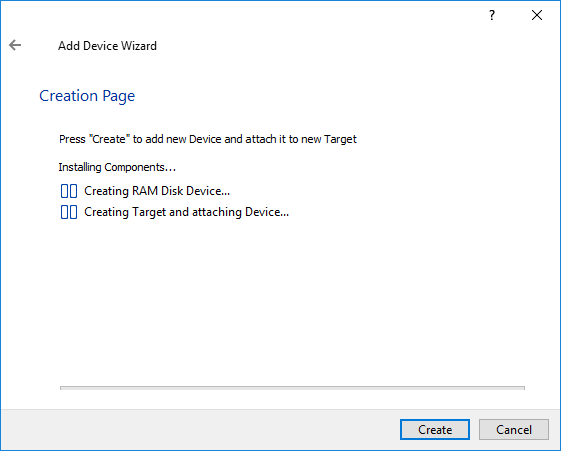
12. Click Close to close the wizard.