IMPORTANT NOTE: Starting from 14869 build, the LSFS device feature was excluded and deprecated. Please remove all Asynchronous replicas and LSFS devices before the update to 14869 build. See more information in the release notes: https://www.starwindsoftware.com/release-notes-build
LSFS requirements:
- 4.6 GB of RAM per 1 TB of LSFS size without deduplication. For example, if you have a 10 TB LSFS device, it requires 46 GB of free RAM.
- 7.6 GB of RAM per 1 TB of LSFS size with deduplication. For example, if you have a 10 TB LSFS device, it requires 76 GB of free RAM.
- Over-provisioning is 200% (LSFS files can occupy 3 times more space compared to initial LSFS size).
- Snapshots require additional space to store them.
To create an LSFS device, perform one of the following actions:
NOTE: StarWind Management Console cannot be installed on an operating system without a GUI. You can install it on any GUI-enabled Windows Editions including the desktop versions of Windows.
1. Open Add Device Wizard in one of the following ways:
- Right-click a StarWind server and select Add Device (advanced) from the shortcut menu.
- Select a StarWind server and click the Add Device (advanced) button on the toolbar.
2. As the Add Device Wizard appears, follow the instructions to complete the creation of a new LSFS device.
3. Select Hard Disk Device as a device type to be created.
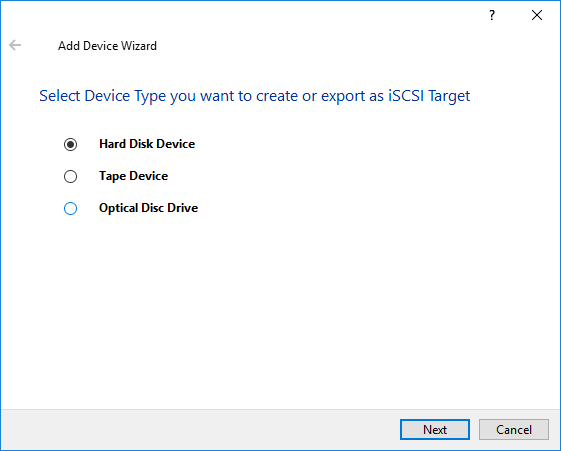
4. Click Next to continue.
5. Select the Virtual disk option.
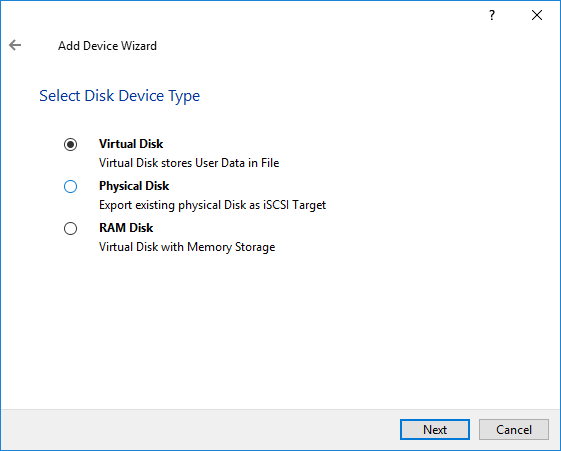
6. Click Next to continue.
7. Specify the virtual disk location and create a new file if needed.
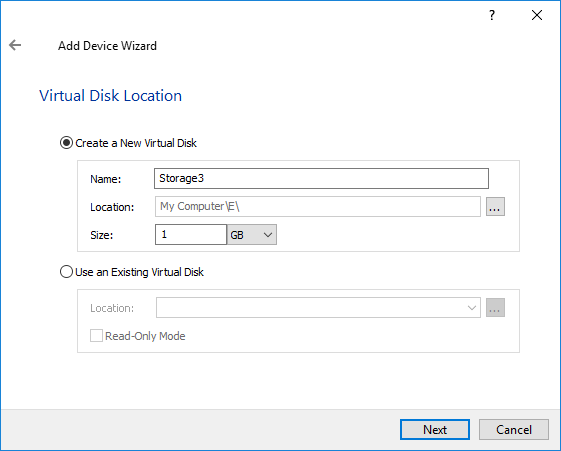
8. Click Next.
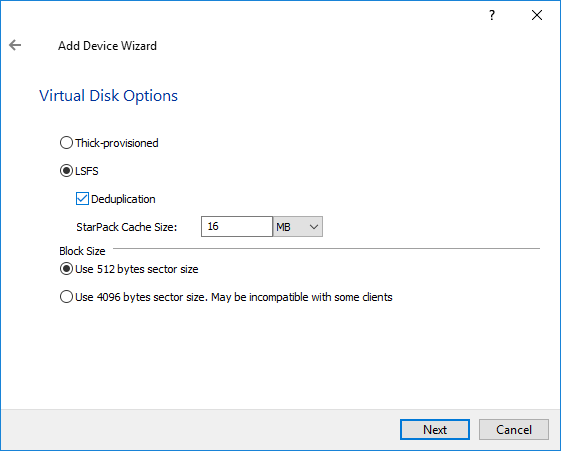
9. Select the virtual disk options:
- Thick provisioned - to create an image file device.
- LSFS - to create an LSFS file device.
NOTE: To learn more about the image device options read the Creating a New Image File Device.
NOTE: StarPack Cache is the low-level cache located between the disk and the LSFS log. It caches log fragments, which are later prepared for writing to the disk or read from it. If deduplication is enabled on the device, the data in the StarPack cache is also deduplicated. The recommended size is 16 MB.
NOTE: Use 4096 Virtual Block size for a Windows-based system or 512 bytes sector size for a Linux-based system (ESXi/Xen/KVM).
Select the Deduplication checkbox to activate in-line deduplication and therefore reduce disk space requirements.
10. Specify the LSFS settings if needed.
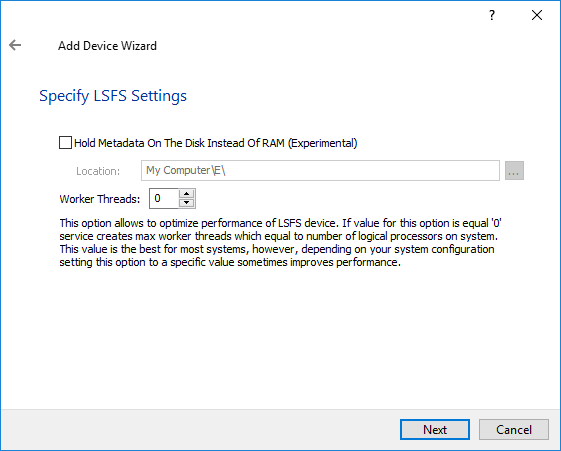
10. Click Next to continue.
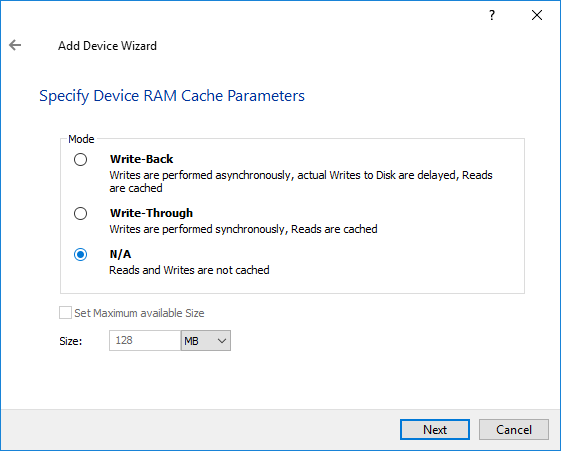
11. Define the caching policy and specify the cache size (in MB).
You can also set the maximum available cache size by selecting the appropriate checkbox.
NOTE: It is not recommended to configure cache in Write-Back mode on Standalone devices in order to avoid possible data corruption upon power outage or incorrect service shutdown.
NOTE: It is recommended to read the information on implementing of cache at the link below before adding it: https://www.starwindsoftware.com/resource-library/starwind-virtual-san-l1-and-l2-caches-operational-principles
12. Click Next to continue.
13. Define the L2 caching policy and the cache size.
Note: L2 cache can be used with LSFS or flat storage devices for performance acceleration. Use SSD drives to enable the L2 cache.

14. Click Next to continue.
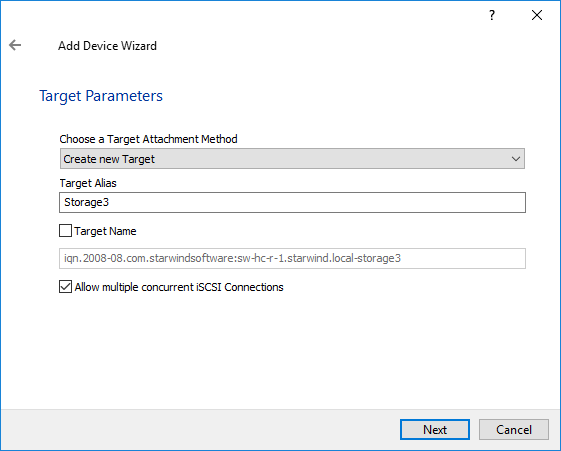
15. Select a method of target attachment and fill in the Target Alias text field.
Select the Target Name checkbox to enter a custom name of a target. Otherwise, the name is generated automatically in accordance with the target alias specified.
NOTE: Specifying a reasonable name and alias simplifies navigation through the available iSCSI targets.
Select the Allow multiple concurrent iSCSI Connections checkbox if you want to enable several clients to connect simultaneously to the target.
18. Click Next to continue.
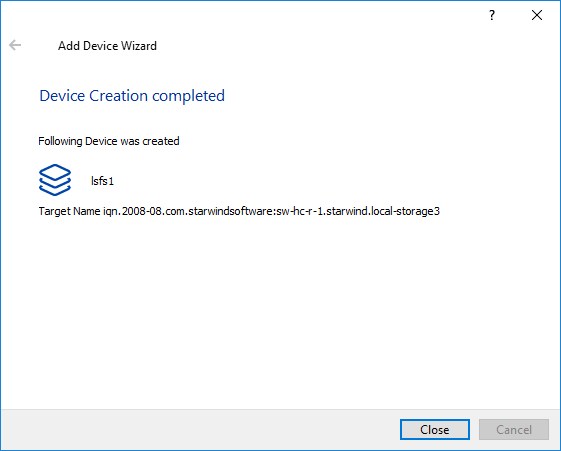
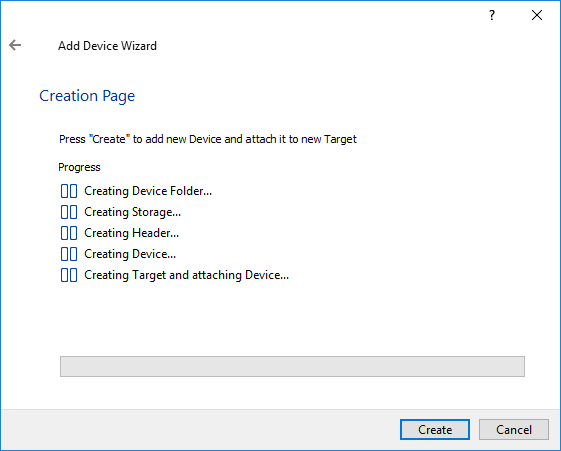
19. Click Create to add a new device and attach it to the target.
20. Click Close to close the wizard.