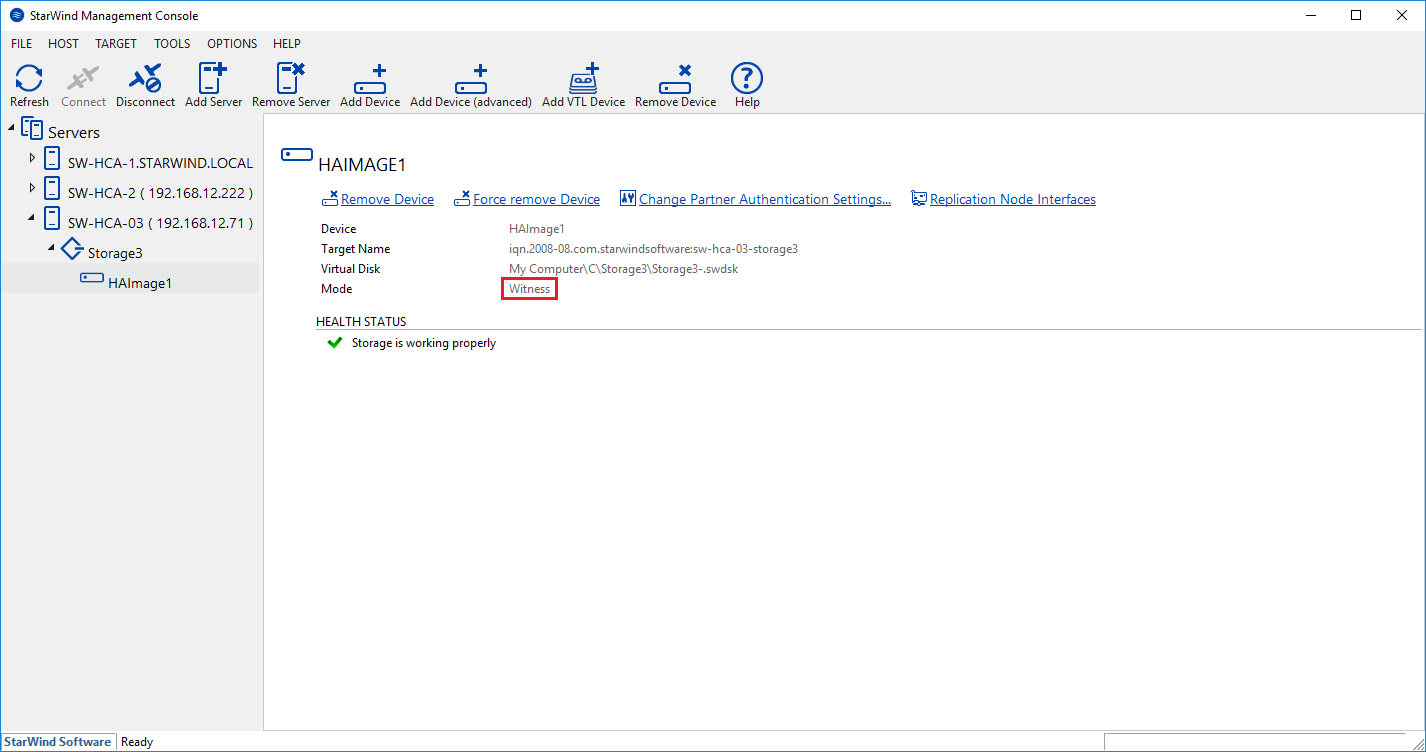
To set up the witness node, perform the following actions:
Witness node works only with Node Majority Failover Strategy.
1. Create a new device. To create the new device, use the guide at the following link:
Creating a New Image File Device
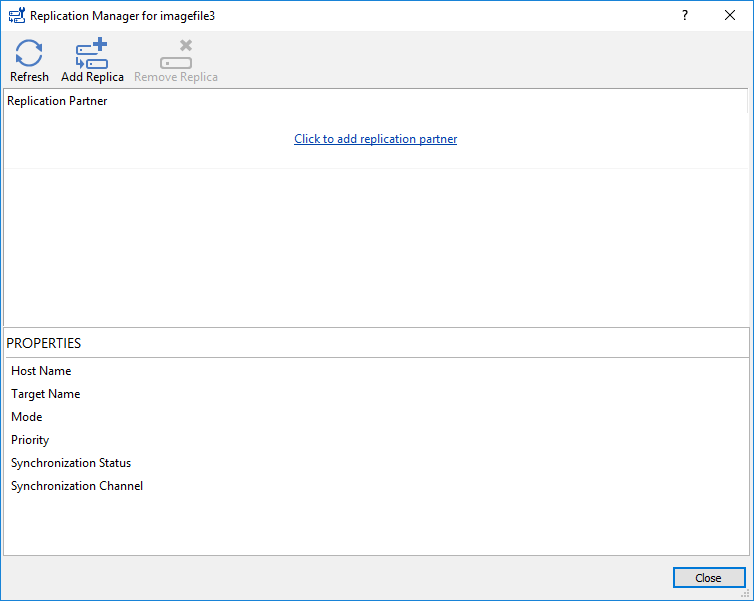
2. Right-click the required device and select Replication Manager from the shortcut menu. Then, click Add Replica.
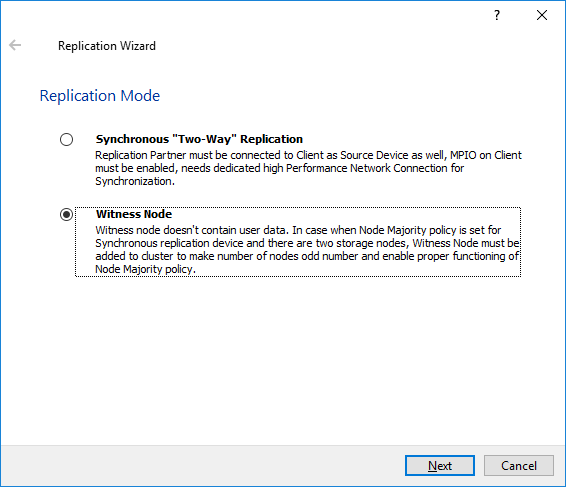
3. Select Synchronous "Two-Way" Replication as a replication mode.
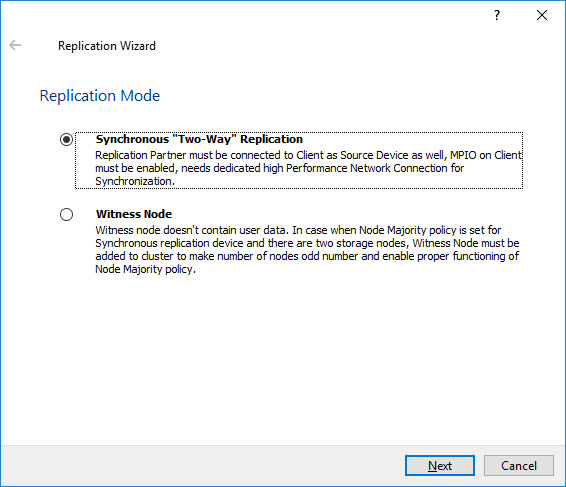
4. Click Next to proceed.
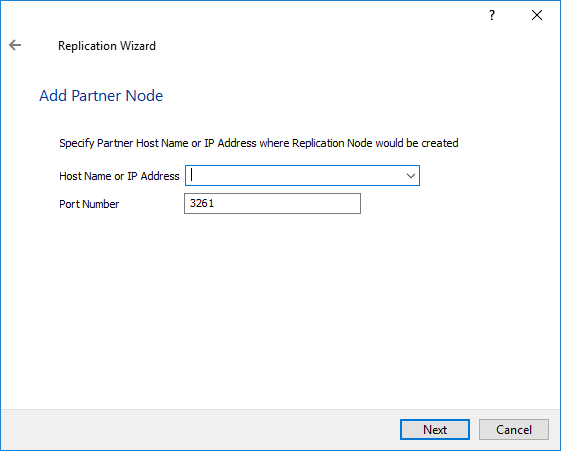
5. Specify a partner hostname, IP address, and port number.

6. Click Next.
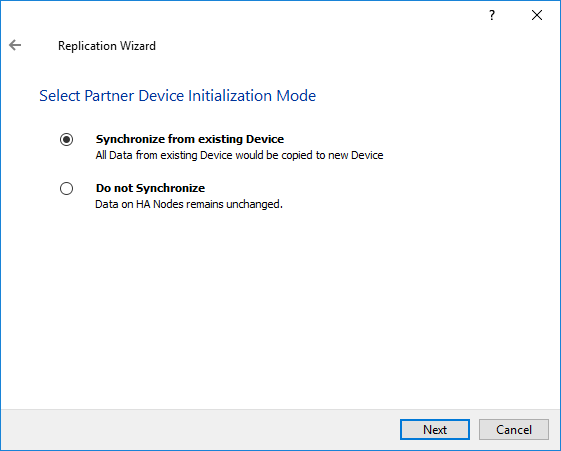
7. Select Node Majority and click Next.

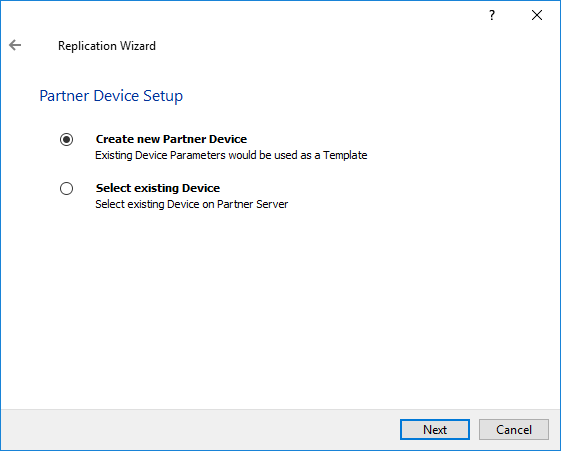
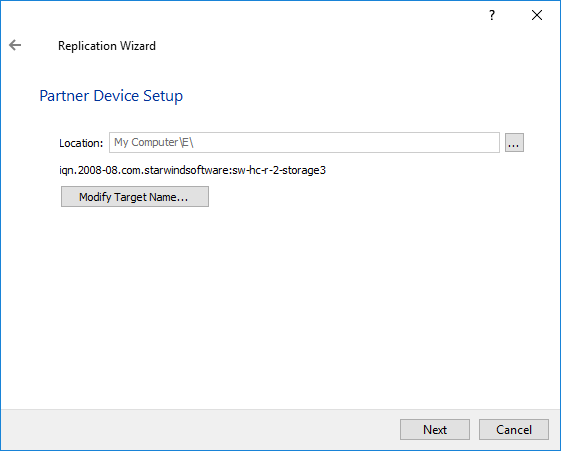
8. Select Partner device setup and click Next.
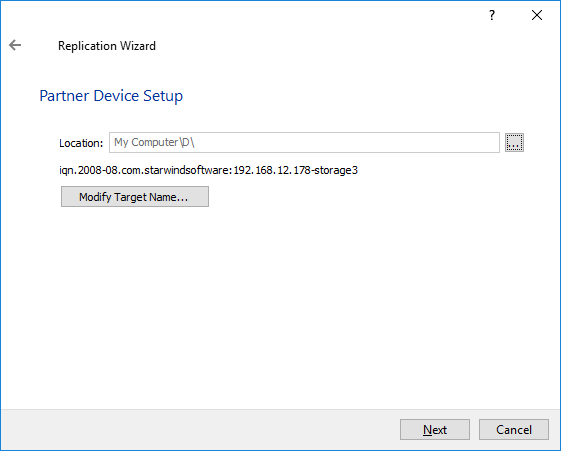
9. You can modify the target name if required. Click Next.
10. Select Synchronization Journal Strategy and click Next.
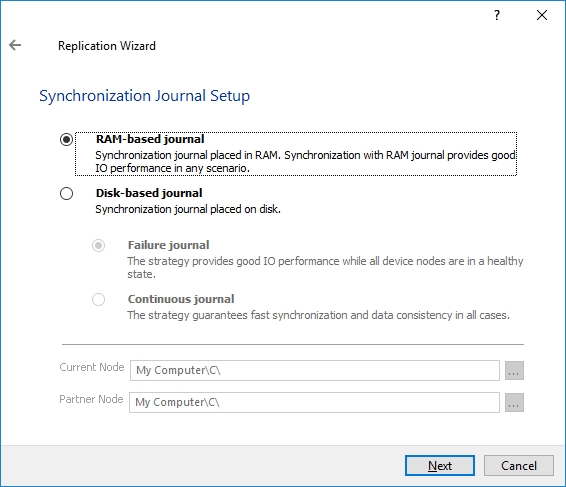
There are several options – RAM-based journal (default) and Disk-based journal with failure and continuous strategy, that allow to avoid full synchronization cases.
RAM-based (default) synchronization journal is placed in RAM. Synchronization with RAM journal provides good I/O performance in any scenario. Full synchronization could occur in the cases described in this KB: https://knowledgebase.starwindsoftware.com/explanation/reasons-why-full-synchronization-may-start/
Disk-based journal placed on a separate disk from StarWind devices. It allows to avoid full synchronization for the devices where it’s configured even when StarWind service is being stopped on all nodes.
Disk-based synchronization journal should be placed on a separate, preferably faster disk from StarWind devices. SSDs and NVMe disks are recommended as the device performance is defined by the disk speed, where the journal is located. For example, it can be placed on the OS boot volume.
It is required to allocate 2 MB of disk space for the synchronization journal per 1 TB of HA device size with a disk-based journal configured and 2-way replication and 4MB per 1 TB of HA device size for 3-way replication.
Failure journal – provides good I/O performance, as a RAM-based journal, while all device nodes are in a healthy synchronized state. If a device on one node went into a not synchronized state, the disk-based journal activates and a performance drop could occur as the device performance is defined by the disk speed, where the journal is located. Fast synchronization is not guaranteed in all cases. For example, if a simultaneous hard reset of all nodes occurs, full synchronization will occur.
Continuous journal – guarantees fast synchronization and data consistency in all cases. Although, this strategy has the worst I/O performance, because of frequent write operations to the journal, located on the disk, where the journal is located.
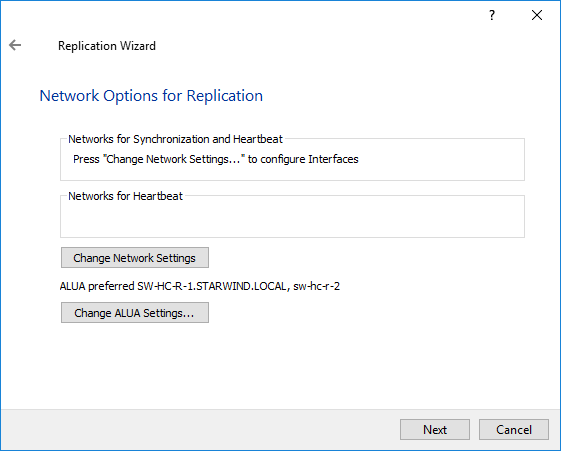
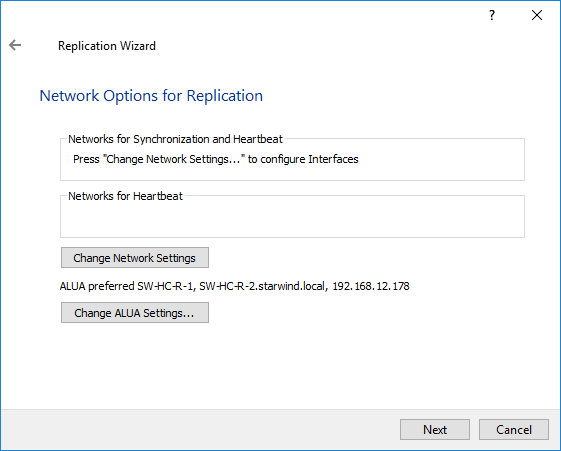
11. Click Change network settings.
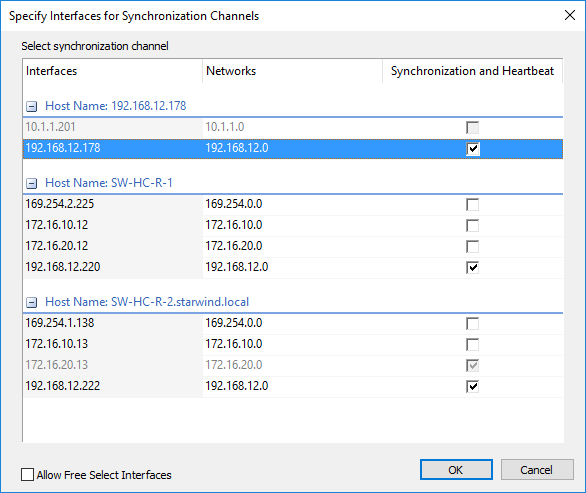
12. Specify the interface for Synchronization and Heartbeat channels.
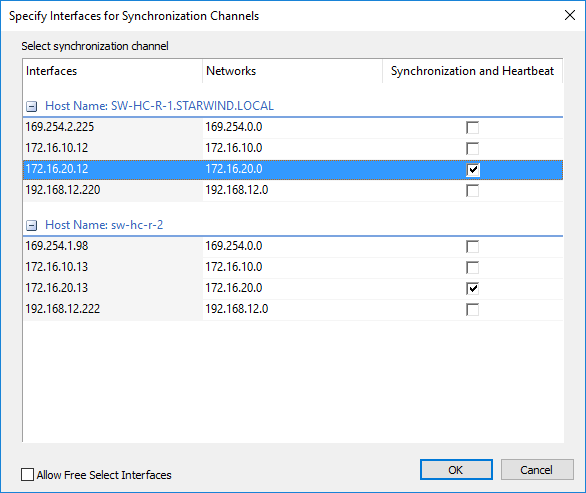
13. Click Next.
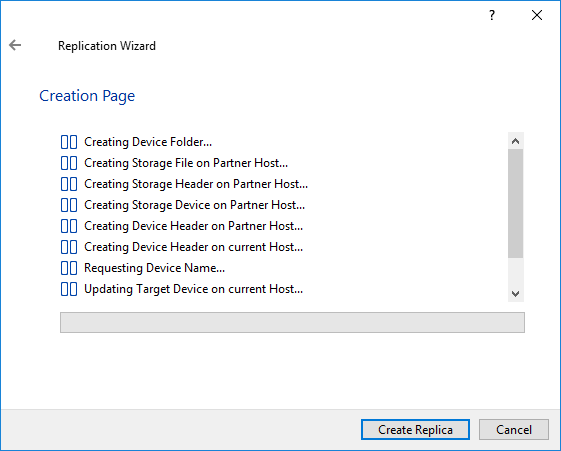
14. Click Create Replica.
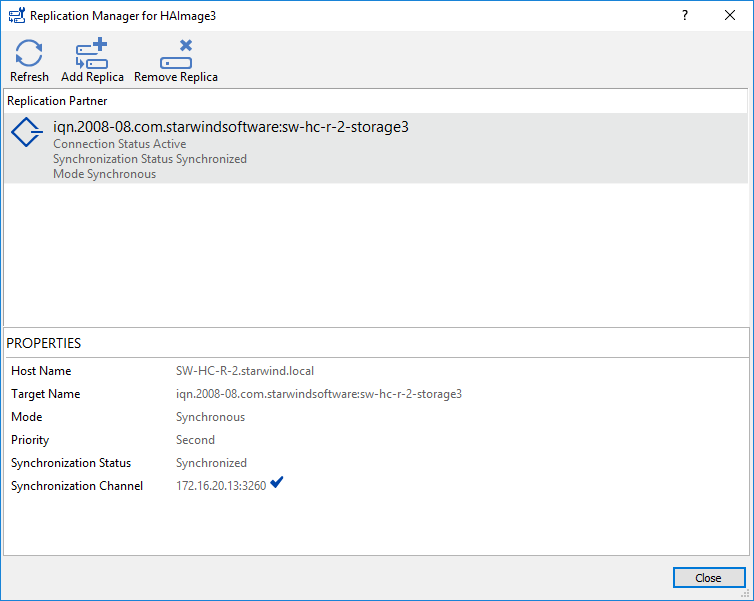
15. The successfully added devices appear in the StarWind Console.
16. Right-click the required device and select Replication Manager from the shortcut menu. Then, click Add Replica.
17. Select Witness Node replication as a replication mode.
18. Click Next to proceed.
19. Specify a partner hostname, IP address, and port number.
20. You can modify the target name if required. Click Next.
21. Click Change network settings.
22. Specify interfaces for the synchronization channel.
23. Click Create Replica.

24. Click Close to close the wizard.

25. The successfully added devices appear in the StarWind Console.