


When you replace the vCenter Server configured in Veeam Backup & Replication, you need to re-map MoRef ID of protected VMs to avoid backup jobs failure.
During the migration to a new vCenter or if an inventory change occurs in the vCenter, the virtual machine MoRef ID changes with the result of a failure of the backup job associated with the error Object with reference <vmname> was not found in the hierarchy cache.

To replace the vCenter Server configured in Veeam Backup & Replication, you need to keep same MoRef IDs for all protected virtual machines. In vSphere 6.5 and 6.7, the Upgrade option available in Stage 1: Deploy appliance wizard takes care of migrating also the virtual machine’s MoRef IDs.
If you can’t perform a successfull migration using the VMware Migration utility or if the source vCenter Server is corrupted or failed, as a last resort the migration can be achieved using the vCenter Migration Utility available at Veeam website. Although is not officially supported by Veeam, this tool allows to re-map the MoRef ID’s keeping the backup incremental chains intact.
If you use Cloud Connect repository, the tool cannot fix jobs targeting a Cloud Connect repository but Active Full backup should be used instead.
Before migration
Before using the Migration Tool, make sure to have a valid configuration backup of Veeam Backup & Replication and no backup jobs are currently running.
- When the migration has been completed successfully, remove the old vCenter from Veeam Backup & Replication configuration.
- If you have any vLab configured, you need to manually recreate it after the migration has completed.
Backup of the Veeam Backup database
Before proceeding, take a backup of the configuration database to quickly restore the Veeam Backup Server if something goes wrong during the procedure. From the main menu, click on Settings icon and select Configuration Backup.

Click on Backup now button. The backup is being performed.

When the backup has completed successfully click OK.

Configure the new vCenter Server
From the Backup Infrastructure area, select Managed Servers > VMware vSphere > vCenter Servers and click Add Server from the menu.

Enter the DNS name or IP address of the new vCenter and optionally a Description then click Next.

Specify the Credentials needed to access the new vCenter then click Next.

Click Connect to proceed.

Click Finish to add the new vCenter Server.

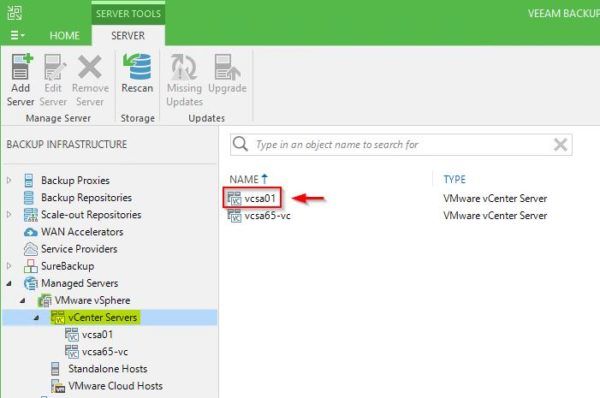
The vCenter Server has been added successfully.
Re-map MoRef IDs with vCenter Migration Utility
Download from Veeam website the vCenter Migration Utility and copy the tool in the Veeam Backup Server.

Open the Command Prompt, access the MigrationTool_9.5 directory and run the following command to prepare the list of VMs to migrate:
|
1 2 3 |
Veeam.Backup.VmMigrator.exe preparemigrationtask <old_vCenter> <new_vCenter> C:\> Veeam.Backup.VmMigrator.exe preparemigrationtask vcsa65-vc vcsa01 |

Current VM references on the new vCenter are compared with the VM references in the VeeamBackup database and the result is written in a text file created in the MigrationTool_9.5 directory named <old_vCenter>_to_<new_vCenter>_migration_task.

The file contains info related to objects found during the pre-migration task. The file can be reviewed and edited as necessary.

Now run the following command to associate the VMs to the new vCenter Server:
|
1 2 3 |
Veeam.Backup.VmMigrator.exe executemigrationtask <new_vCenter> C:\> Veeam.Backup.VmMigrator.exe executemigrationtask vcsa01 |

The re-mapping of the MoRef ID‘s of the virtual machines procedure has completed successfully.
Check of existing backup jobs
Edit an existing backup job and go to Virtual Machines tab. Click Recalculate to check if virtual machines to protect are properly detected. It can happen that you need to adjust the tags if something has changed in the new vCenter.

Click Add and select the correct Tag or VMs from the new vCenter Server.

Select the tag to delete and click Remove.

Click Finish to save the new backup job configuration.

Run the backup job
Once the backup jobs have been fixed, select and run a backup job to check if the correct backup chain is used. Right click a backup job and select Run.

The backup job is being executed. The (Incremental) label at the top indicates the correct backup chain is used.

The incrementals are merged in the full backup, it confirms the backup chain hasn’t been altered.

Also the available backups from the specific backup job show the backup chain remained the same.

When all jobs have been fixed, you can safely remove the old vCenter Server from Veeam Backup Server configuration. Right click the old vCenter Server and select Remove.

With this procedure you can replace a vCenter Server in your infrastructure without compromise the configured backup chains.
