

One new announced feature in Windows Server 2019 is Storage Migration Service (SMS). SMS enables to ease drastically the migration from a file server to another. Moreover, SMS is fully manageable from Windows Admin Center as Microsoft has released an extension for this feature.
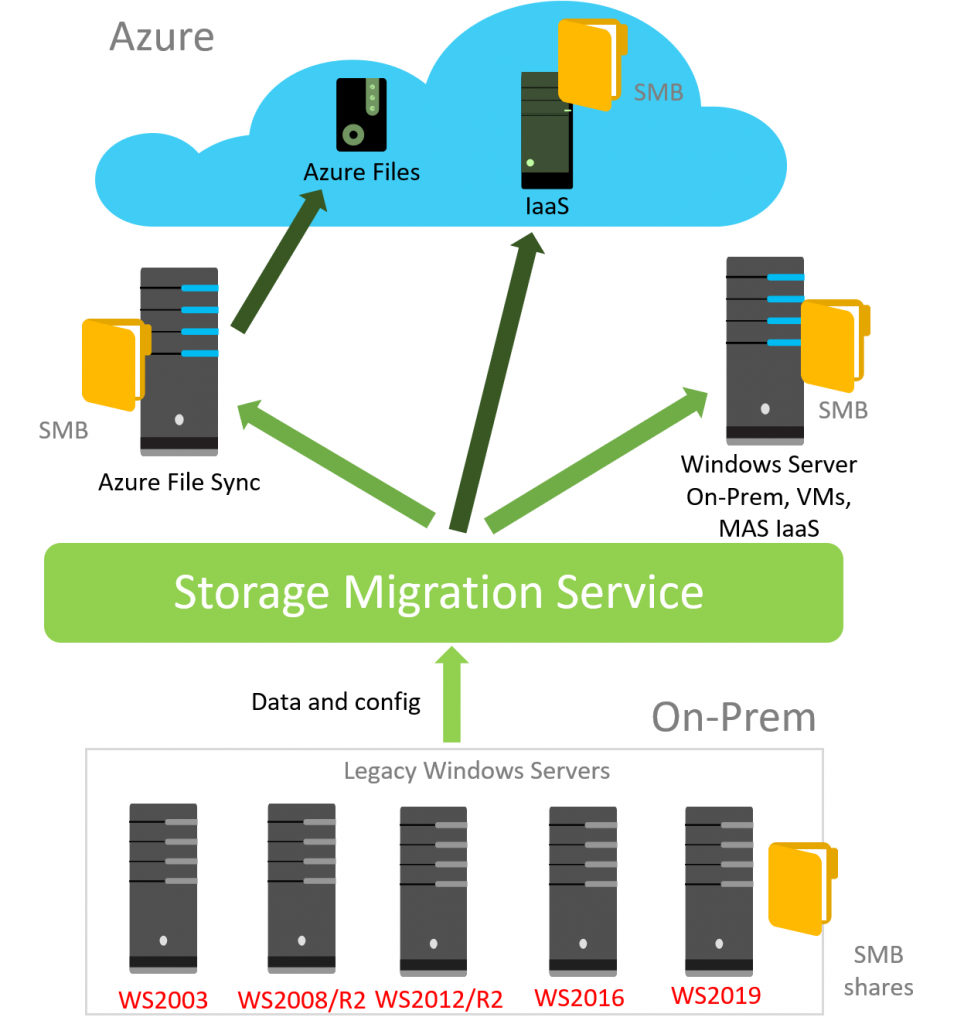
The following diagram (source: Microsoft) introduces the available migration path with SMS. The source server can be Windows Server 2003 to Windows Server 2019. The destination can be Azure File Sync, an On-Prem Windows Server (2012-2019) or Azure.
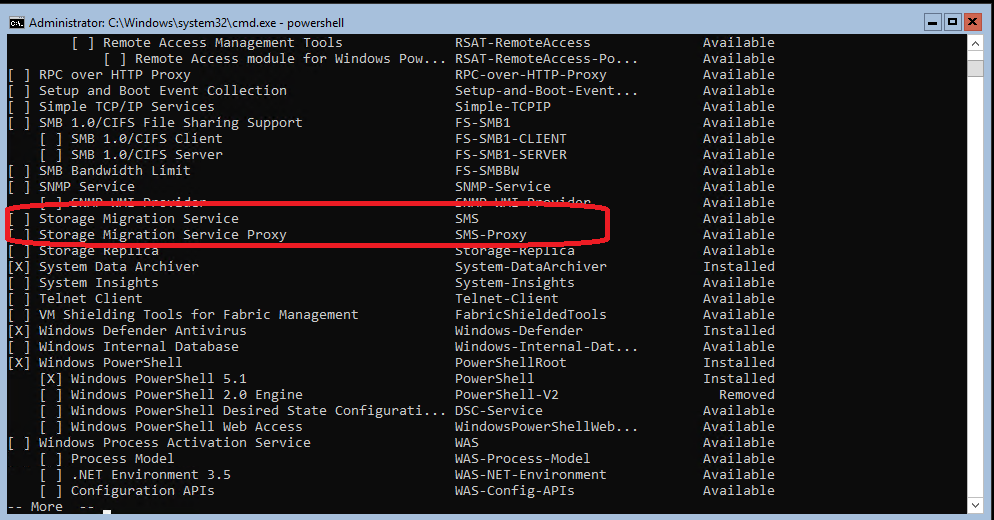
A Windows Server 2019 server is required to migrate data from one server to another. The following components are required:
- Storage Migration Service: Job based orchestration
- Storage Migration Service Proxy, handle the migration process especially the cutover, the migration with SMB and by allowing administrators to inventory data, security and network settings.
How to migrate data with Storage Migration Service
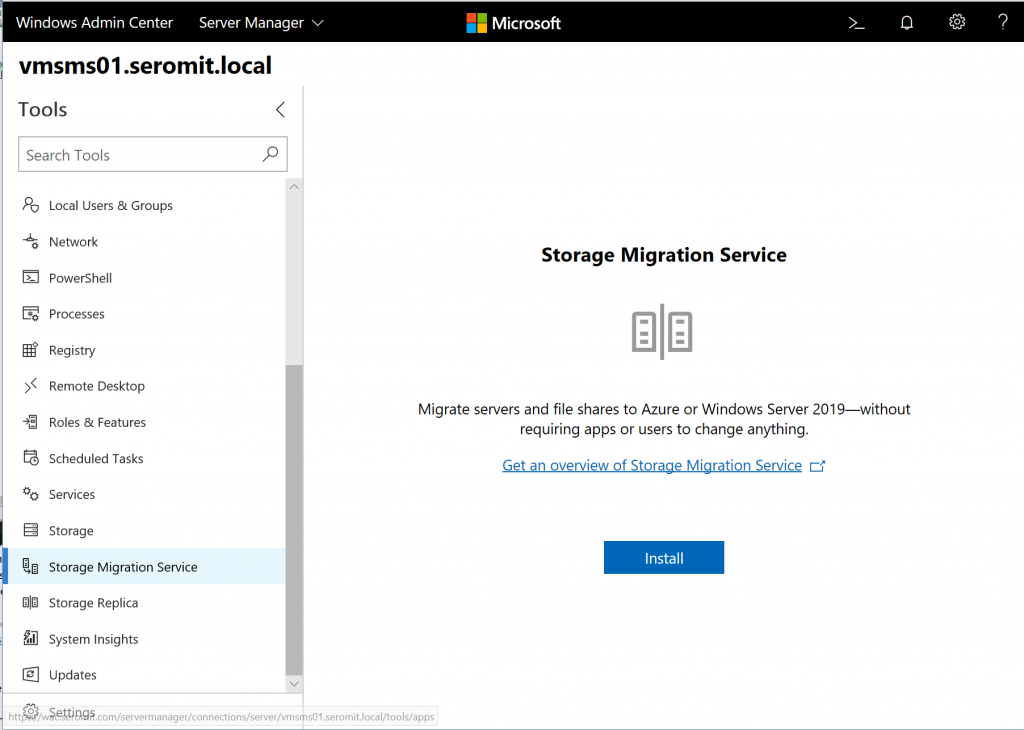
First of all, you need a running Windows Admin Center and a Windows Server 2019 to install SMS components. Then open Windows Admin Center and add the Windows Server 2019 server to manage it. Navigate to Storage Migration Service tab and click on Install to deploy the SMS components.
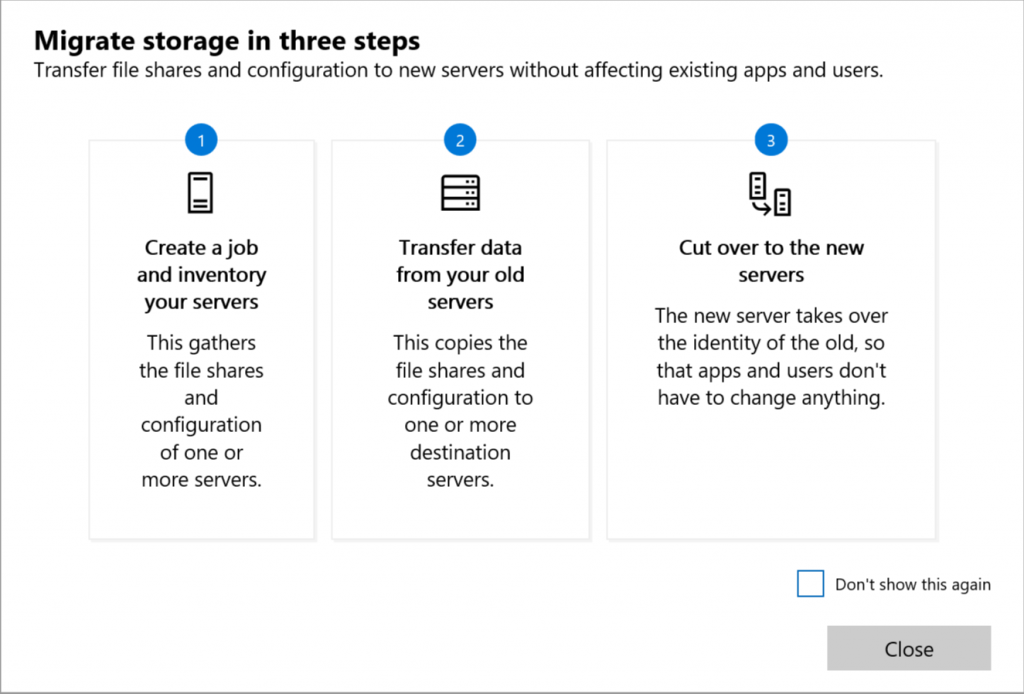
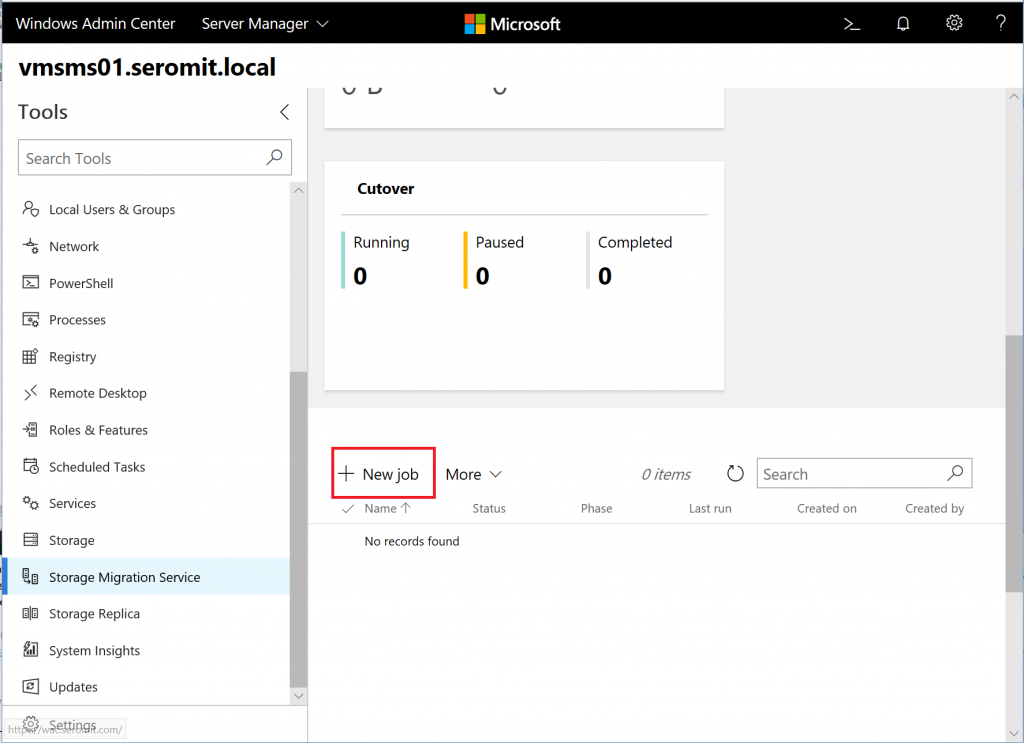
Once Storage Migration Service is installed, the wizard introduces the three steps to migrate your data.
Then click on new job to prepare a migration process.
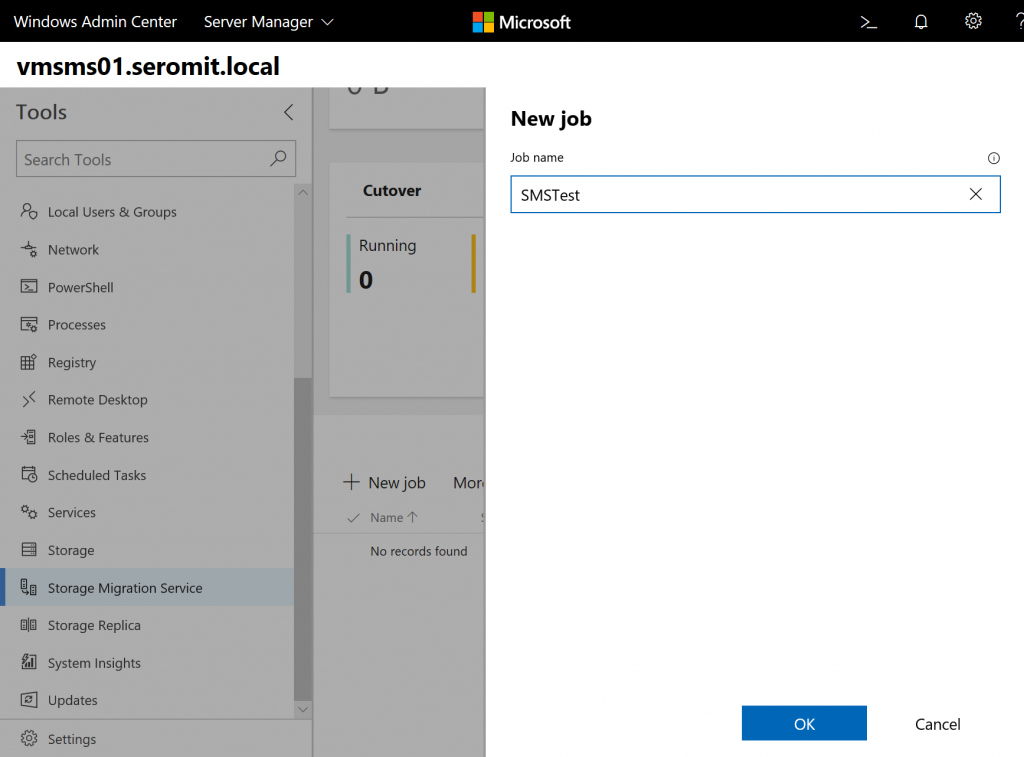
Give a name to the job.
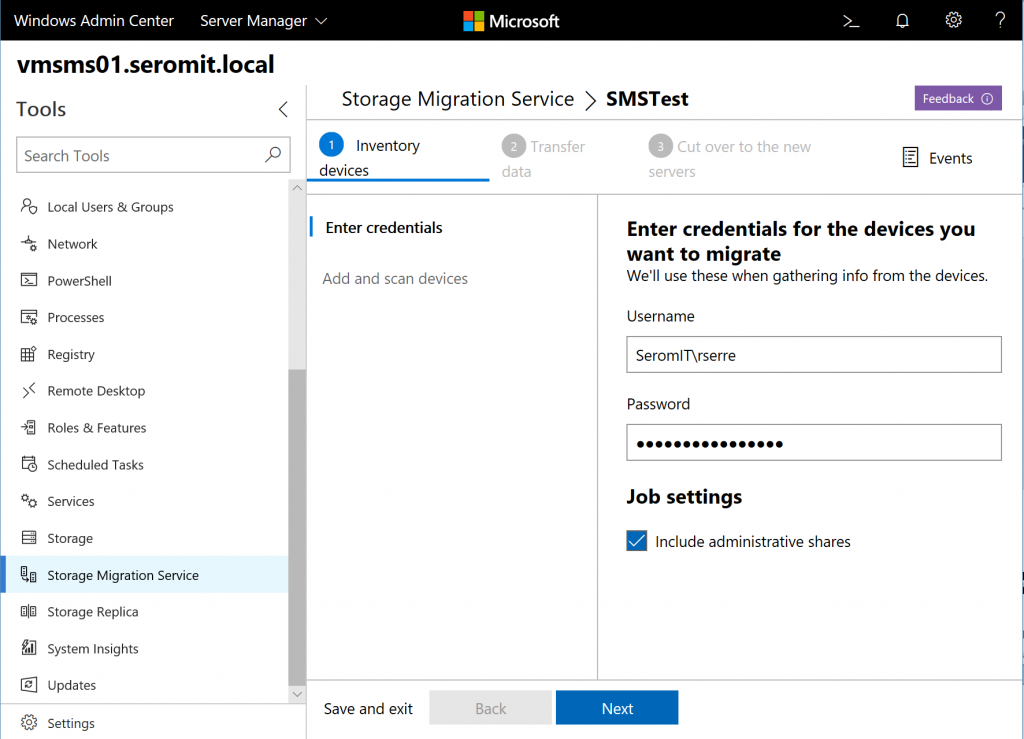
Next specify credentials that are allowed to connect to the source servers. You can choose whether to include administrative shares.
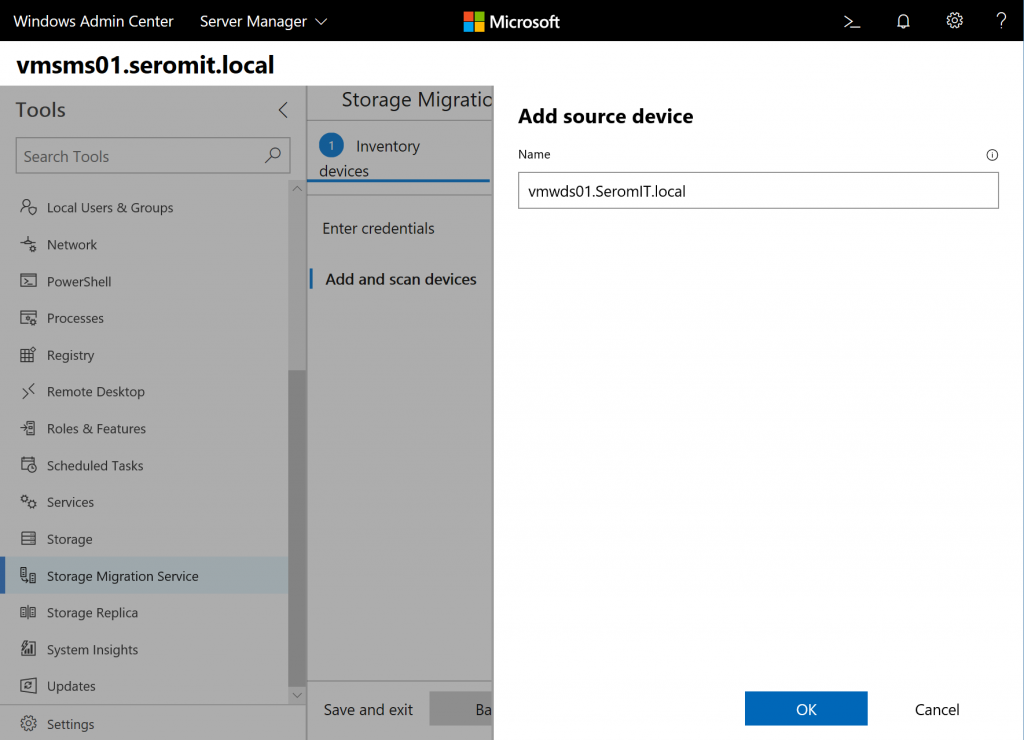
Next provide the source device and click on next.
Once the source devices added, you can start to scan them. That is really powerful because you can migrate from many to one. If you have several file servers and you want to migrate them into a single machine, you can do it.
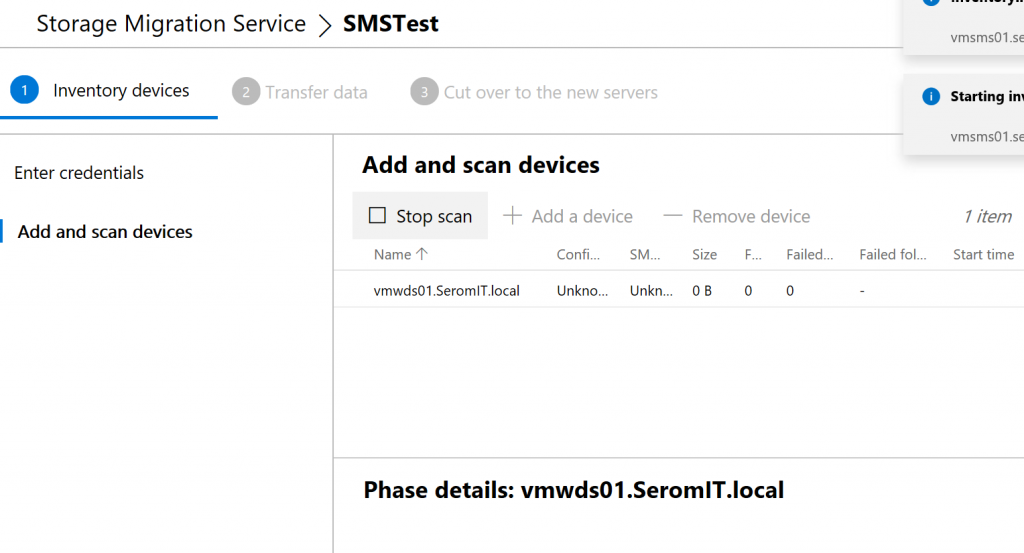
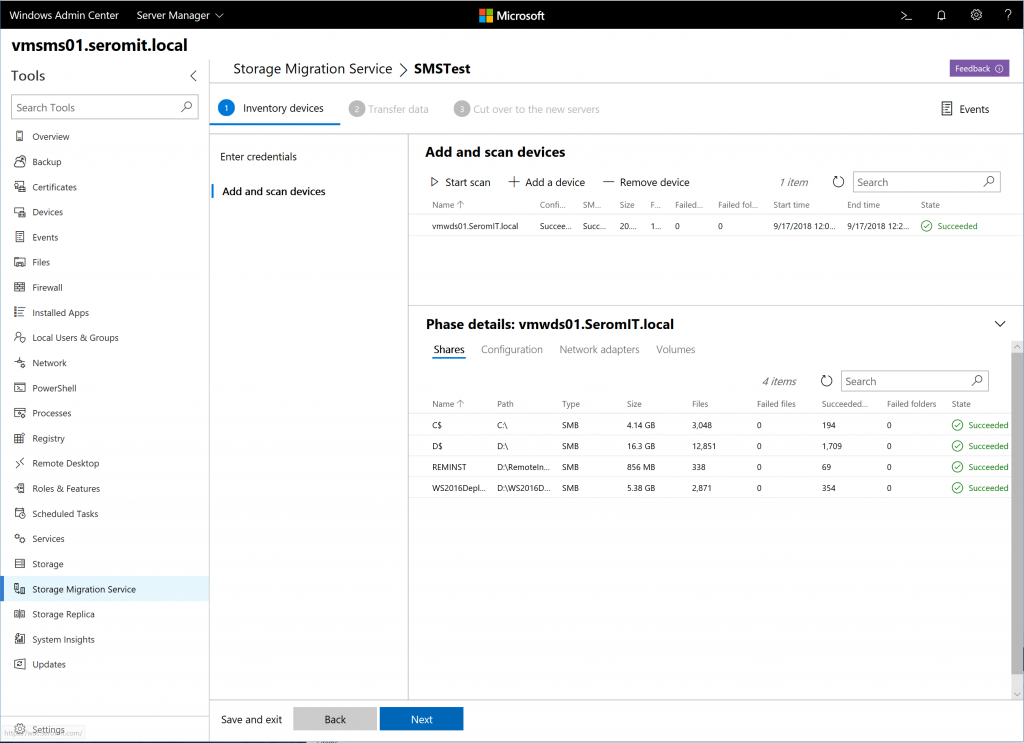
Once the scan is finished, the wizard discovered the shares.
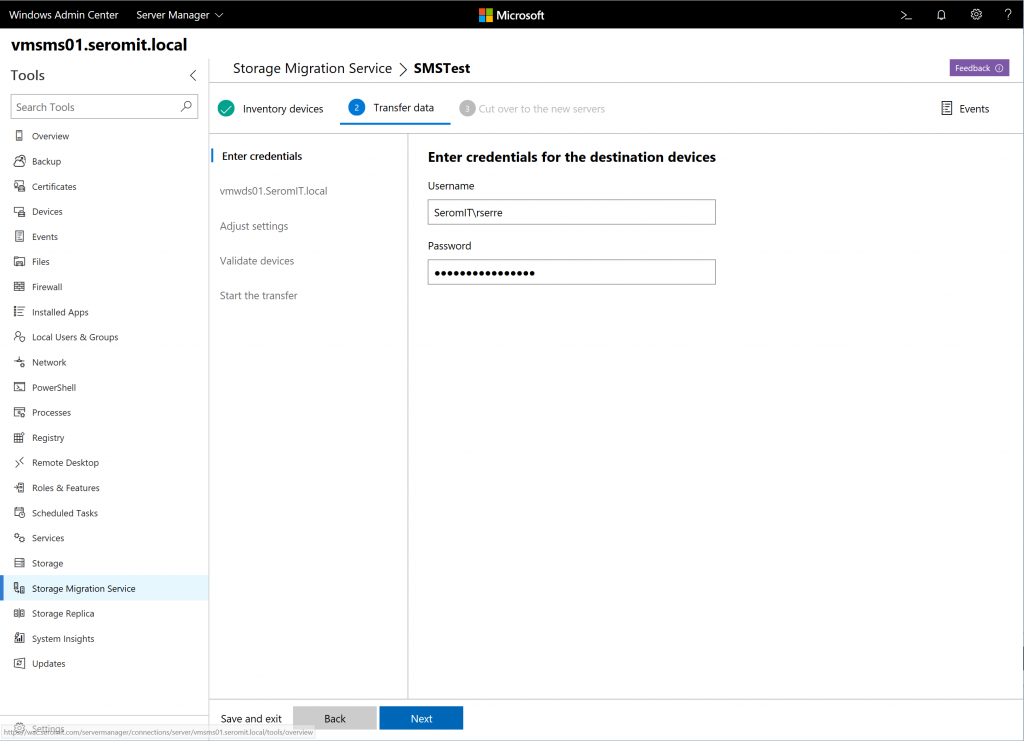
Then specify credentials for the destination device.
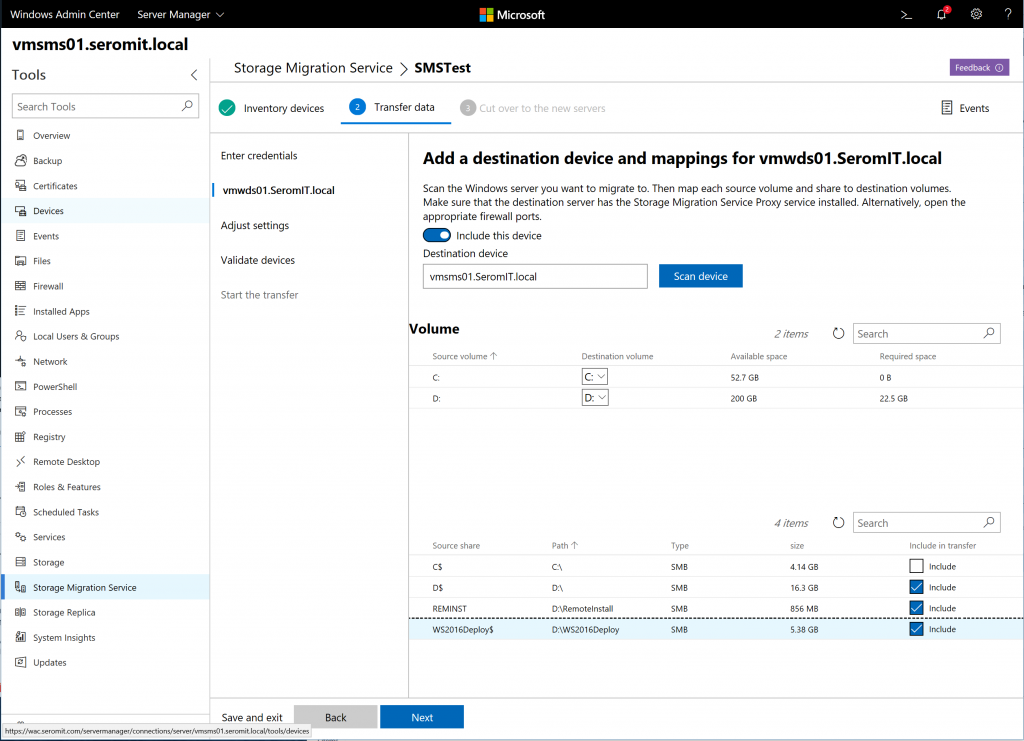
Specify the device name to scan it. Then you can make the mapping between source and destination volumes. You can choose whether to include some shares. It’s not mandatory to migrate all shares.
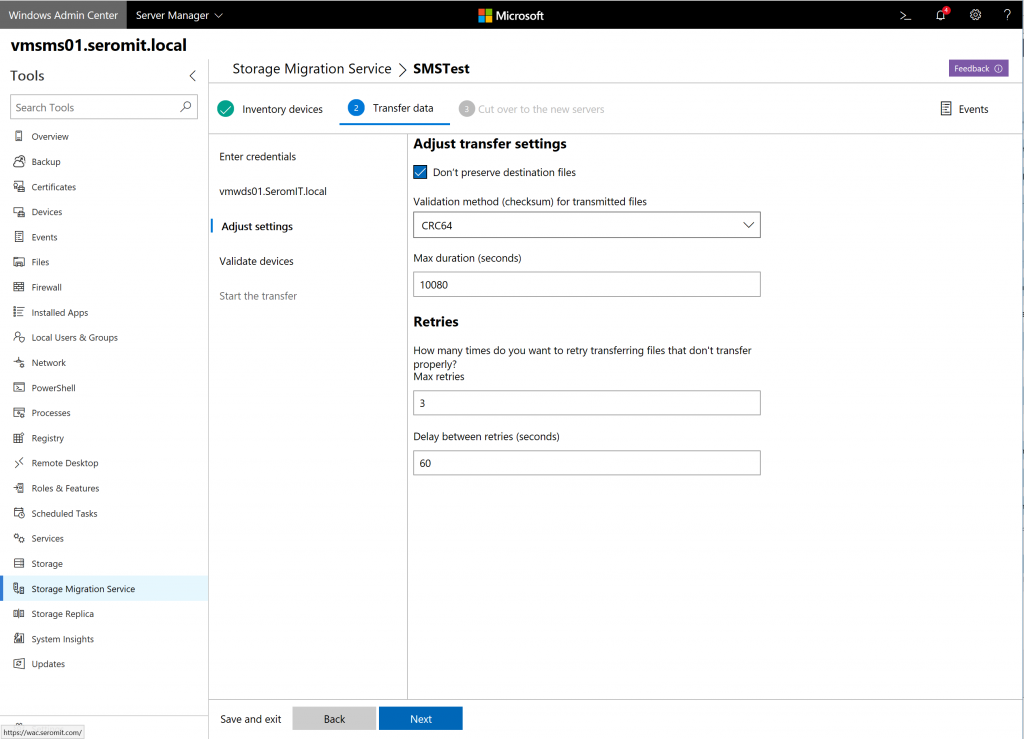
Next specify some transfer settings such as the max duration, the retries and the checksum.
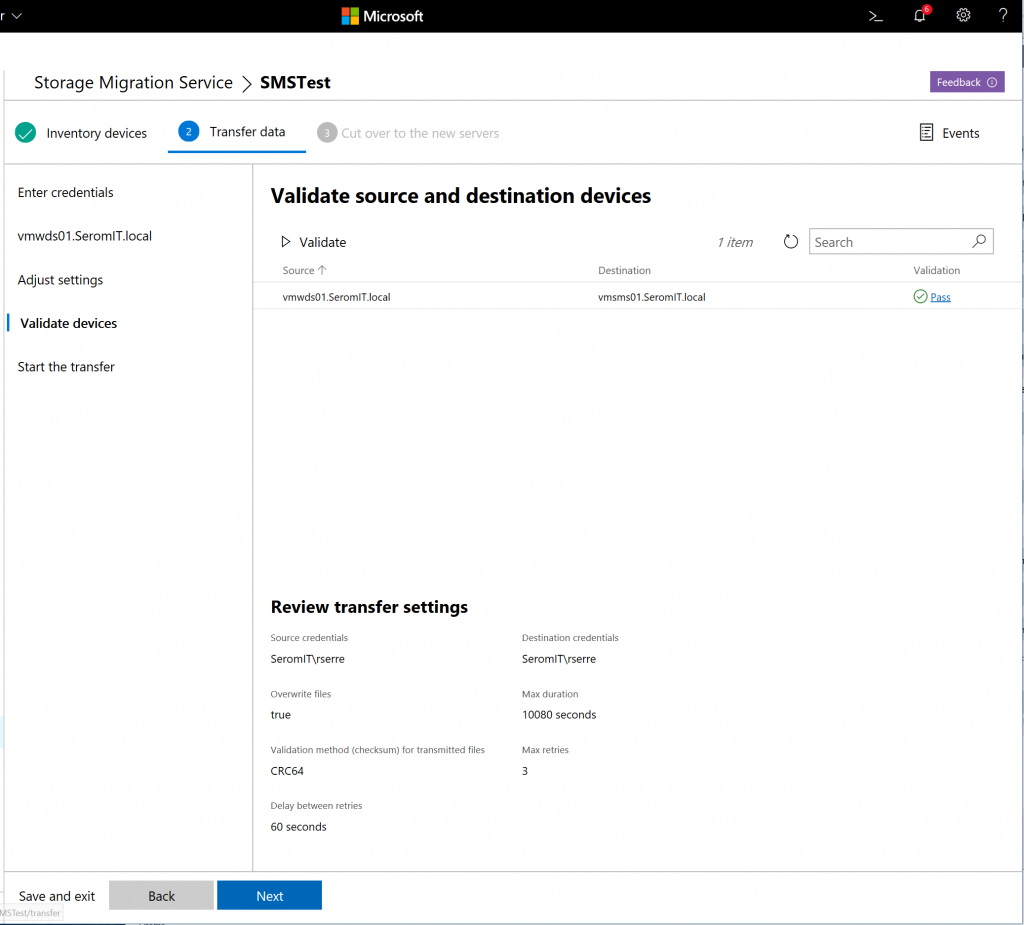
In the next screen you can validate the configuration. Once the settings are validated you can click on Next.
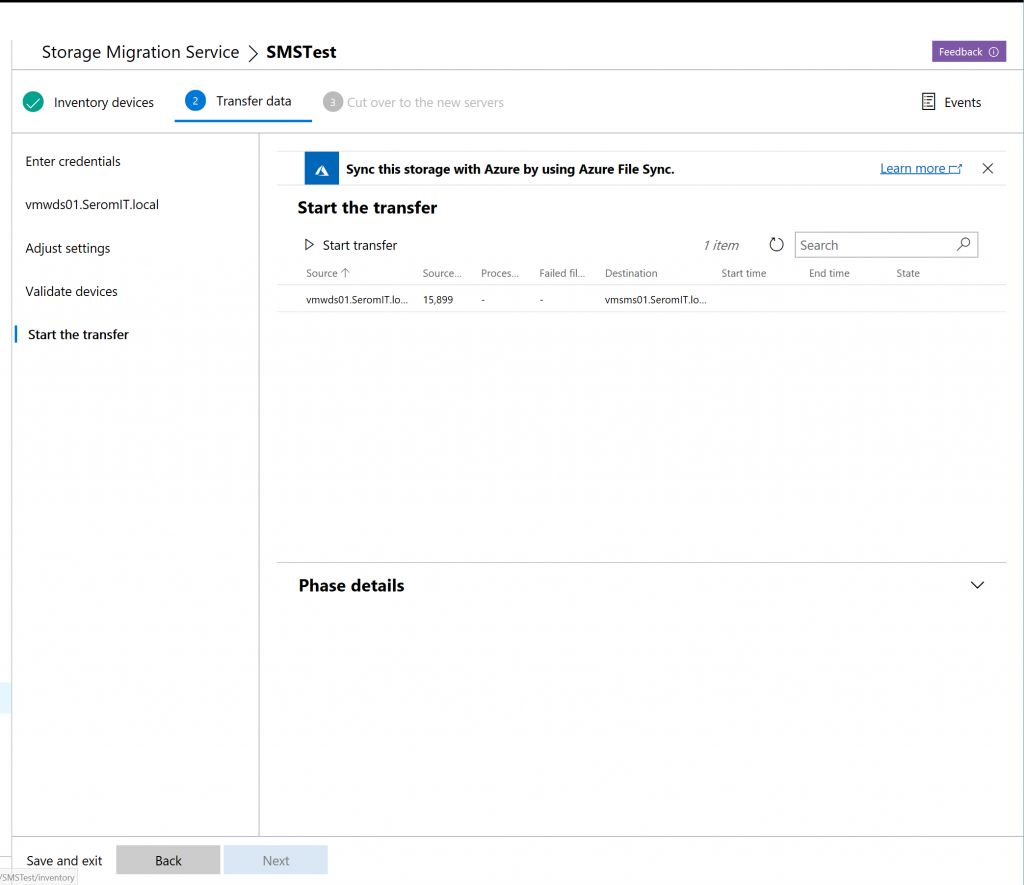
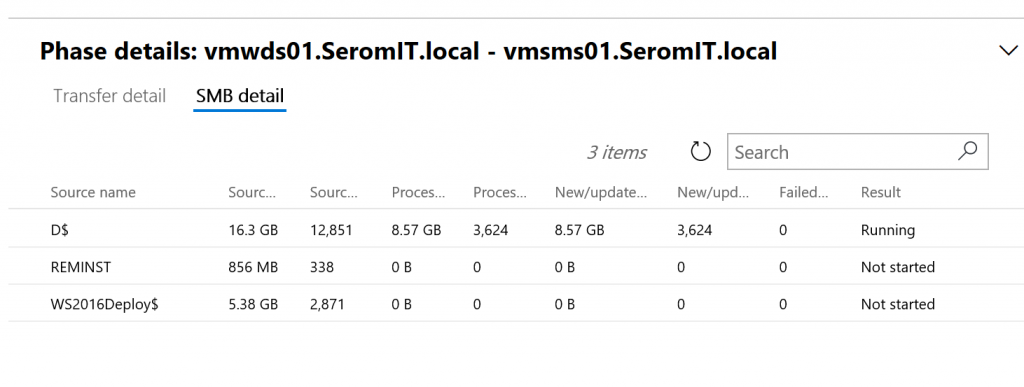
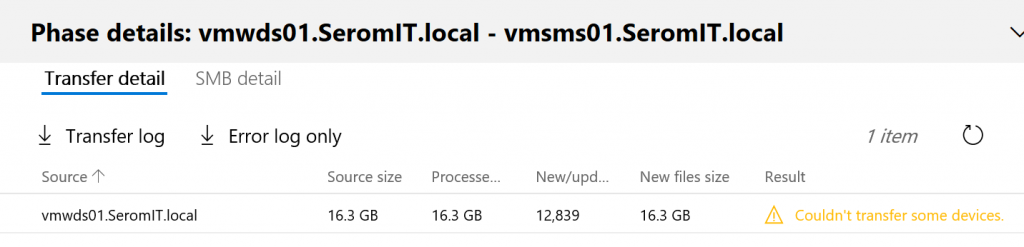
Then the transfer start and you can monitor the copy progress. Some logs are available to troubleshoot why some files are not copied (access denied for example).
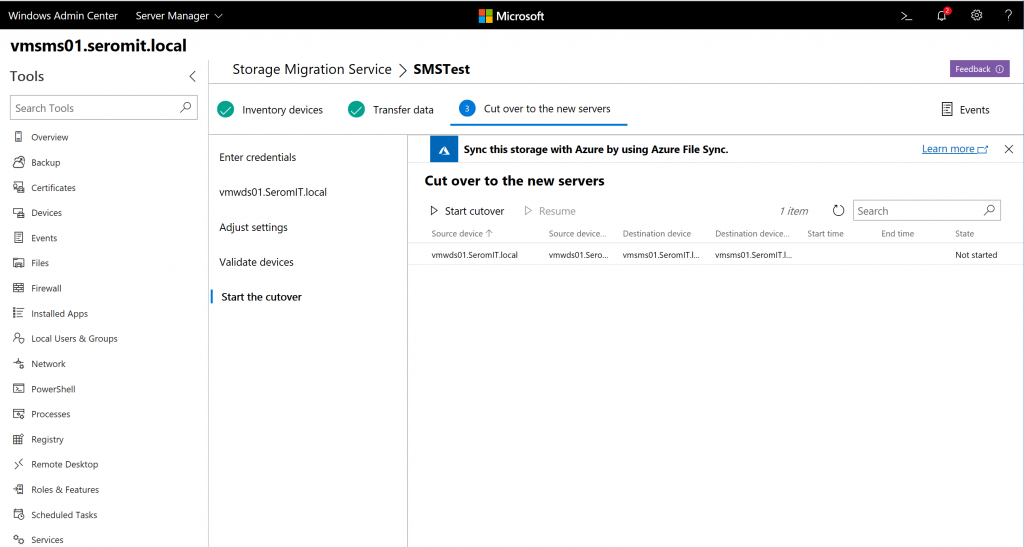
Cut over to the new servers
Once you are ready to migrate to the new server, you can process the cut over. The following steps will be executed:
- A final copy between source and destination
- Rename the source machine
- Change the IP of the source machine
- Rename the destination device with the name of the source device
- Set the IP address of the destination device with the information of the source device
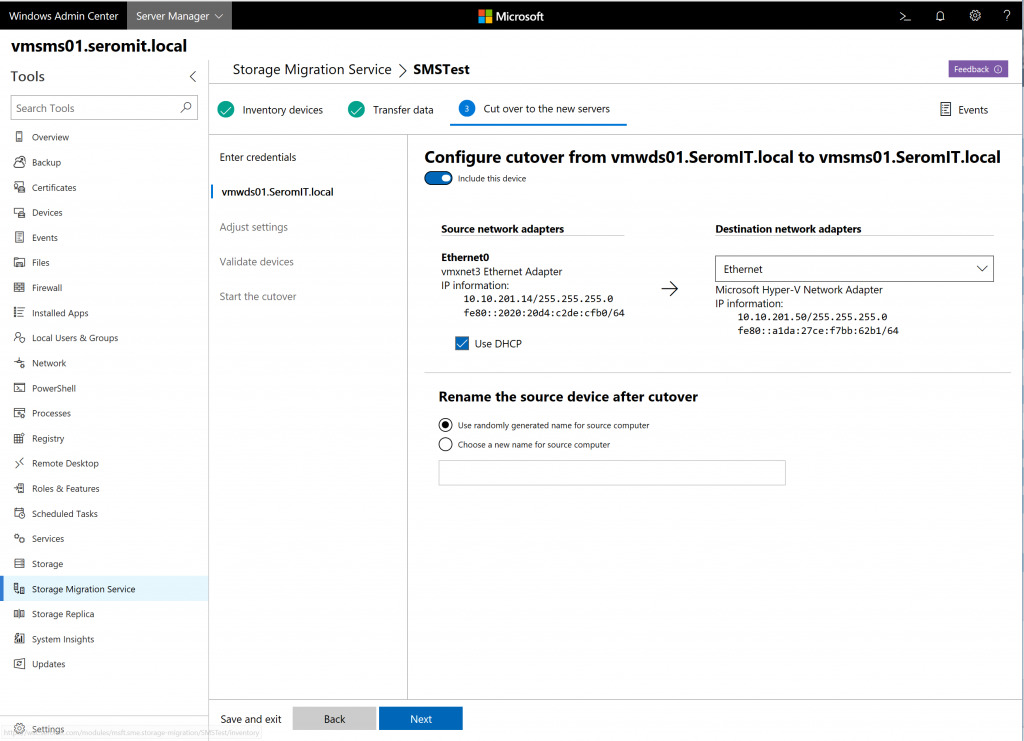
In this wizard, you can configure the name and the IP address of the source machine that will be applied by the cut over process.
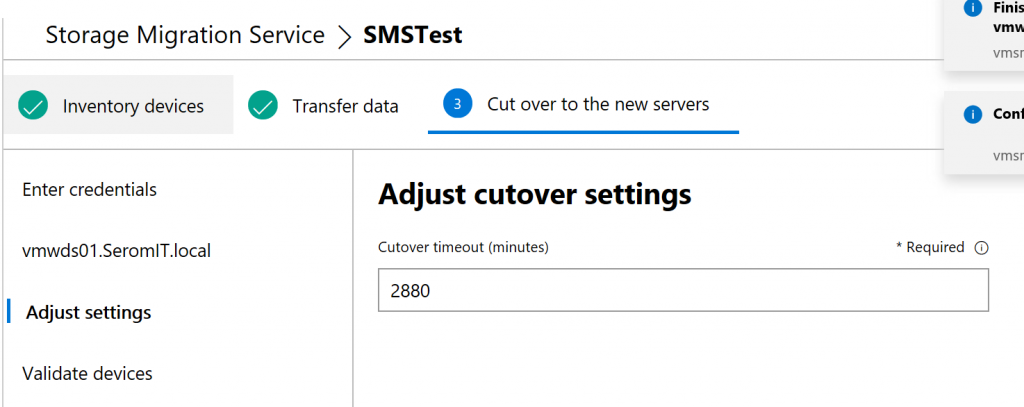
You can set a cut over timeout. If this timer is reached, the cut over is cancelled.
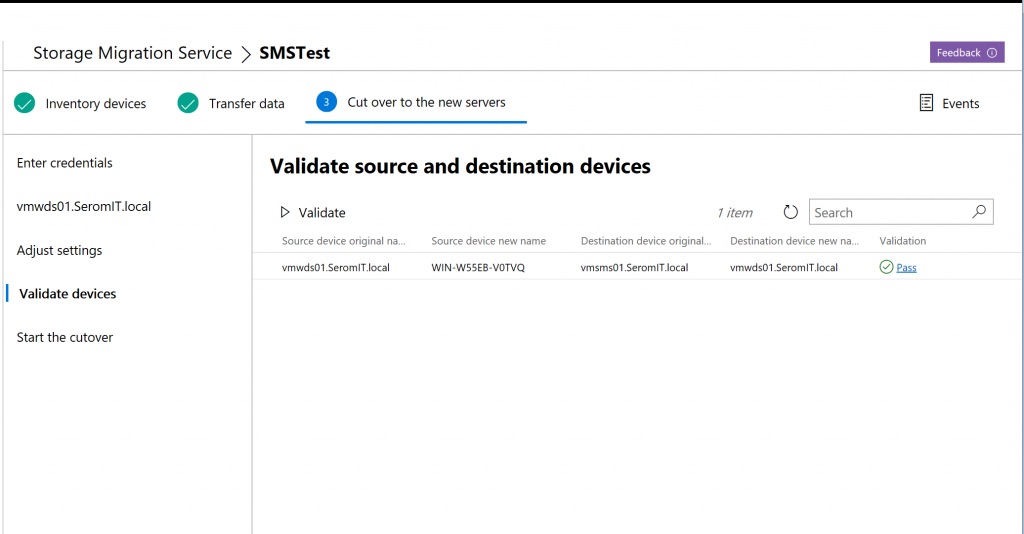
In the next window click on Validate to check the configuration. Once it’s validated click on Next.
Finally you can run the cutover to put into production the destination server.
Conclusion
Microsoft has developed a powerful tool to ease the file server migration. Usually it’s a painful process where a lot of script must be created to map things between them. Storage Migration Service is there to simplify this process. You have no excuse anymore to keep an old file server under Windows Server 2003 / 2008 / 2012 in production. Finally, the integration with Windows Admin Center is perfect. No I’d like to use the same service to migrate from a SMB3 NAS capable 🙂
