

Introduction
In this first blog post, I’ll walk you through to migrate Active Directory objects (users, groups, and workstations or member servers) between two domains in the same forest (Intraforest) using Active Directory Migration Tool (ADMT) 3.2.
ADMT allows you to migrate objects (including users, groups, computers, profiles, service and managed service accounts) with the help of the following tools:
- ADMT console
- Command line
- VBScript
However, in this post, I’ll focus only on ADMT console and command line.
Intraforest Active Directory Domain Object Migration
When you migrate objects between domains in the same forest, the migrated objects no longer exist in source domain except computer accounts which are copied. The following table lists some behaviours during the migration process.

Table 1: Intraforest migration behavior
Include File
When you have a limited number of objects to migrate, you can directly specify them in a command line or in ADMT console. However, when you migrate a large number of objects, it is more efficient and less time consuming to specify them in an include file. Include file is a text file in which you place each object on a separate line. You can then provide the path of that file in ADMT console or command line during the migration process.
The following table list fields of an include file with their explanation.
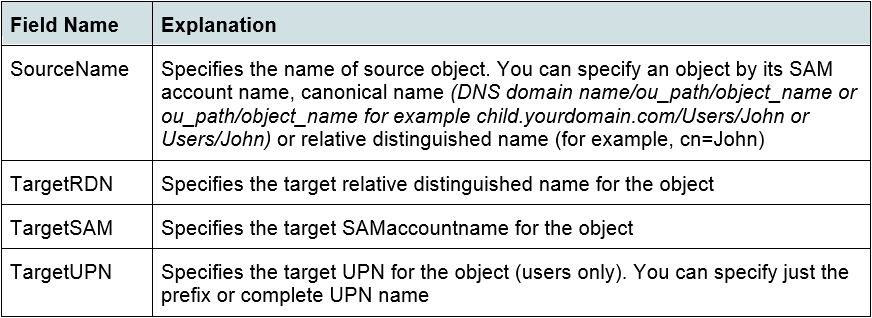
Table 2: Include file fields
It is mandatory to specify source name of an object in include file while rest of the fields are optional. You can specify optional fields in any combination and in any order. I have listed below few examples to make things more clear.
SourceName
John
SourceName,TargetRDN
John, CN=johnny
SourceName,TargetRDN,TargetSAM
John, CN=johnny, johnnym
SourceName,TargetRDN,TargetSAM,TargetUPN
John, CN=johnny, johnnym, johnm@yourdomain.com
Preparing for AD Objects Migration
Before you proceed with the migration process, cross-check the following requirements:
- Identify the source, target domain and the organizational unit (OU) where you will place migrated objects.
- Create an assignment table and document the domain objects that you are migrating with their source and target locations.
- ADMT doesn’t have any built-in migration test options. You should develop a test plan separately and test each object during and after they are migrated to the target domain. Identify and correct any problems to make sure that the objects once migrated can access resources based on their group membership and credentials.
- The migration process is non-reversible and you cannot roll back changes. Once objects are migrated, the only way is to remigrate them from target domain back to the source domain. You should have a rollback plan and the method you will use to remigrate objects.
- Inform all affected users beforehand about accounts migration plan and its schedule so that they are aware of the impact of the migration. 6. Download and install the latest version of Active Directory Migration Tool (ADMT) 3.2 in the target domain.
- Download and install the latest version of Active Directory Migration Tool (ADMT) 3.2 in the target domain.
Lab Topology Overview
I have three domains in my forest:
- Root domain
- Child domain
- Tree domain
Each domain has a single domain controller and they are running on Windows Server 2016. Default two-way trust is already created between domains since they are part of a single forest. The full topology is shown in the following figure.
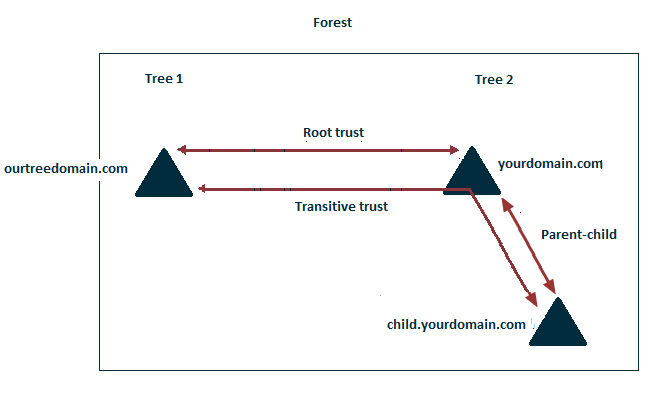
Figure 1: Lab topology overview
In this article, I’ll show you to migrate objects from child domain (child.yourdomain.com) to parent domain (yourdomain.com). The process is same if you migrate between tree domain (ourtreedomain.com) and child domain or vice versa because there is a default transitive trust between them.
Migrating Objects from Child Domain to Parent Domain Using ADMT Snap-in
Migrating Limited Users
1. Log in with ADMT migration account on computer in target or parent domain where ADMT is installed
2. Right-click Active Directory Migration tool and then click User Account Migration Wizard
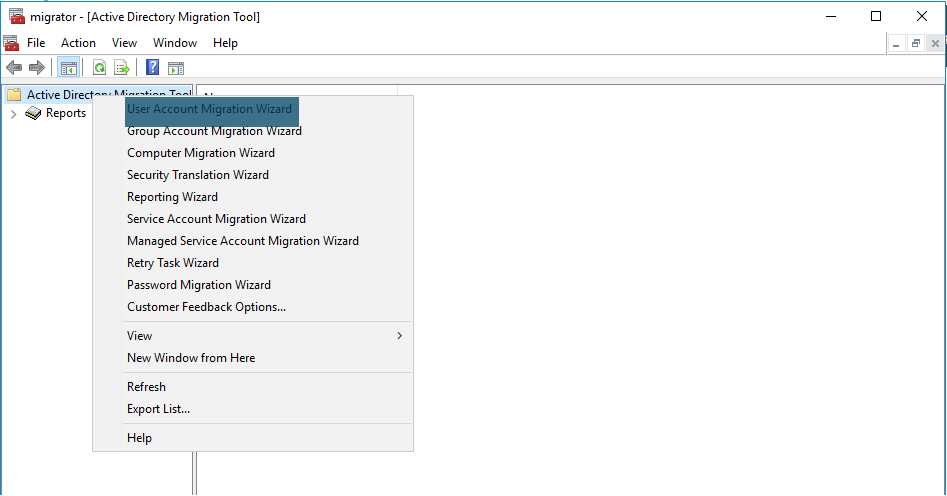
Figure 2: ADMT Snap-in
3. Click Next

4. Provide or select NetBIOS or DNS name of the source and the target domains. Provide or select the name of domain controller of source and target domains (or select Any domain controller) and click Next
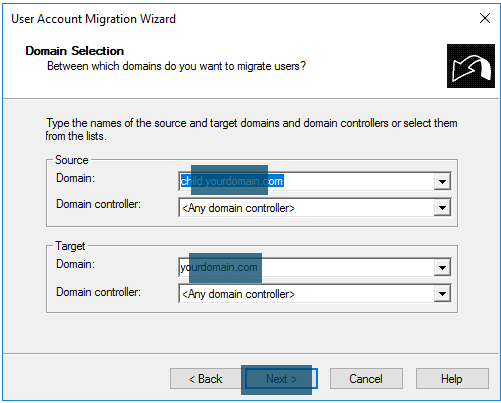
Figure 4: Source and target domains selection
5. Click ‘Select users from domain’ radio button and then click Next
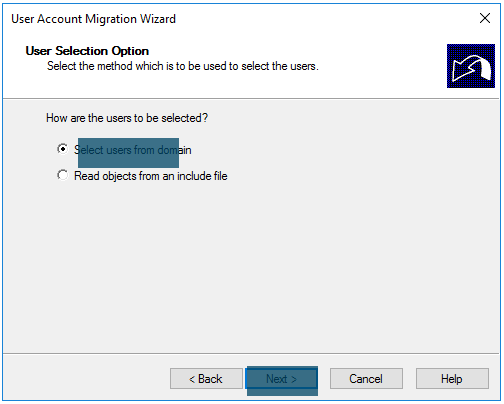
Figure 5: User selection method
6. Click Browse and add desired user(s) you would like to migrate
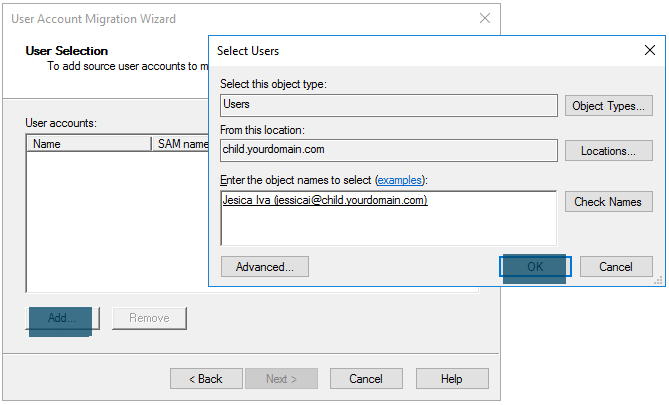
Figure 6: Adding users
7. Click Next

Figure 7: Adding users
8. Click Browse to choose the target OU for migrating users
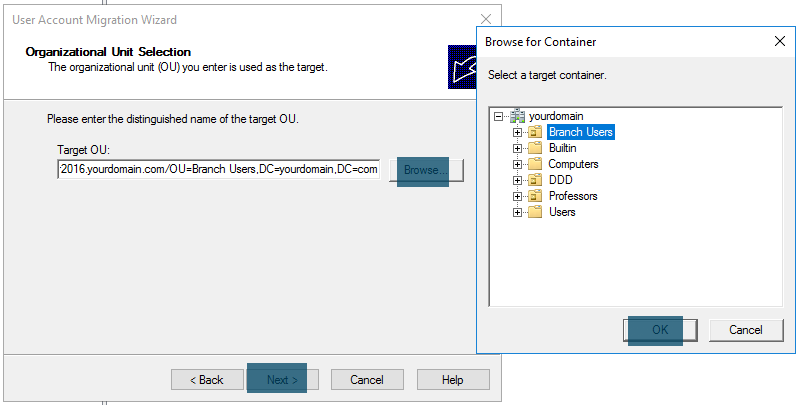
Figure 8: Target OU selection
9. Click Next
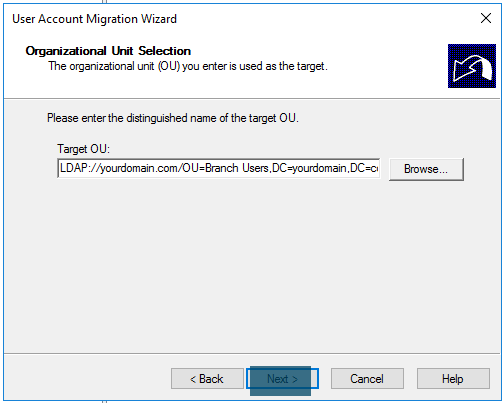
Figure 9: Target OU selection
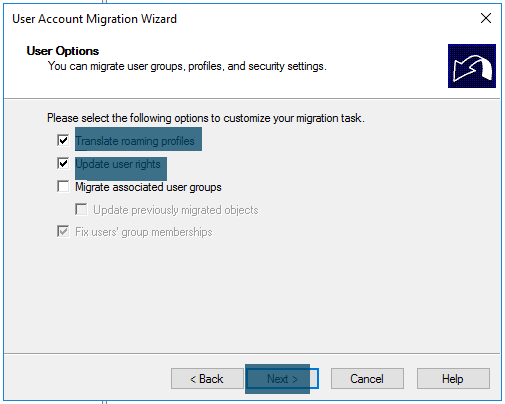
10. Check both Translate roaming profiles, and Update user rights. Ignore any warnings and click Next
11. Click ‘Do not migrate source object if a conflict is detected in the target domain’ radio button and click Next
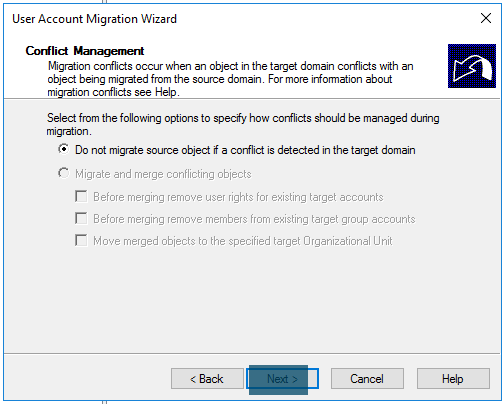
Figure 11: User accounts conflict management
12. Click Finish

Figure 12: Completing the user migration wizard
13. Wait for the wizard to complete and look for any errors. Click Close

14. Open Active Directory Users and Computers snap-in and verify the user account in target OU.
Migrating Large Number of Users Using Include File
Steps 1,2, 3, 4 are similar to single user migration wizard. However, proceed as follow after step 4.
– Click ‘Read object from an include file’ radio button and click Next
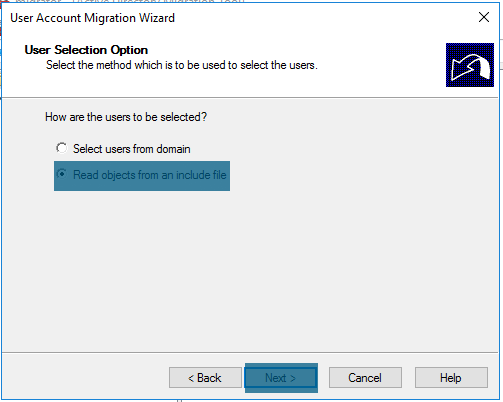
Figure 14: User selection method
– Click Browse and choose the path of include file from local hard drive of your computer
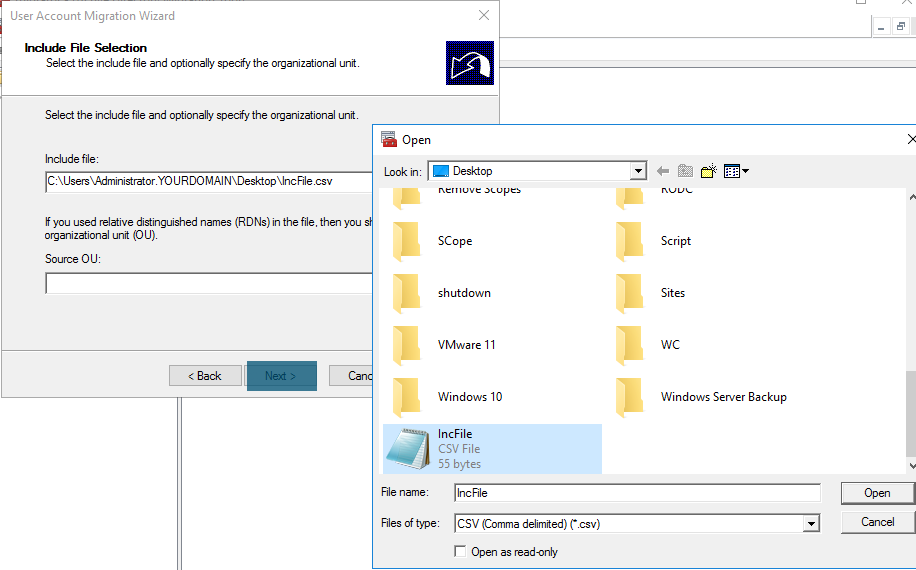
Figure 15: Providing include file path
When you are done with above steps, proceed with step 8 of single user migration wizard and follow it till the end.
- Log in with ADMT migration account on computer in target or parent domain where ADMT is installed
- In ADMT snap-in, right-click Active Directory Migration Tool and then click Group Account Migration Wizard
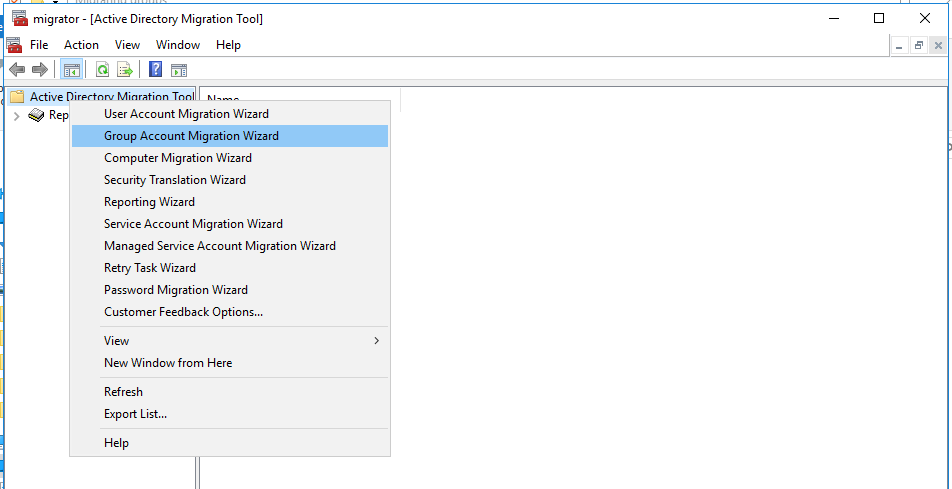
Figure 16: ADMT snap-in
3. Click Next
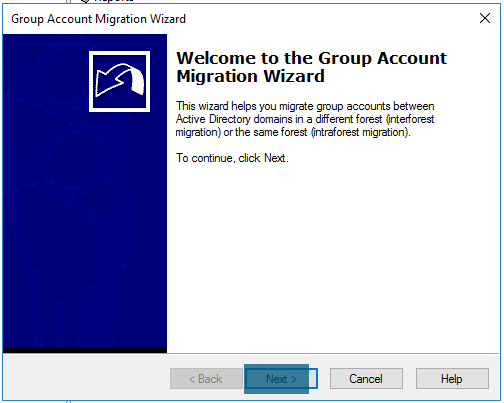
Figure 17: Group account migration wizard
4. Provide or select NetBIOS or DNS name of the source and target domains. Provide or select the name of domain controller of source and target domains (or select Any domain controller) and click Next
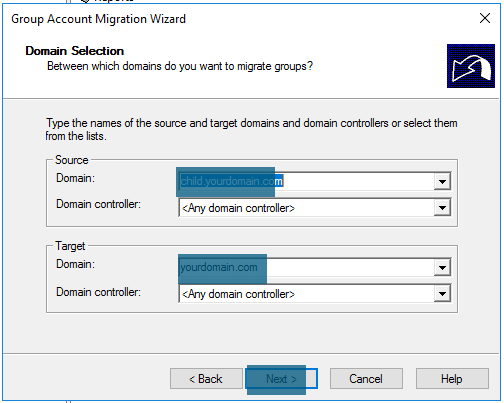
Figure 18: Source and target domains selection
5. Click ‘Select groups from domain’ radio button and click Next
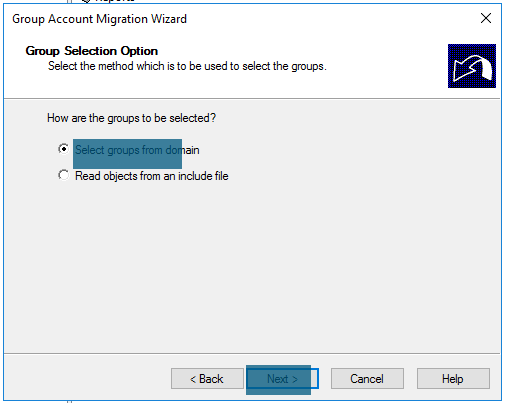
Figure 19: Group selection method
6. Add the desired group(s) you would like to migrate and click Next
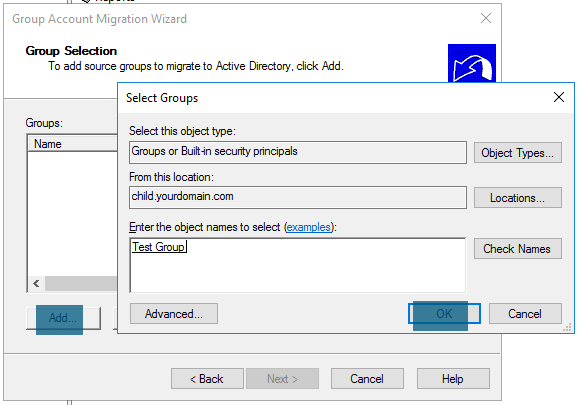
Figure 20: Adding groups
7. Click Browse and choose the target OU for migrating group(s). When you are done click Next
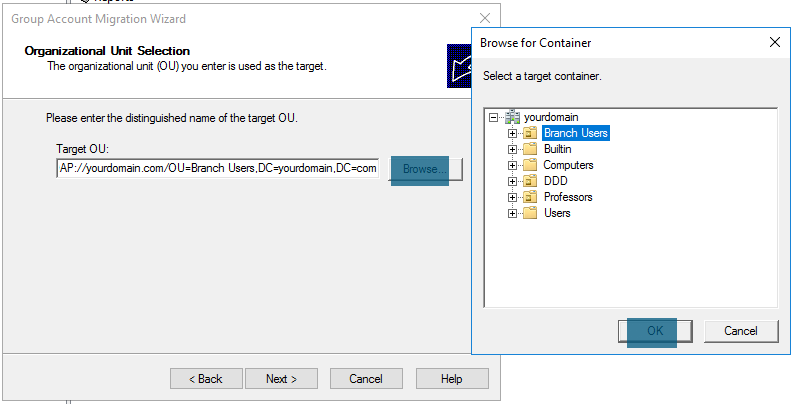
Figure 21: Choosing target OU
8. Click Next and ignore any warnings if they appear
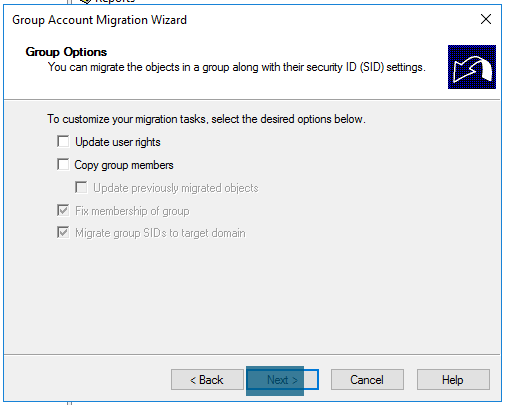
Figure 22: Group options
9. Click ‘Do not migrate source object if a conflict is detected in the target domain’ radio button and click Next
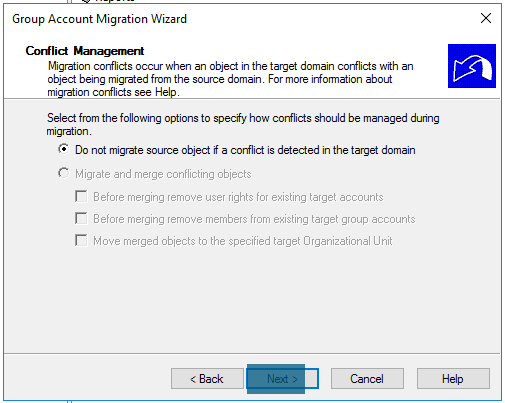
Figure 23: Group account conflict management
10. Click Finish
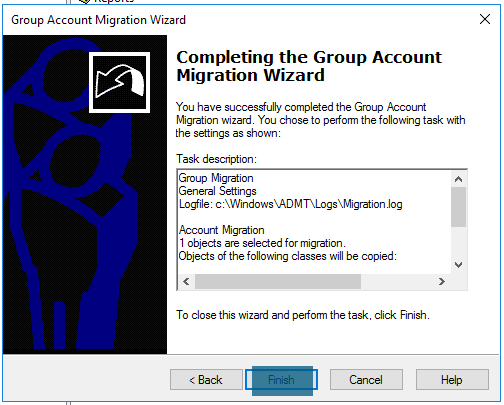
Figure 24: Completing the group account migration wizard
11. Wait for a wizard to complete and look for any errors. Click Close
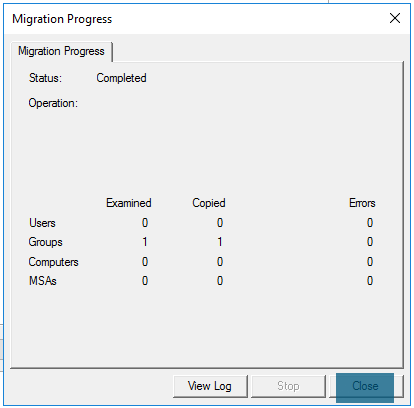
Figure 25: Group migration progress
12. Open Active Directory Users and Computers snap-in and verify the group account in target OU.
Migrating Large Number of Groups Using Include File
When you are migrating multiple groups using an include file, first four steps are same from single group migration wizard. From step 5, proceed as follow.
– Click ‘Read objects from an include file’ radio button and click Next

Figure 26: Group selection method
– Click Browse and choose the path of include file from your local hard drive. When you are done click Next
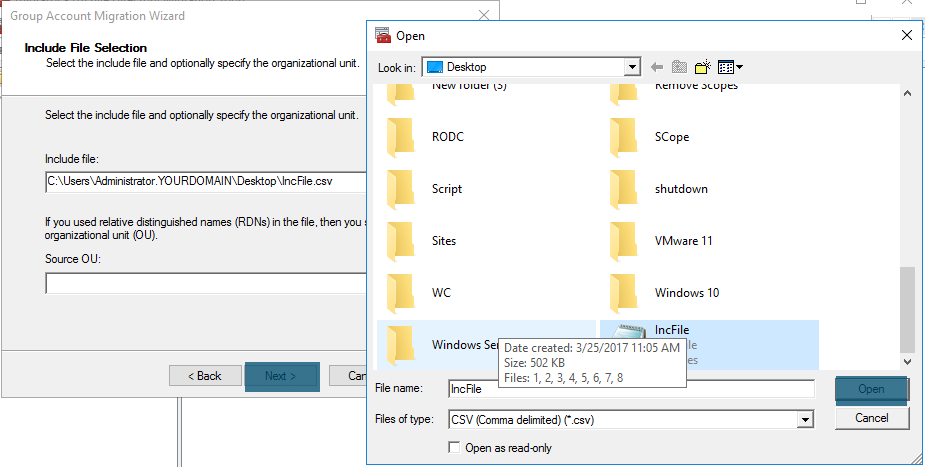
Figure 27: Providing include file path
When you are done with above steps, proceed to step 7 of single group migration wizard and follow it till the end.
Migrating Limited Workstations or Member Servers
1. Log in with ADMT migration account on computer in target or parent domain where ADMT is installed
2. In ADMT snap-in, right-click Active Directory Migration Tool and then click Computer Migration Wizard

Figure 28: ADMT snap-in
3. Click Next
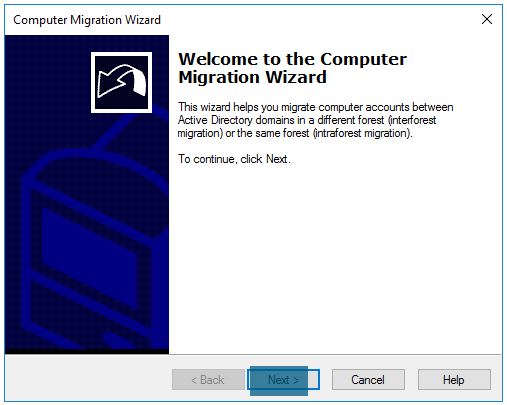
Figure 29: Computer migration wizard
4. Provide or select NetBIOS or DNS name of the source and target domains. Provide or select the name of domain controller of source and target domains (or select Any domain controller) and click Next
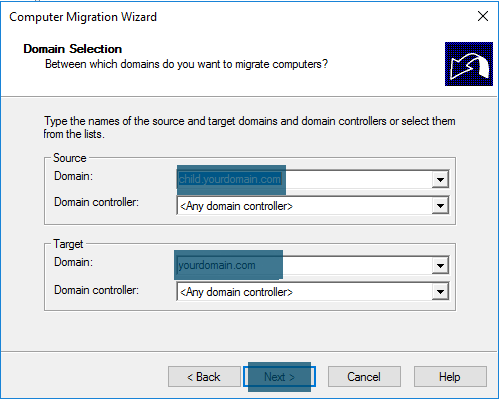
Figure 30: Source and target domains selection
5. Click ‘Select computers from domain’ radio button and click Next
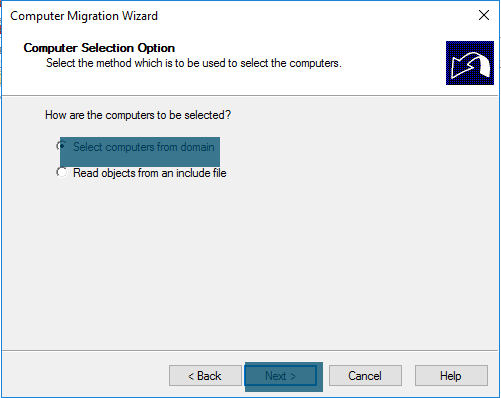
Figure 31: Computer selection method
6. Add the desired computer(s) you want to migrate and click Next
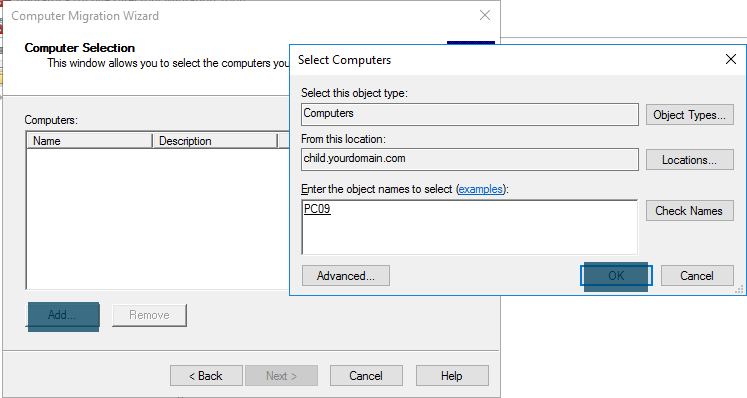
Figure 32: Adding computers
7. Click Next

Figure 33: Adding computers
8. Click Browse and choose target OU. Click Next
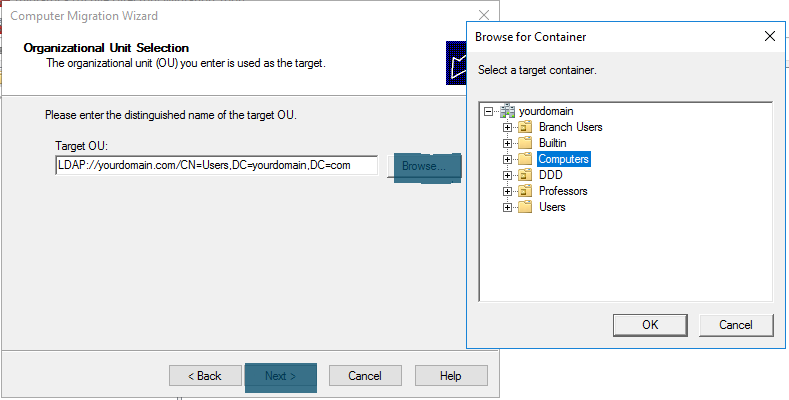
Figure 34: Choosing target OU
9. Click Next
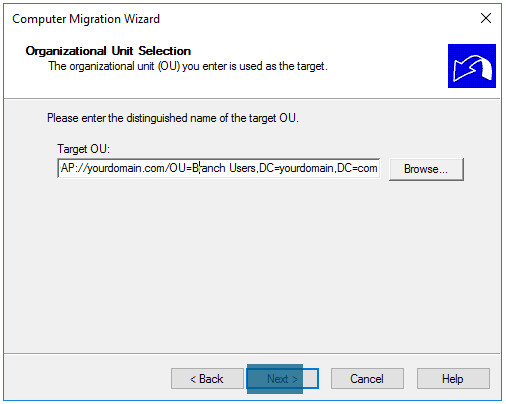
Figure 35: Choosing target OU
10. Choose Local groups and User rights. Click Next

Figure 36: Computer translation options
11. Choose Replace and click Next. Ignore any warnings
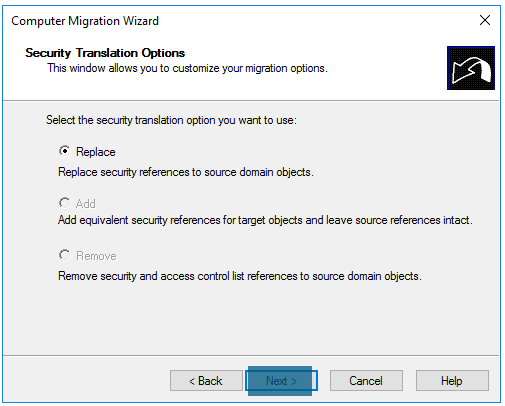
Figure 37: Security translation options
12. Accept the default value and click Next
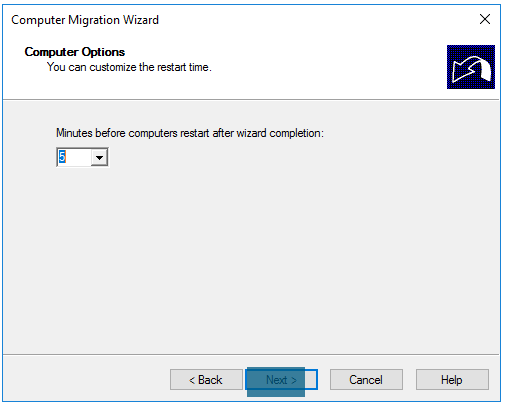
Figure 38: Computer restart delay
13. Click Next
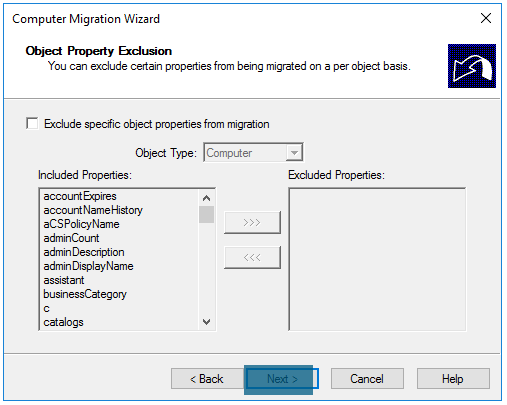
Figure 39: Computer properties exclusion
14. Click ‘Do not migrate source object if a conflict is detected in the target domain’ radio button and click Next
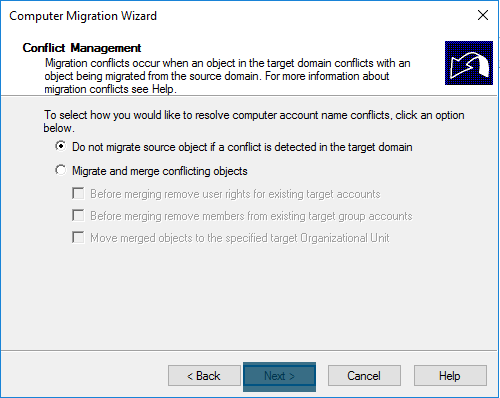
Figure 40: Computer account conflict management
15. Click Finish
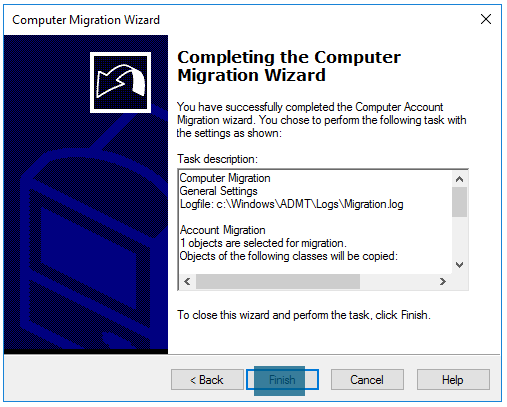
Figure 41: Completing the computer migration wizard
16. Wait for the wizard to complete and look for any errors
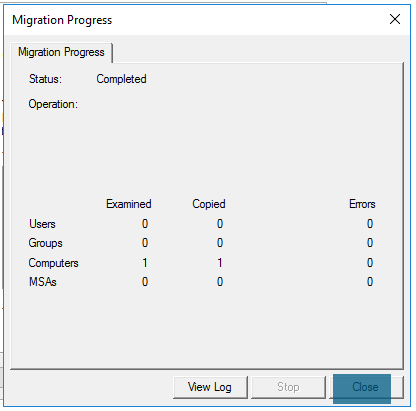
Figure 42: Computer migration progress
17. Open Active Directory Users and Computers snap-in and verify the computer account in target OU.
Migrating Large Number of Workstations or Member Servers Using Include File
Follow the steps 1,2,3 and 4 from single computer migration wizard. After step 4, proceed as follow:
– Click ‘Read objects from an include file’ radio button and click Next
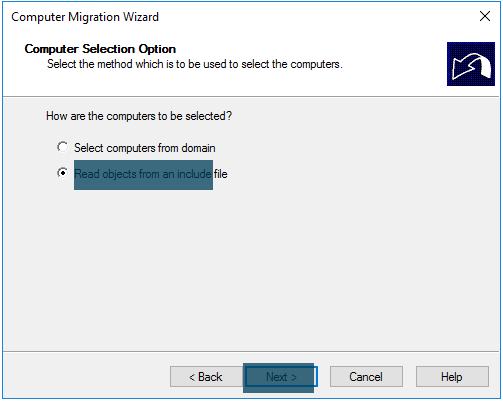
Figure 43: Computer selection method
– Click Browse and provide the path of include file on your hard drive. Click Next
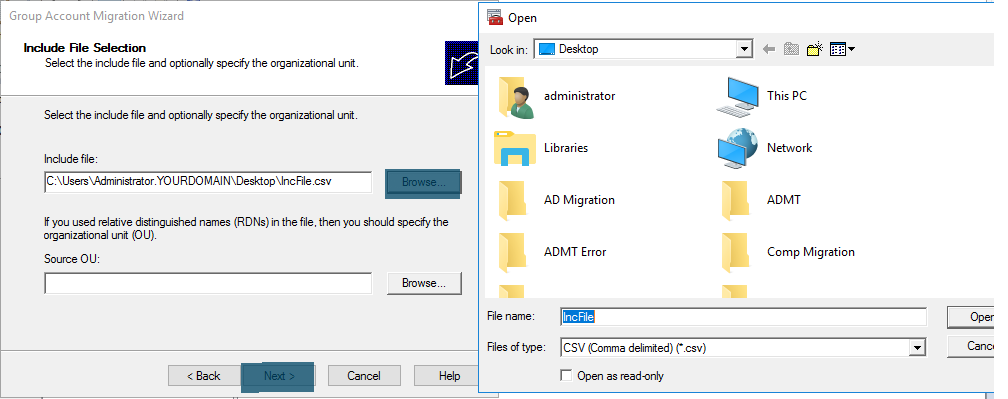
Figure 44: Providing include file path
When you are done with above two steps, proceed with step 8 of single computer migration wizard and follow it till the end.
Migrating Objects from Child Domain to Parent Domain Using Command Line
Log in with ADMT migration account on the computer in target or parent domain where ADMT is installed. open PowerShell with elevated privileges and execute one of the following commands. After the migration, open Active Directory Users and Computers snap-in and verify the migrated objects in target OU.
Migrating Limited Users
Execute the following command on PowerShell.
|
1 |
ADMT USER /N “”<user_name>” /IF:YES /SD:<”source_domain”> /TD:<”target_domain”> /TO:<”target_OU”> /MigrateGroups:<YES\NO> /TRP:<YES/NO> /UUR:<YES/NO> |
The following table lists the required parameters, explanation and their syntax for migrating user accounts in intraforest.
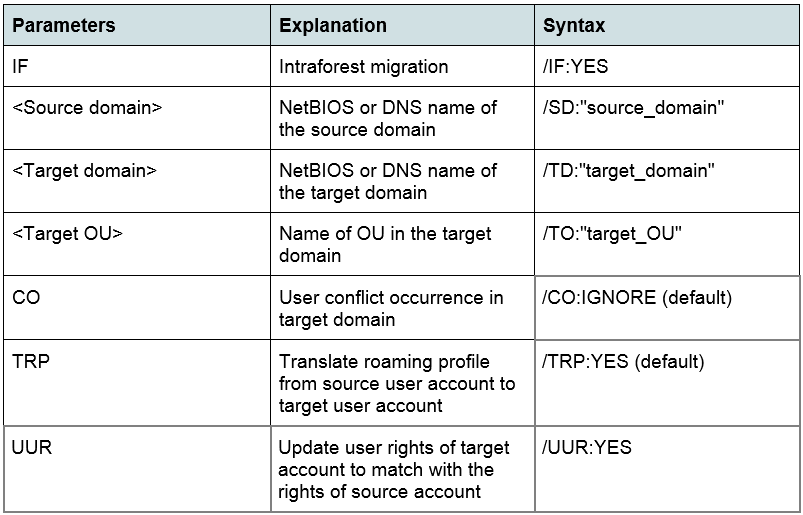
Table 3: ADMT user command line parameters
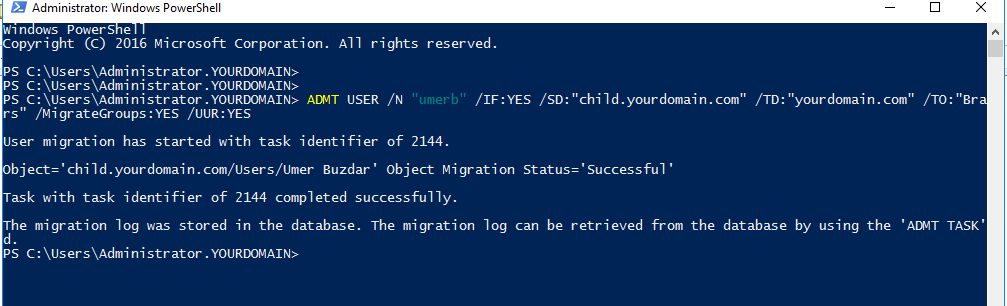
Figure 45: Migrating single user using PowerShell
Migrating Large Number of Users Using Include File
Execute the following command on PowerShell.
|
1 |
ADMT USER /F “<includefile_name>” /IF:YES /SD:<”source_domain”> /TD:<”target_domain”> /TO:<”target_OU”> /MigrateGroups:<YES\NO> /UUR:<YES/NO> /TRP:<YES/NO> |
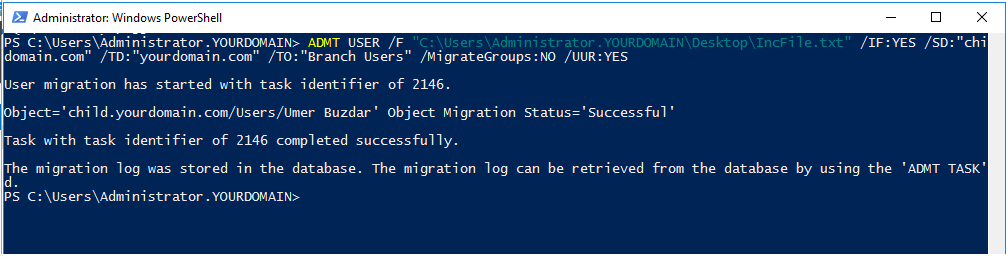
Figure 46: Migrating multiple users with include file
Migrating Limited Groups
Execute the following command on PowerShell.
|
1 |
ADMT GROUP /N “<group_name1>” “<group_name2>” /IF:YES /SD:<”source_domain”> /TD:”<target_domain>” /TO:”<target_OU>” |
The following table lists the required parameters and their syntax for migrating global groups in intraforest.
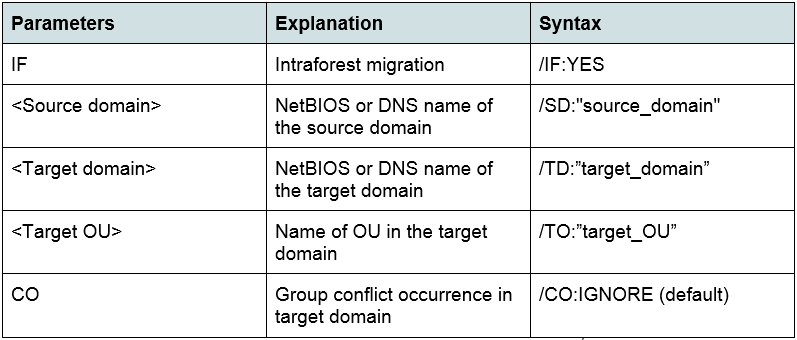
Table 4: ADMT group command line parameters
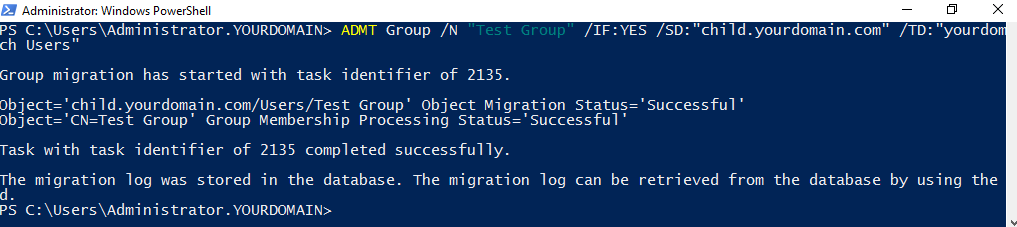
Figure 47: Migrating single group using PowerShell
Migrating Large Number of Groups Using Include File
Execute the following command on PowerShell.
|
1 |
ADMT GROUP /F “includefile_name” /IF:YES /SD:<”source_domain”> /TD:”target_domain” /TO:”target_OU” |
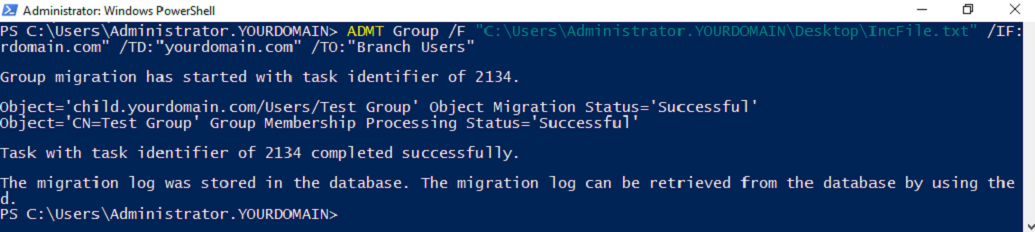
Figure 48: Migrating multiple groups with include file
Migrating Limited Workstations or Member Servers
Execute the following command on PowerShell.
|
1 |
ADMT COMPUTER /N “<computer_name1>” “<computer_name2>” /IF:YES /SD:<”source_domain”> /TD:<”target_domain”> /TO:<”target_OU”> /RDL:<value in minutes> |
Following table list the required parameters and their syntax for migrating workstations or member servers in intraforest.
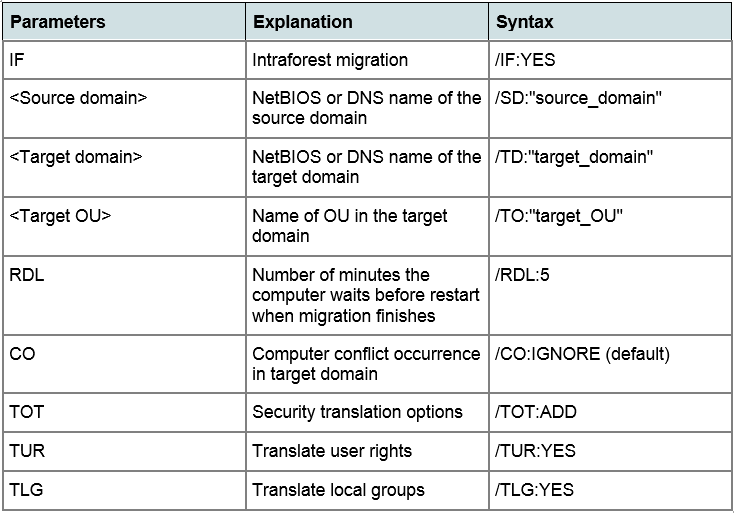
Table 5: ADMT computer command line parameters

Figure 49: Migrating single computer using PowerShell
Migrating Large Number of Workstations or Member Servers Using Include File
Execute the following command on PowerShell.
|
1 |
ADMT COMPUTER /F “”<includefile_name>” /IF:YES /SD:<”source_domain”> /TD:<”target_domain”> /TO:<”target_OU”> /RDL:<value in minutes> |

Figure 50: Migrating multiple computers with include file
Conclusion
Today, I have covered AD objects migration including users, groups and computers account in the same forest with ADMT snap-in and PowerShell. However, intraforest migration is not about moving only these three AD objects. Security translation, service, and managed service account migration are still left and I’ll cover them in other blog posts.
