

Introduction
In order to replicate your Hyper-V Virtual Machines between two hosts, the replication process must copy the snapshot from the primary host to the secondary host. Why using the Hyper-V Replica? This allows you to run a standby server with copies of the VMs ready in case of business continuity and disaster recovery.
As a reminder, I use the following architecture in this article:
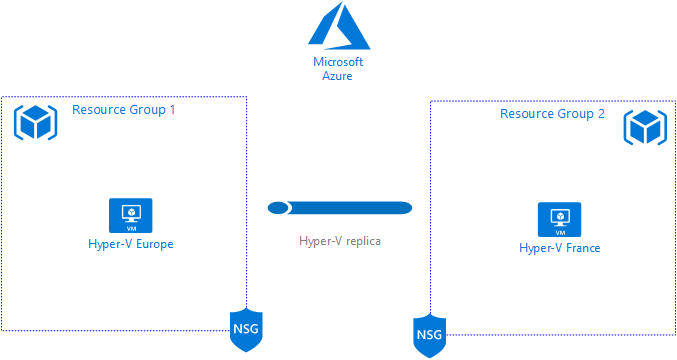
In the first part, I deployed two Hyper-V hosts:
- The first one is called “Hypv-Europe“, which is located in the Resource Group 1
- and the second one is called “Hypv-France“, which is located in the Resource Group 2.
Virtual Network Peering is enabled to allow the communication between “Hypv-Europe” and “Hypv-France“.
Configuring Hyper-V Replication
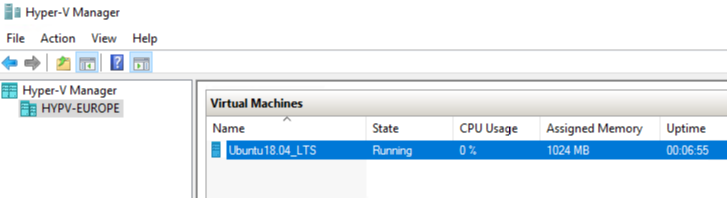
Before configuring the Hyper-V replication, you must have a valid Virtual Machine to replicate from the primary host to secondary host. In my case, on the primary host “Hypv-Europe”, I created a Virtual Machine called “Ubuntu1804_LTS” that will be replicated on “Hypv-France”:
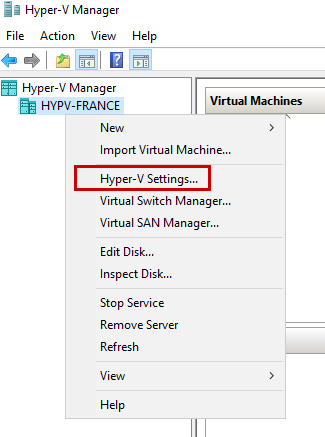
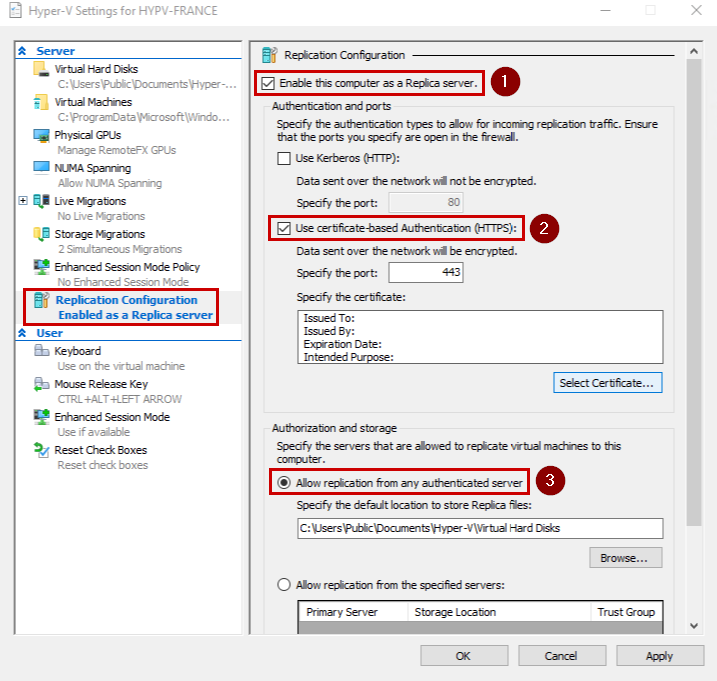
We must enable replication on the primary host and the replica host. Open the Hyper-V console, right-click on your Hyper-V host, and select “Hyper-V Settings…”
1. Click “Replication Configuration” in the left pane
2. Turn on Checkbox to “Enable this computer as a Replica server”
3. Make sure “Use certificate-based Authentication (HTTPS)” and specify the port: 443
4. Click “Allow replication from any authenticated server“. Here, you can enter the IP Address of the second Hyper-V Host to allow only this host to replicate VMs to this host.
5. Specify the default location you would like to store replicas
6. To finish, click “Apply” and “OK”
Repeat these steps for the second host.
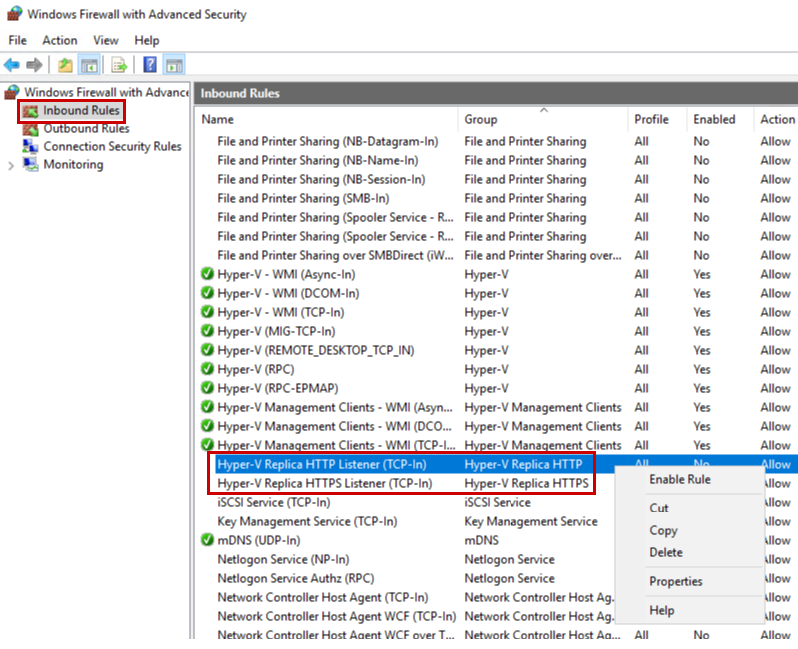
To allow any incoming virtual machine replication traffic for configured replication ports, you must ensure an inbound firewall rule is created. Open the Windows Firewall blade, right-click the following rules and select “Enable Rule“:
Configuring Hyper-V Host Certificates
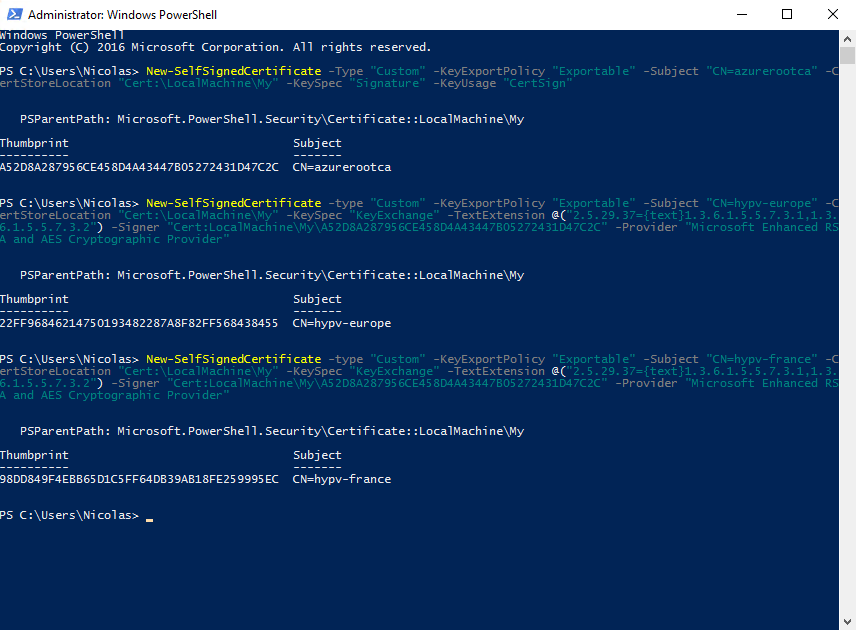
In this lab, I do not use an Active Directory Domain, so both Hyper-V host are in a workgroup. I need to use a certificate to allow replication. So, the first step we need to do is to create a root CA certificate.
Go to the first host and run the following command:
|
1 |
PS > New-SelfSignedCertificate -Type "Custom" -KeyExportPolicy "Exportable" -Subject "CN=azurerootca" -CertStoreLocation "Cert:\LocalMachine\My" -KeySpec "Signature" -KeyUsage "CertSign" |
Next, we must create two server certificates for both Hyper-V hosts. We will use the previous Thumbprint and run the following command:
|
1 2 3 |
PS > New-SelfSignedCertificate -type "Custom" -KeyExportPolicy "Exportable" -Subject "CN=hypv-europe" -CertStoreLocation "Cert:\LocalMachine\My" -KeySpec "KeyExchange" -TextExtension @("2.5.29.37={text}1.3.6.1.5.5.7.3.1,1.3.6.1.5.5.7.3.2") -Signer "Cert:LocalMachine\My\6A7196D9759FC2F7C49D62E08FA7195310DE5EB7" -Provider "Microsoft Enhanced RSA and AES Cryptographic Provider" PS > New-SelfSignedCertificate -type "Custom" -KeyExportPolicy "Exportable" -Subject "CN=hypv-france" -CertStoreLocation "Cert:\LocalMachine\My" -KeySpec "KeyExchange" -TextExtension @("2.5.29.37={text}1.3.6.1.5.5.7.3.1,1.3.6.1.5.5.7.3.2") -Signer "Cert:LocalMachine\My\6A7196D9759FC2F7C49D62E08FA7195310DE5EB7" -Provider "Microsoft Enhanced RSA and AES Cryptographic Provider" |
Do not forget to replace the subject parameter to match with Hyper-V Hostnames. The output should be similar to the following:
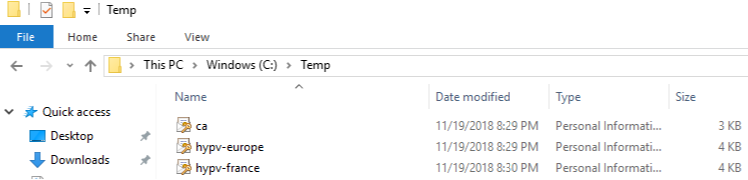
If it works as expected, you should have three certificates in the Certificates store. Open the MMC for the local computer and confirm that certificates are visible:

Next, right-click each certificate and select “Export”. Do not forget to include the private key.
We need to import these certificates to the second Hyper-V host. Import the root CA certificate to the “Trust Root Certification Authorities” store and import both Hyper-V host certificates to the “Personal” Store.
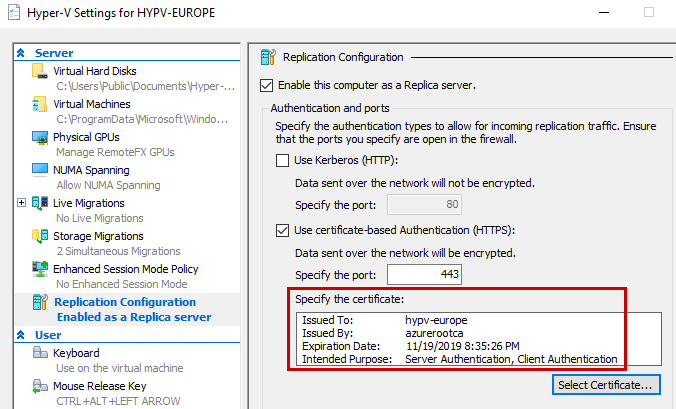
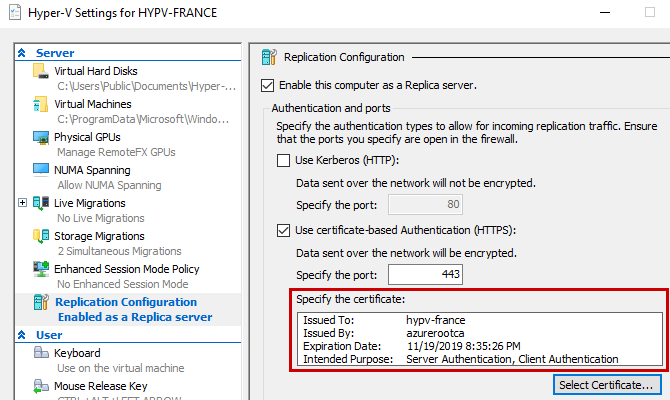
Go back to the Replication Settings on both Hyper-V hosts and select the certificate:
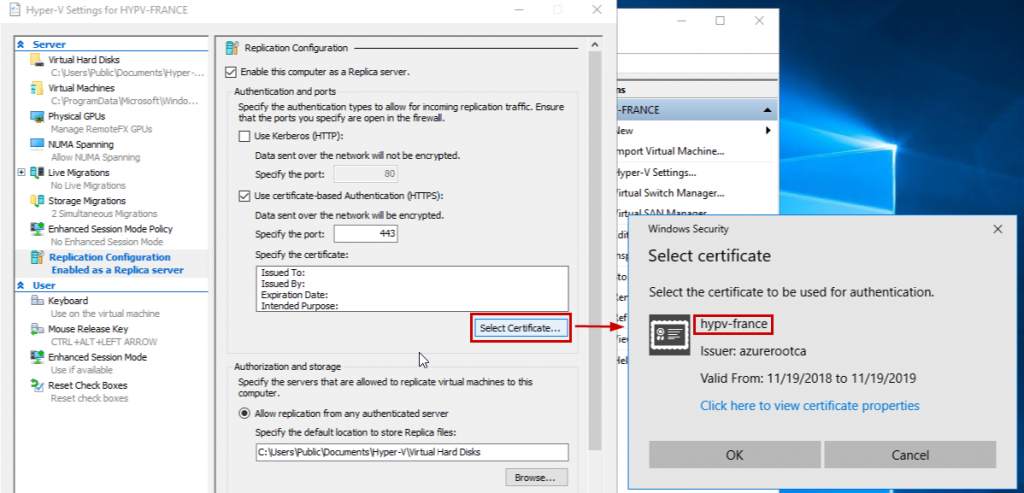
You should have something like the following screenshot:
Please note that if the console cannot find the certificate, then you must close the Hyper-V Manager console to refresh the store.
Enabling Replication
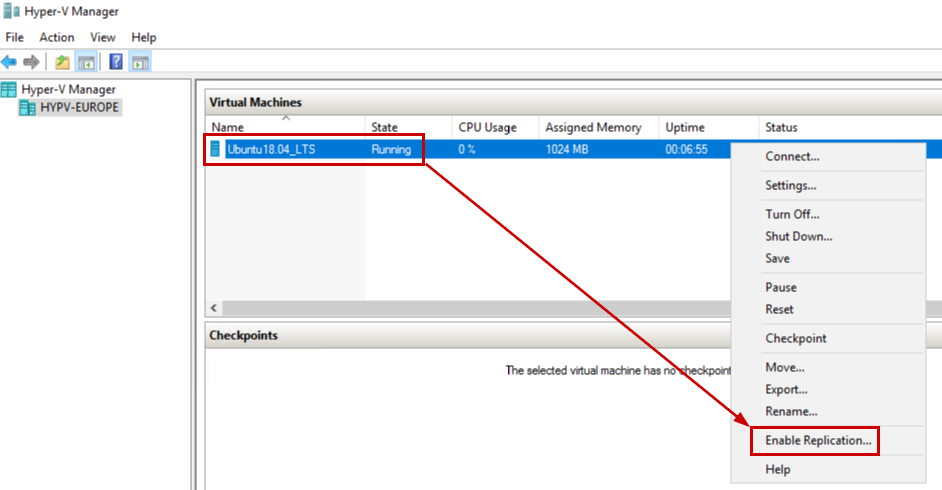
Everything is ready to replicate the Virtual Machine. Go to the Hyper-V Manager Console, right-click the Ubuntu Virtual Machine, and choose “Enable Replica”.
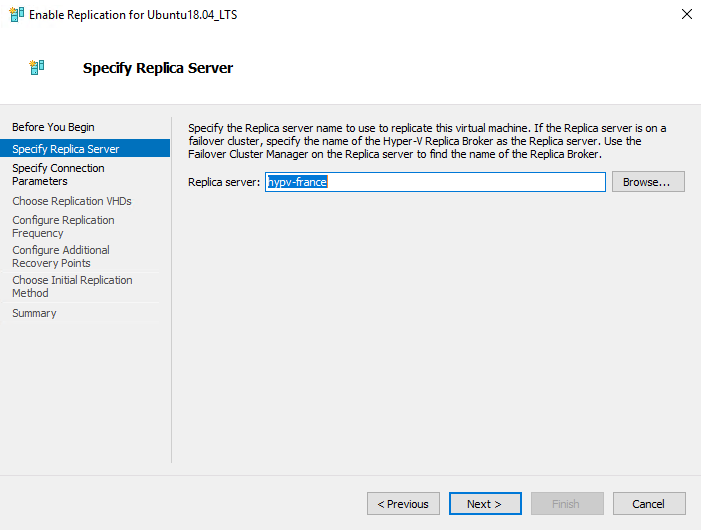
Enter the name of the second Hyper-V Host. In my case, I want to replicate the Virtual Machine from “Hypv-Europe” to “Hypv-France“:
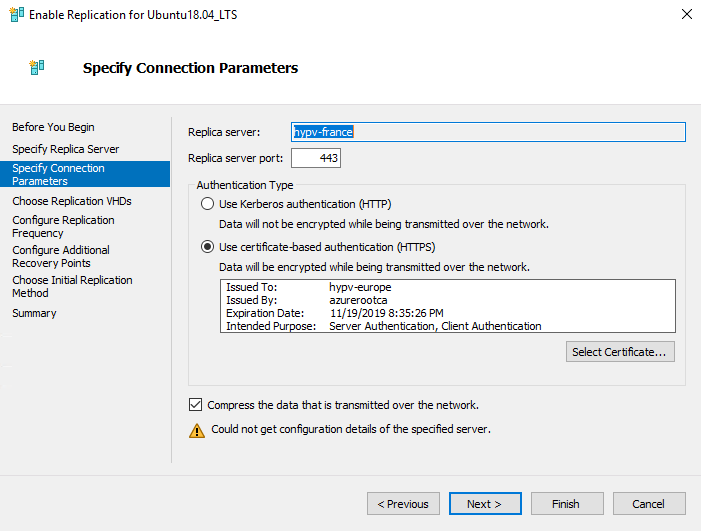
Select the second option to use HTTPS and select the certificate
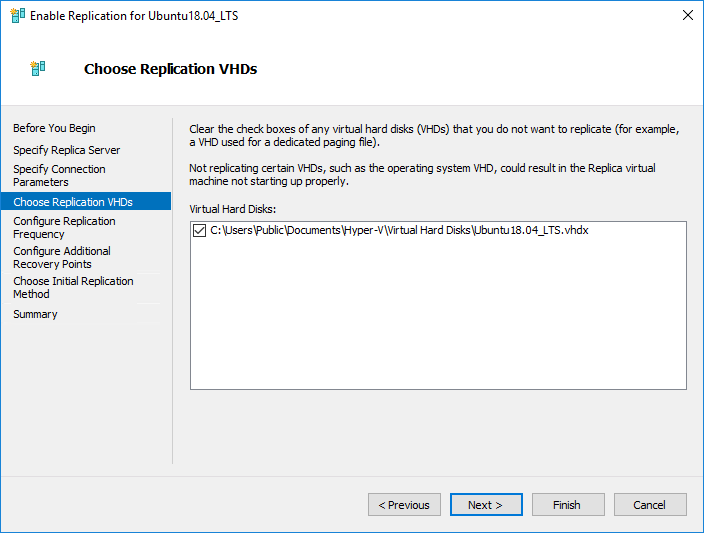
Use the default settings or change some settings to suit your needs.
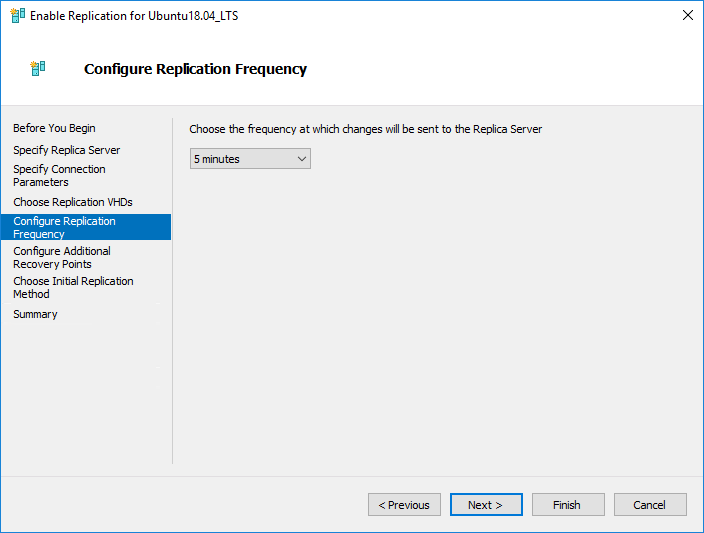
Choose when the changes will be sent to the replica server.
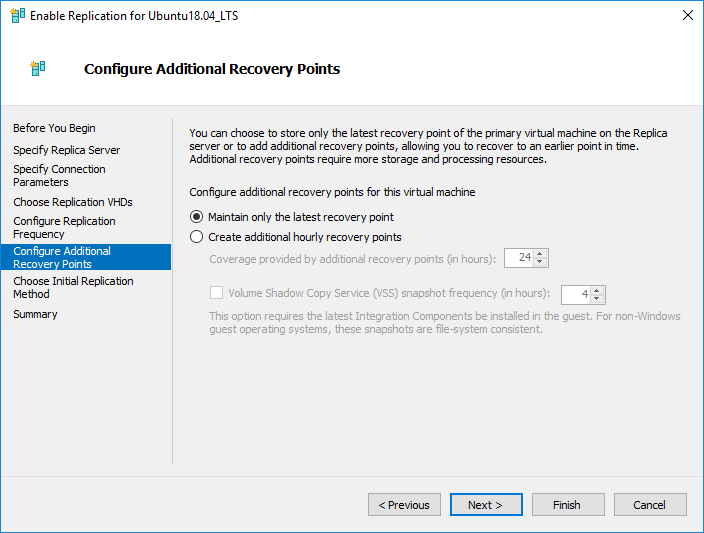
Select how many recovery points you want to maintain.
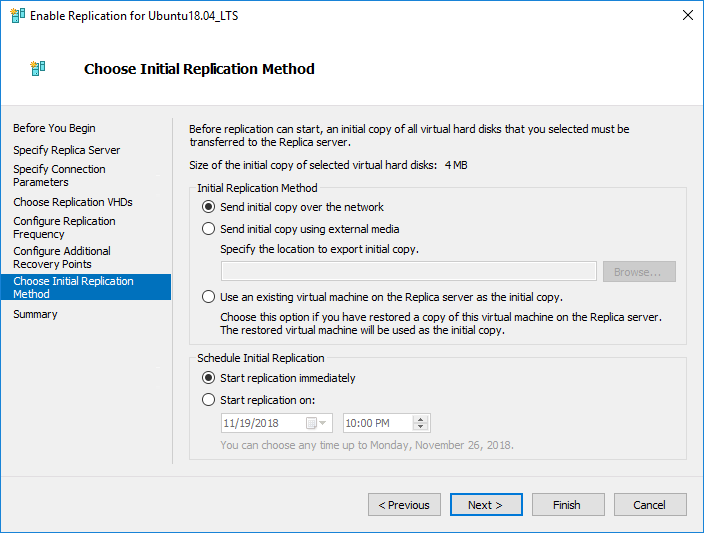
Select the first option to send the initial copy over the network.
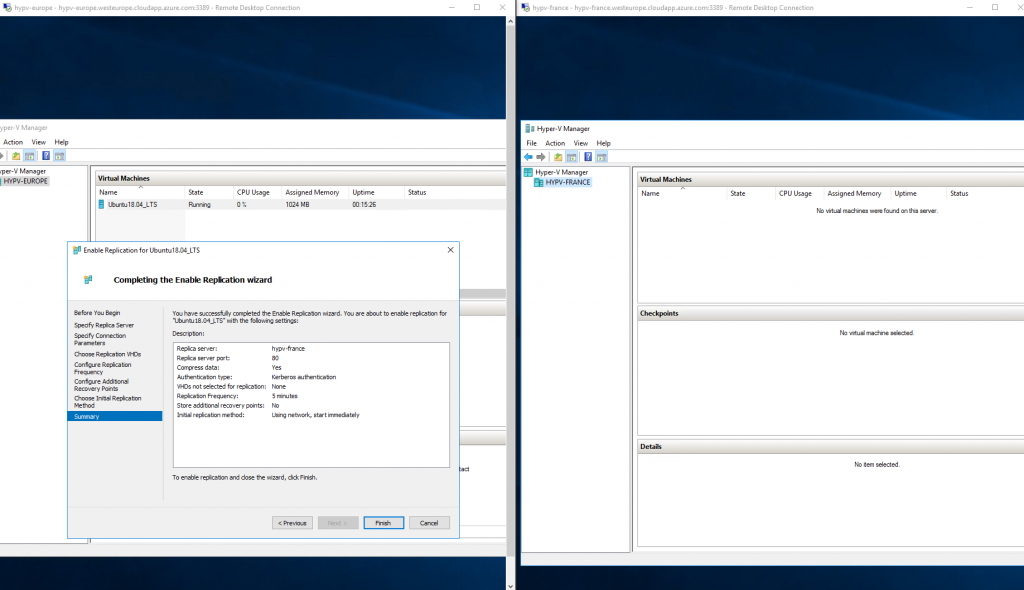
Click “Finish” to start the replication process from the primary host to the secondary host.
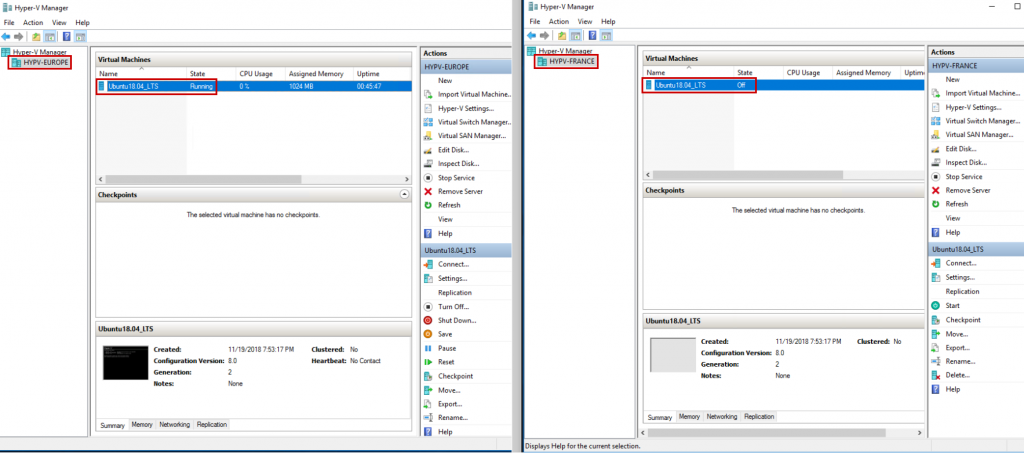
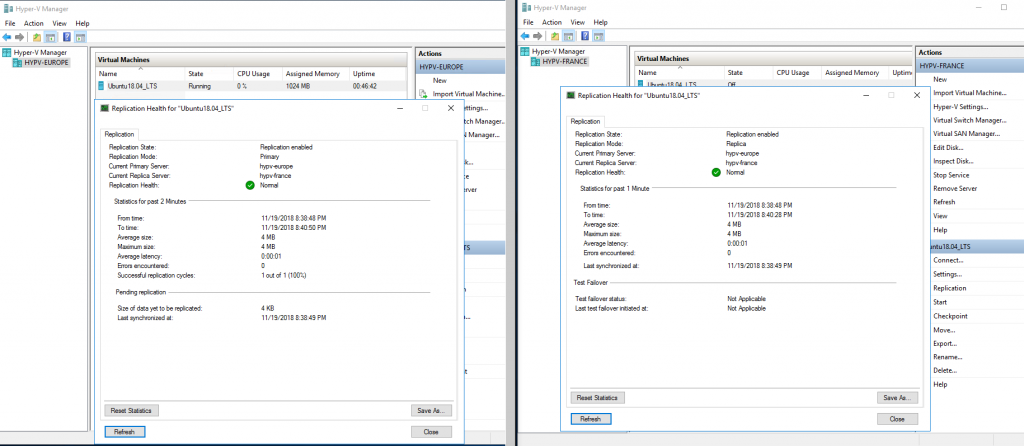
In my case, the VM is very light, so the replication has been done very quickly. You can check some information such as the replication health. Right-click on the Source and Replica Virtual Machine, and select “View Replication Health…”
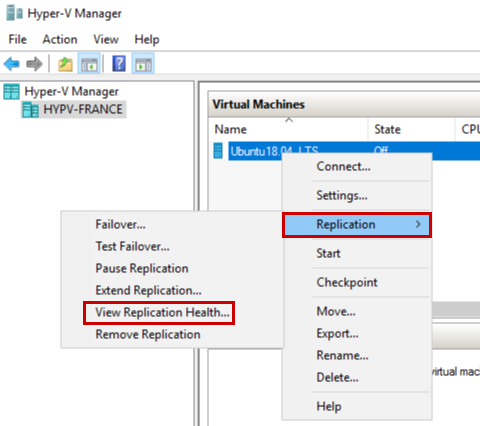
Confirm the following replication information:
- Current primary server
- Current replica server
- Replication health
- Errors encountered
Conclusion
Thanks to this guide, you should be able to create your own Hyper-V lab on Azure. Obviously, you should not use this topology in a production environment because Microsoft does not support this type of installation. However, it can be useful to test the Hyper-V features using this architecture, especially if you do not have your own lab at home.
Thanks for reading!
