

In a last topic, I’ve explained how to deploy a Kemp LoadMaster appliance. In this topic, I show how to deploy a Kemp LoadMaster HA cluster. The goal is to ensure that the load-balancing service is highly available. Most of the time, Kemp LoadMaster is a critical service because if you lose it, you’ll get service outage especially on E-mail, web application, SharePoint etc. To ensure high availability, most of the time I deploy a HA cluster.
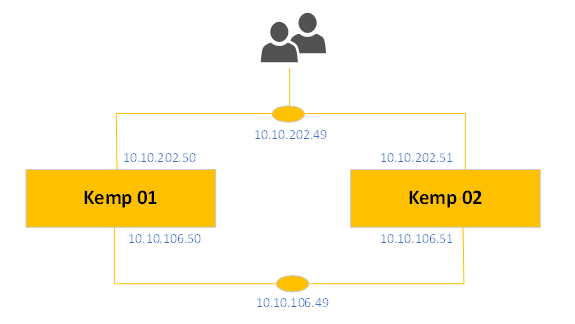
In HA clustered mode, a Kemp appliance is active and the other is passive. If the active one is down, the passive becomes active. To get a single-entry point, a shared IP address is created between Kemp Appliance. In Kemp HA clustered mode, two networks should be configured: one for the cluster usage (farm network) and one for the user network. In the below example, the network 10.10.106.0/25 (not routed) is the farm network and the 10.10.202.0/24 (routed) network is the user network. A shared IP address is created in both networks.
In this topic, I explain how to deploy a Kemp LoadMaster HA cluster by following the above explanation. To follow this topic, you need two Kemp appliances already deployed.
Configure the first Kemp LoadMaster
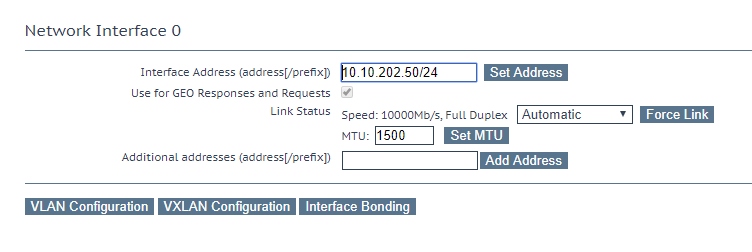
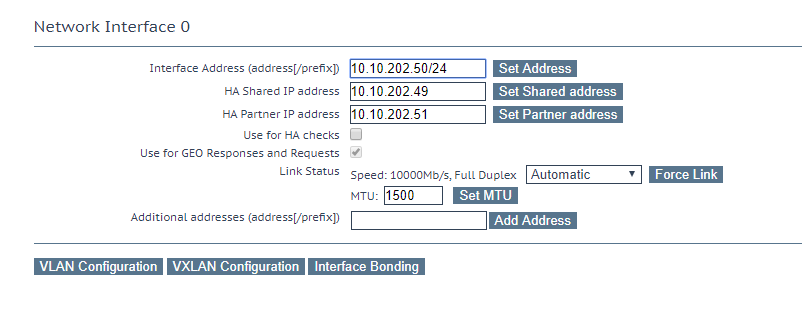
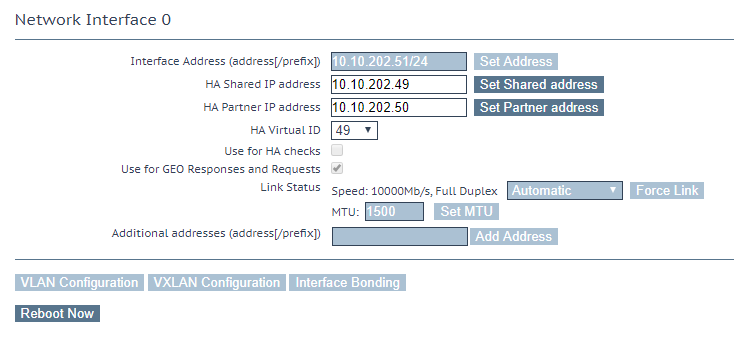
First of all, I review the network configuration. I ensure that Network Interface 0 is configured with an IP in the user network.
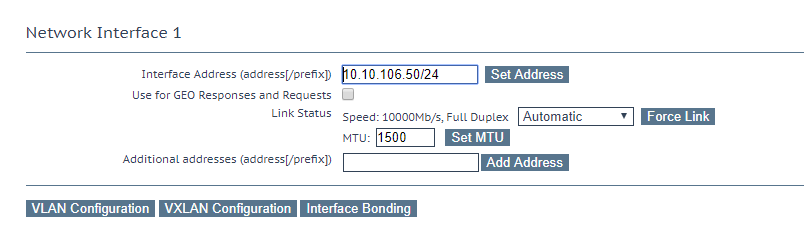
I check also that network interface 1 has an IP address in the farm network.
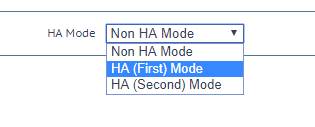
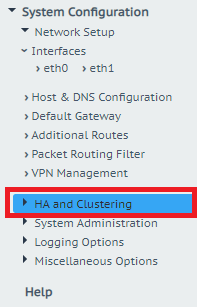
Then I navigate in the menu and I click on HA and Clustering.

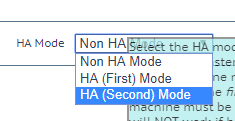
Next, I choose HA Mode.
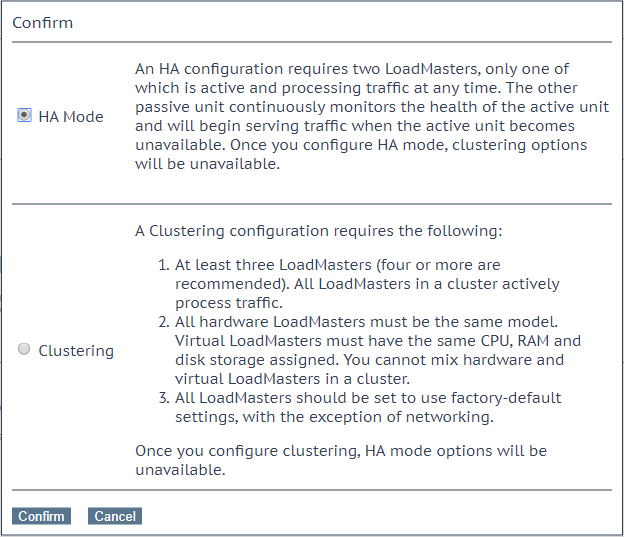
Then I choose HA (First) Mode.
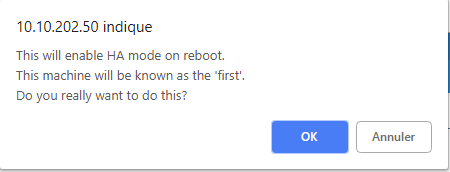
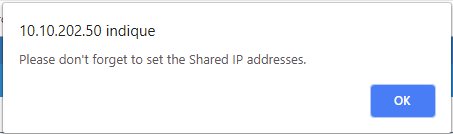
Two warning are shown, just click on OK in both pop-ups.
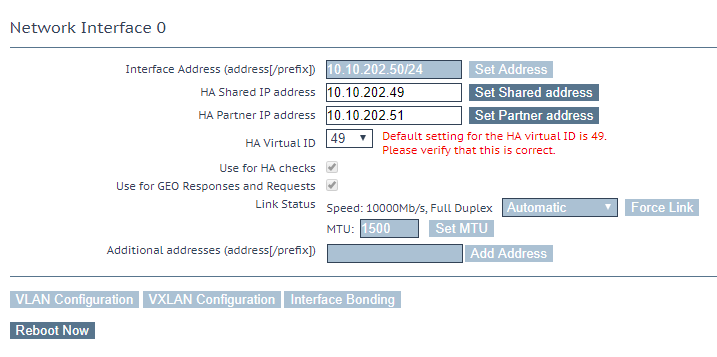
Next specify the shared IP address and the IP address of the second Kemp appliance. The HA Virtual ID is generated with the last bytes of the shared IP address. The HA virtual ID must be unique in your network. It ensures that another Kemp HA cluster cannot disturb this HA cluster. Click on Reboot now.
Once the LoadMaster has rebooted, open again the network interface 1 configuration. Specify the Shared IP address and the partner IP address in the farm network. Enable Use for HA checks.
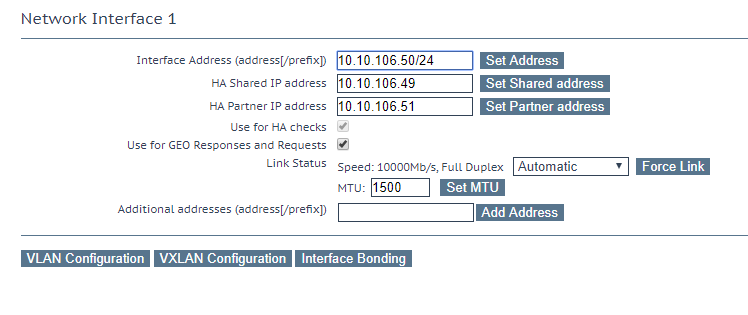
In Network Interface 0 pane, disable Use for HA checks.
In HA parameters, configure the following settings:
- HA Update Interface: Eth1
- Enable Inter HA L4 TCP Connection Updates
- Enable Inter HA L7 Persistency Updates
- HA Multicast Interface: Eth1

Configure the second LoadMaster
As the first appliance, be sure that the IP addresses specified for network interface 0 and 1 are correct. Then click on HA and Clustering.
This time select HA (Second) Mode.
Click on OK in both pop-ups.
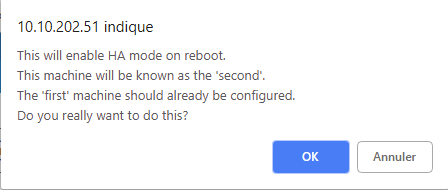
Finally, specify the shared IP address and the IP address of the first node. Ensure that the HA virtual ID is the same that you specified in the first node.
Once ou have rebooted, you can connect on the Kemp LoadMaster HA shared IP address (in user network). You should have the following indication on top right of the interface. That means that both Kemp communicates and your cluster is ready. Now, you have to configure your cluster from the shared IP address

Conclusion
Usually Kemp is in front of critical services such as E-mail, web applications, SharePoint and so on. So the Load-Balancer is a critical service and should be almost never down. A single appliance is not enough to ensure high availability (especially physical appliance). This is why it’s recommended to deploy at least a HA cluster.
