

The overall process will be relatively simple and will have 3 major steps:
1. Create and configure the recovery services vault
2. Install and register the agent
3. Set and configure the System State backup
Let’s dive in with the specifics.
1. Create and Configure the Recovery Services Vault
The first step will be to create and configure the Recovery Services Vault. This is the Azure component in your subscription that will store your backups. From this area, you can also trigger the restoration processes.
1.1 Access the Azure Portal using your subscription.
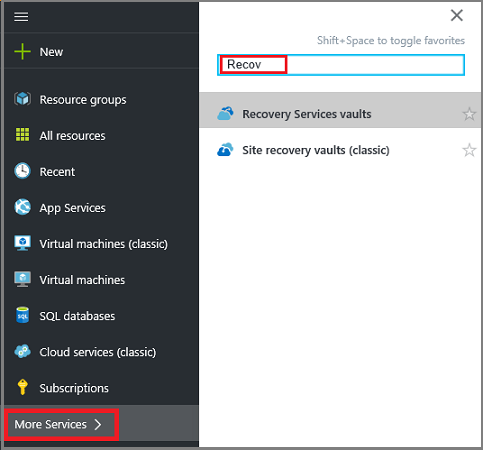
1.2 On the left menu, click More Services and in the list of resources, type Recovery and click Recovery Services vaults.
1.3 On the Recovery Services vaults menu, click Add.

1.4 The Recovery Services vault options are opened, and it will require some basic information:
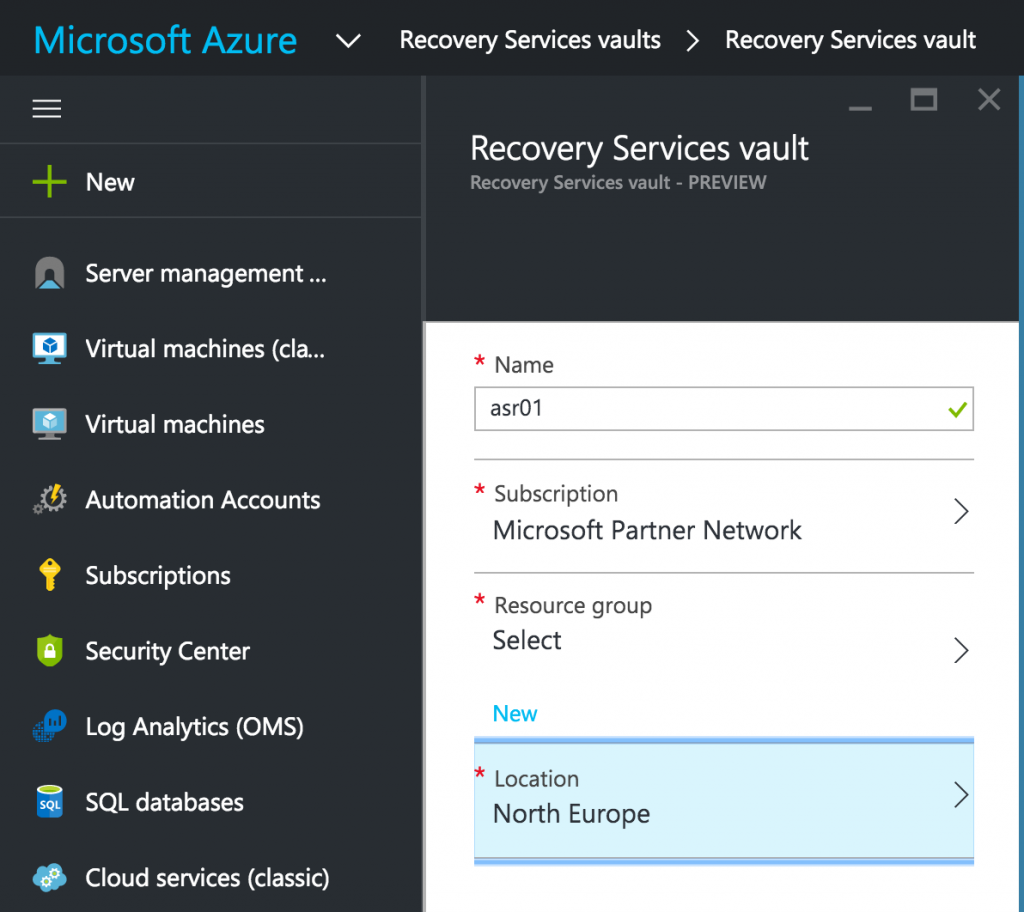
a) Name for the vault.
b) In the Resource group section, you can create a new RG or use an existing one.
c) Click Location to select the geographic region for the vault. This selects area where your backup data is sent.
1.5 Click Create.
It could take a few minutes before you can see the new Recovery Vault created. Once it’s created you can select the storage redundancy for this vault.
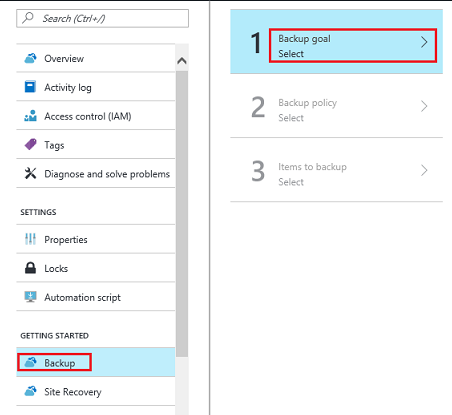
1.6 From the Recovery Services vaults, click the new vault. And then access the Settings section for this vault.
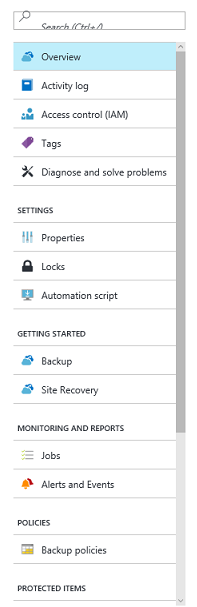
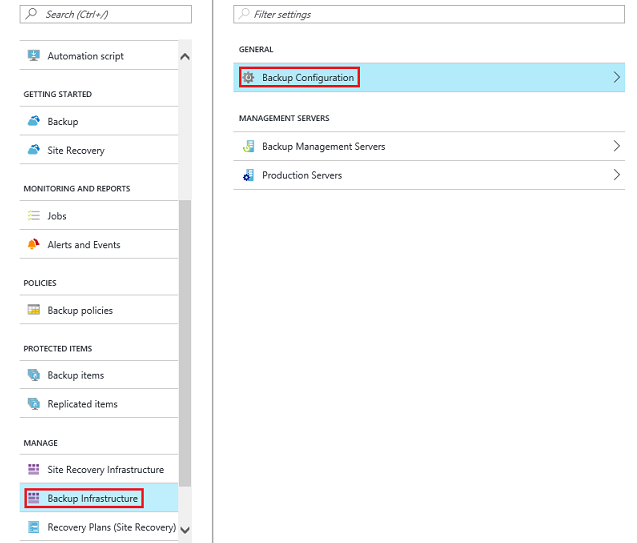
1.7 In this area, scroll down to the Manage section, and click Backup Infrastructure.
1.8 In Backup Infrastructure, click Backup Configuration.
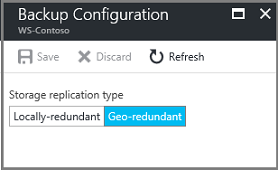
1.9 By default, your vault has geo-redundant storage. If you use Azure as a primary backup storage endpoint, continue to use Geo-redundant.
If you don’t use Azure as a primary backup storage endpoint, then choose Locally-redundant, which reduces the Azure storage costs.
With these steps completed, now it’s time to configure the backup itself, source type and backup type.
1.10 Access the Getting Started section, click Backup and Backup goal.
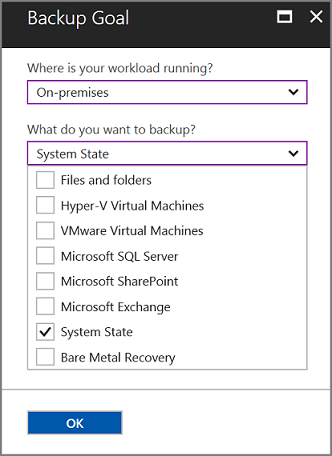
1.11 In the Backup Goal select the source and type of the machine you need to backup.
1.12 In this example, we will use the option for an on-premises machine and System State as the option to protect.
After clicking OK, a checkmark should appear next to Backup goal to confirm this step is completed. Following to that, the Prepare infrastructure options will appear.
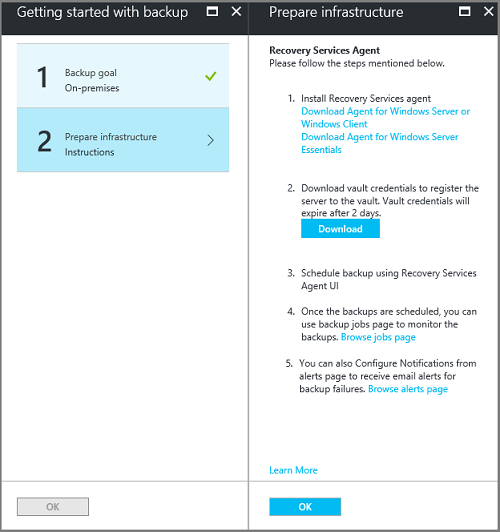
1.13 Click on Download Agent for Windows Server or Windows Client. This will generate the automatic download of the agent installer: MARSAgentInstaller.exe. Select Save for this file.
You can install the agent after you have downloaded the vault credentials, which will be required for the installation process.
1.14 Click Download to obtain the vault credentials. The file will be required for the agent installation and needs to be stored locally on the Windows Server you need to execute the System State backup.
2. Install and Register the Agent
The second step is very simple and easy, in the machine we are selecting to obtain the System State backup we need to install and register the backup agent that will communicate and send the data to Azure.
2.1 In the Windows Server machine selected for the System State backup, double-click the MARSagentinstaller.exe to start the installation process.
2.2 The wizard is simple and straight-forward, complete the information as required:
a) Choose a location for the installation and cache folder.
b) Provide your proxy server info if you use a proxy server to connect to the internet.
c) Provide the downloaded vault credentials
d) Save the encryption passphrase in a secure location.
2.3 The passphrase is crucial to store in a secure location since in case you lose it, Microsoft cannot help you restore that file and the backup will be unusable.
The agent is now installed and your machine is registered to the vault. You’re ready to configure and schedule your backup.
3. Set and Configure the System State Backup
Once the agent is installed and registered properly with your Azure subscription, we are going to set a schedule for the System State backup and execute the first backup into Azure.
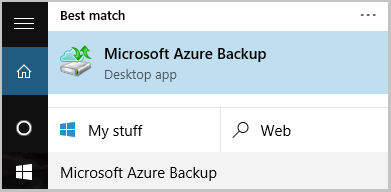
3.1 In the Windows Server machine, open the Microsoft Azure Recovery Services agent, you can find it from the Start menu as “Microsoft Azure Backup”.
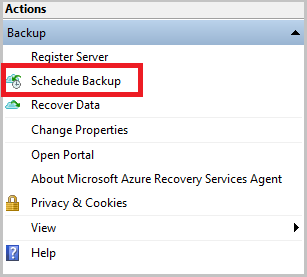
3.2 In the Recovery Services agent, review the Actions pane and select Schedule Backup.
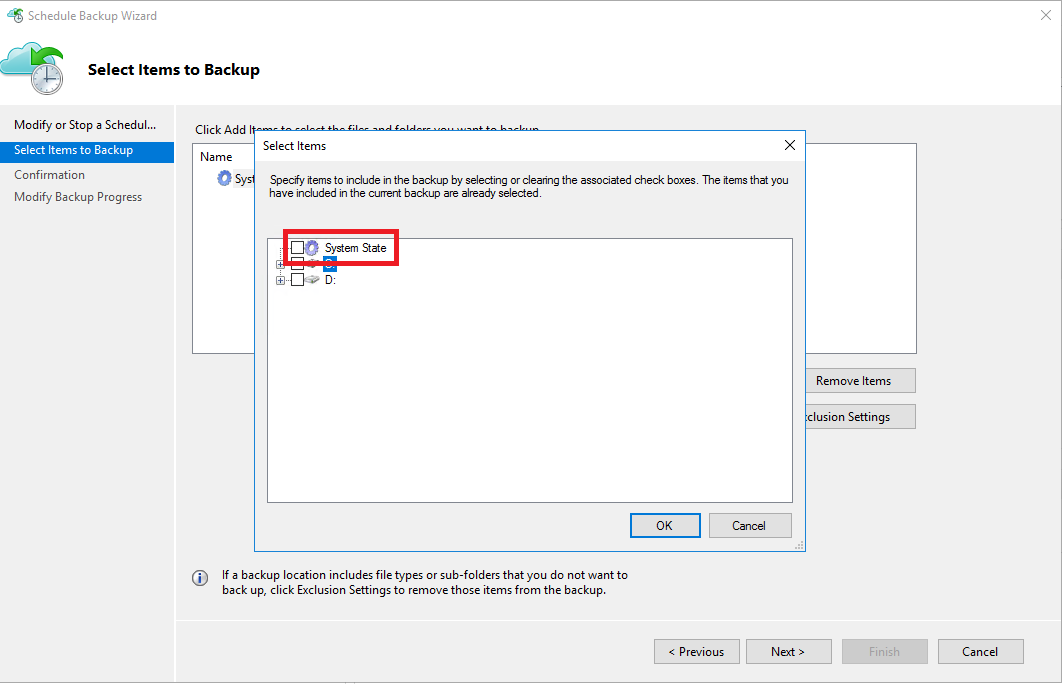
3.3 On the Getting started page of the Schedule Backup Wizard, click Next. And then click Add Items.
3.4 Select System State and then click OK. And then click Next.
3.5 Select the required Backup frequency and the retention policy for your System State backups in the options presented.
3.6 On the Confirmation page, review the information and then click Finish.
Now that we have the backup schedule with the desired frequency, let’s execute one System State backup to confirm our process works properly.
3.7 In the Recovery Services agent, click Back Up Now to have a full backup available now that will be sent over the network.
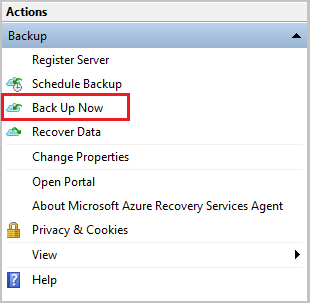
3.8 Select System State on the Select Backup Item screen that appears, and click Next.
3.9 On the Confirmation page, review the information and click Back Up.
3.10 Click Close to close the wizard.
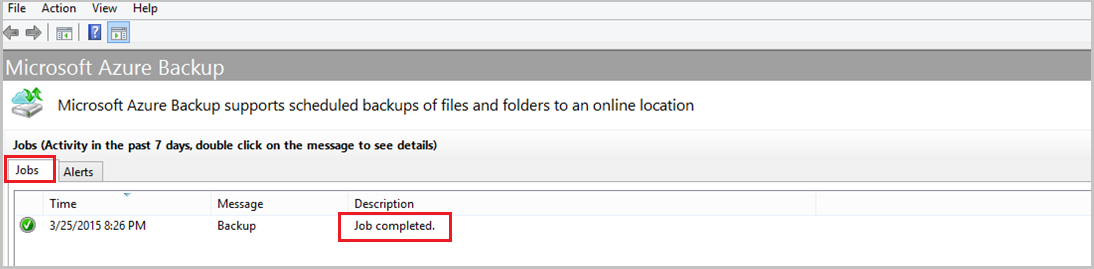
After the initial backup is completed, the Job completed status should appear in the Backup console.
3.11 In your Azure portal, you can access the Recovery Services section and confirm the backup has been sent and available in your subscription.
With that, we have completed our first System State backup into Azure and successfully schedule the backup job to guarantee our server will be backed up automatically. Don’t forget about periodically restoring and testing your backups! There’s no better backup than the one that is tested.
Virtual Tape Library on Azure used with Microsoft System Center Data Protection Manager 2016
