StarWind Virtual SAN®
Installing and Configuring SQL Server 2012
Failover Cluster Instance on Windows Server 2012
INTRODUCTION
This guide is intended for experienced Windows system administrators, IT professionals, and the SQL Server database administrators who would like to install and configure a 2-node Windows Server 2012 Failover Cluster that will host SQL Server 2012 Failover Cluster Instance (FCI).
The Windows Server 2012 hosted storage that will be used for building Windows Server Failover Cluster leverages StarWind Virtual SAN for the implementation of a block-level replication.
This document assumes that:
- Windows Server 2012 is installed on each server that would be joined to the cluster and to the Active Directory (AD) domain.
- The disks (LUNs) are exposed to the servers that should be clustered and are configured according to the StarWind Virtual SAN High Availability Best Practices documentation.
- The disk witness will be used as a quorum model.
A full set of up-to-date technical documentation can always be found here, or by pressing the Help button in StarWind Management Console.
For any technical inquiries please visit our online community, Frequently Asked Questions page, or use the support form to contact our technical support department.
Solution Diagram
The diagram below illustrates the network and storage configuration of the solution described in this guide.
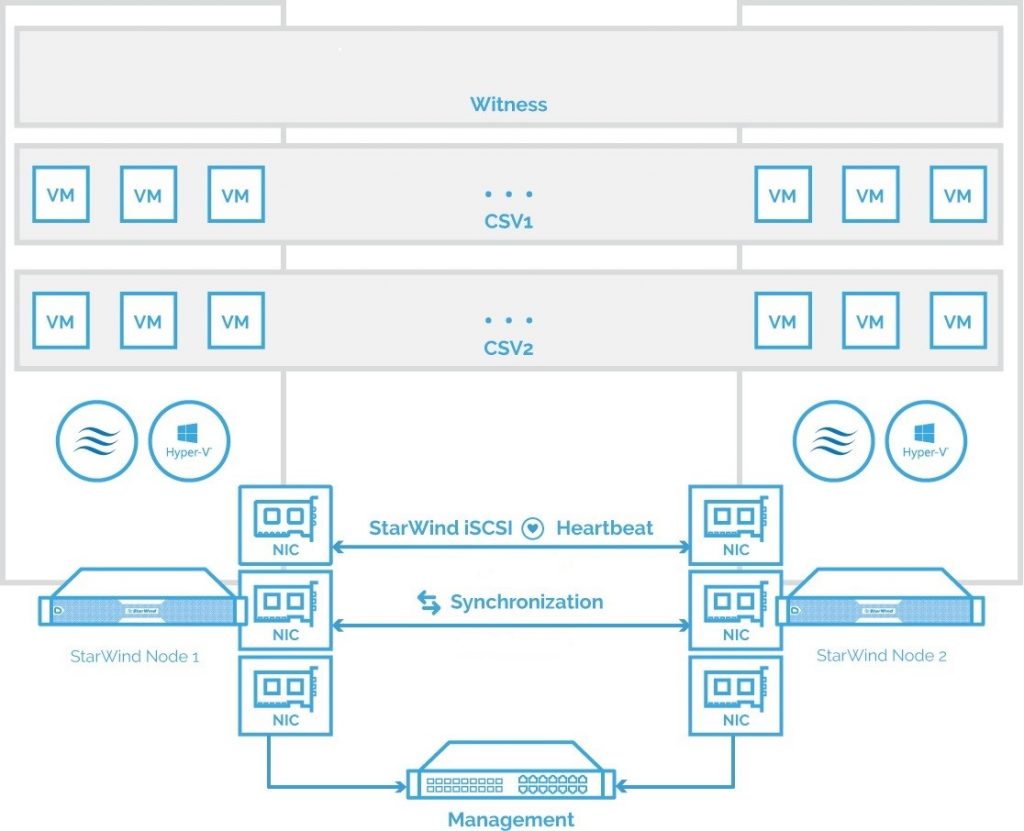
The diagram of a 2-node HA SQL Cluster based on StarWind Virtual SAN
NOTE: Additional network connections may be necessary, depending on the cluster setup and application requirements. For any technical help in regards to configuring additional networks, please, do not hesitate to contact the StarWind Support Department via online community forum, or via support form (depending on the support plan).
1.Make sure to have a domain controller and the servers added to the domain.
2. Install Failover Clustering and Multipath I/O features on both servers.
3. Configure network interfaces on each node to make sure that the Synchronization and iSCSI/StarWind Heartbeat interfaces are in different subnets and connected according to the network diagram above. In this document, 10.0.0.x subnet is used for the iSCSI/StarWind Heartbeat traffic, while 10.1.1.x subnet is used for the Synchronization traffic.
The procedures mentioned above can be performed by following the instructions below.
SQL Server 2012 Windows System Requirements
Make sure that the server used for SQL Server 2012 deployment satisfies the requirements listed below.
Hardware requirements
Memory: 512 MB minimum for Express, 1 GB for Standard, Developer & Enterprise.
File System: NTFS or ReFS.
Please note that other file systems, such as FAT32, are not supported.
Disk space: 6 GB minimum.
Processor speed: Clockspeed of 2 GHz or more. 1.4 GHz minimum.
Processor cores: 2 cores (Virtual or Physical).
Processor type: 64-bit x64-compatible AMD or Intel CPU only.
Software Requirements:
- A minimum of .NET 4.6.1 is required. The SQL Server 2012 setup will install the necessary files before the actual installation.
- The SQL Server setup support files and the native client should be installed first.
- Client versions of Windows 10 or 8.1 and Windows Server 2012 R2. Windows Server Essentials and Foundation Editions are also supported.
However, the SQL Server setup requires a GUI and will not work on the Core editions. - To install all the components, 8030 MB of the hard disk space is required.
- The supported storage types are the following:
– Local
– Shared
– Storage Spaces (including S2D)
– SMB (supported with certain limitations)
- SQL Server has limitations when installing on a domain controller (DC). Failover clustering is not supported on a DC.
The SQL Server Core engine is 64-bit only and does not support the 32-bit editions of Windows 8 or Windows 10. Barring a few 32-bit components (such as Client Tools, Data Quality Client), all other parts require the native 64-bit support.
Cluster Configuration Details
The following prerequisites are used in the configuration:
Active Directory Domain Name: TESTDOMAIN.local
StarWind Virtual SAN Servers IP addresses: 10.0.0.200, 10.0.0.201
Cluster Nodes Names: WS-CLUSTER3, WS-CLUSTER4
Cluster Disks: Q:\, E:\, F:\ & H:\
Windows Server Failover Cluster Name: WINCLUSTER2
Windows Server Failover Cluster IP Address: 172.16.0.211
SQL Server Failover Cluster Name: SQLCLUSTER2
SQL Server Failover Cluster IP Address: 172.16.0.212
SQL Server Service Account: TESTDOMAIN\sqlservice
Connecting to the iSCSI Storage
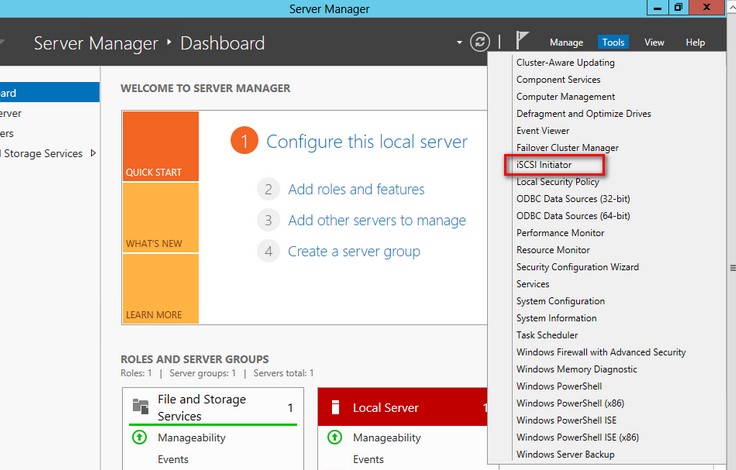
4. Windows Server 2012 comes with the iSCSI Initiator that enables connection of a Windows host to an external iSCSI storage array, i.e. StarWind Virtual SAN using network adapters. To launch the tool from the Server Manager dashboard, select the iSCSI Initiator in the Tools drop-down menu.
NOTE: These steps should be performed on both servers to act as nodes in the Failover Cluster.
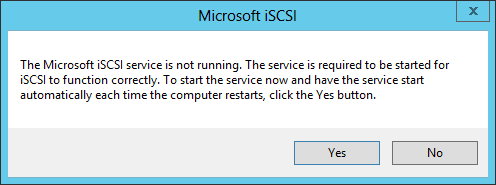
5. The message informing that The Microsoft iSCSI service is not running appears. Ignore it and click Yes to continue.
6. To connect to the iSCSI target:
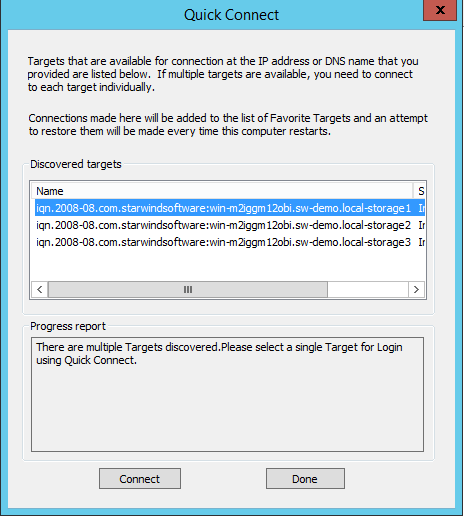
In the iSCSI Initiator Properties dialog box, in the Targets tab, enter the IP address of the StarWind Virtual SAN server in the Target field. Click Quick Connect… The list of the iSCSI Targets can be found in the table.
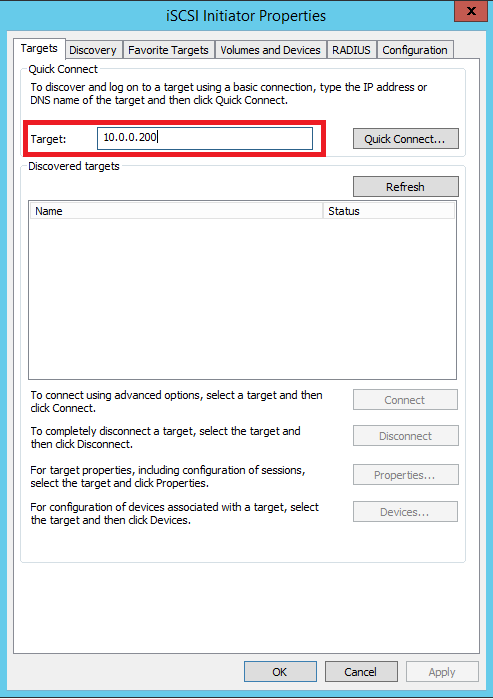
7. In the Quick Connect dialog box, select the target that will be used and click Connect. Click Done to go back to the iSCSI Initiator Properties window.
8. Click OK to close the iSCSI Initiator Properties window. Once the targets are defined using the iSCSI Initiator tool, bring the disks online, initialize them, and create new volumes using the Disk Management console.
Initializing and Formatting Disks
9. After configuring the servers to connect to the iSCSI target, proceed with initializing and formatting the disks using the Disk Management console.
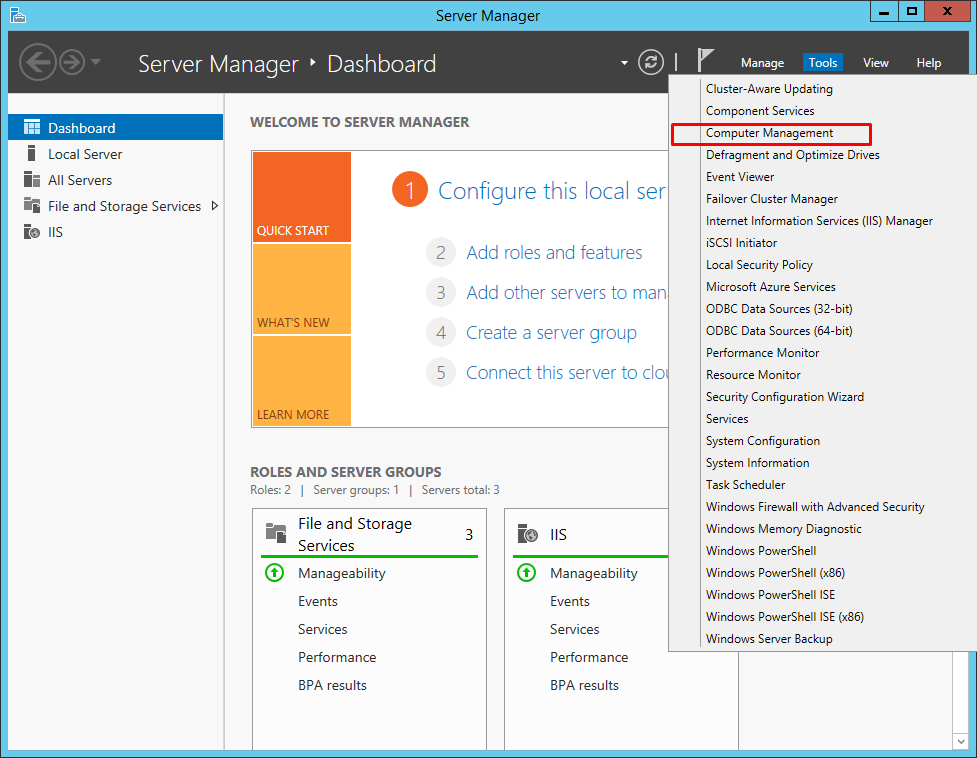
10. To launch the tool from the Server Manager dashboard, select Computer Management in the Tools drop-down menu.
NOTE: These steps must be performed on both servers to act as nodes in the Failover Cluster.
11. To initialize and format the drives:
In the Computer Management console, expand the Storage section and select Disk Management.
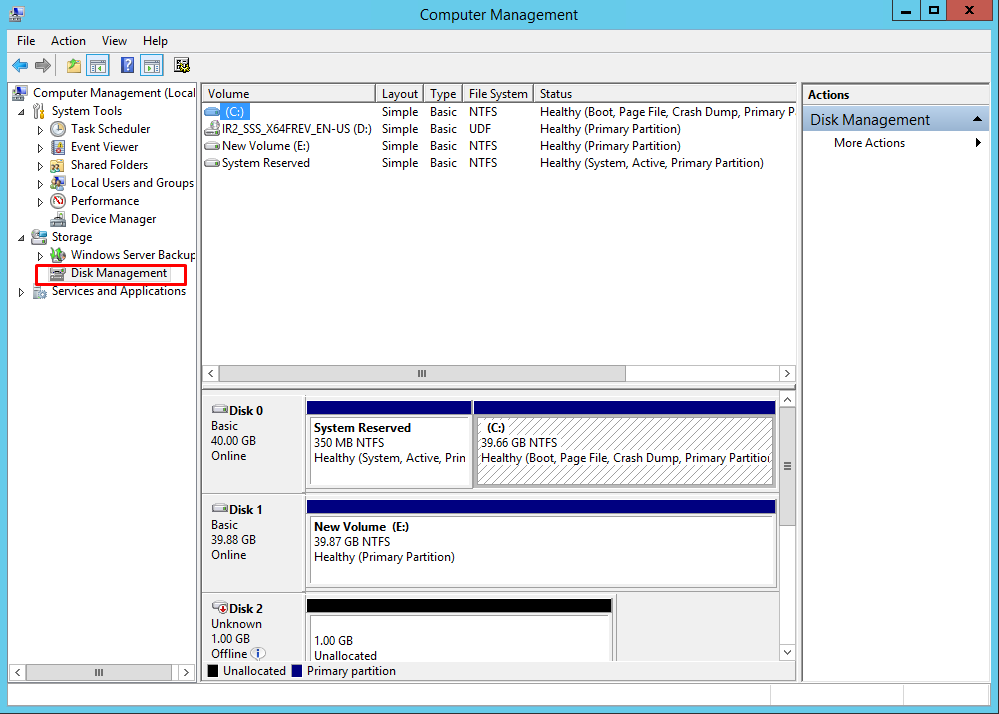
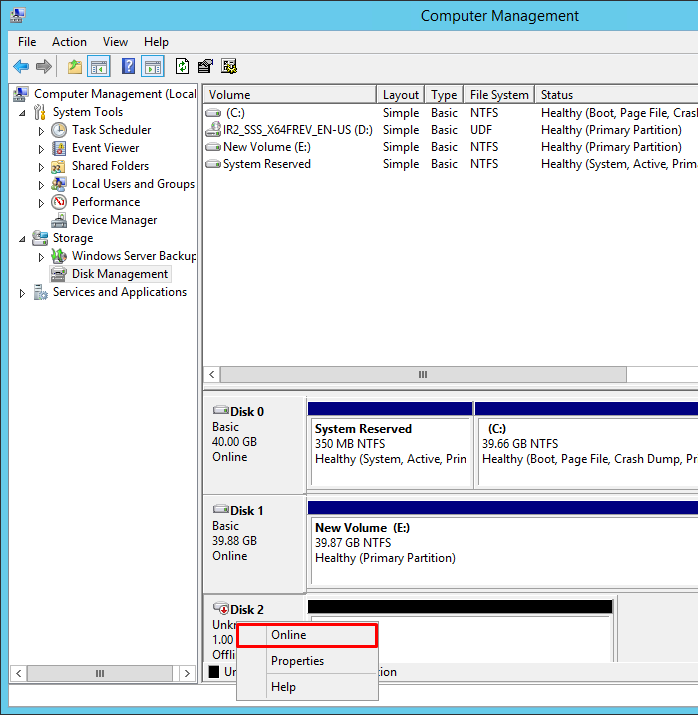
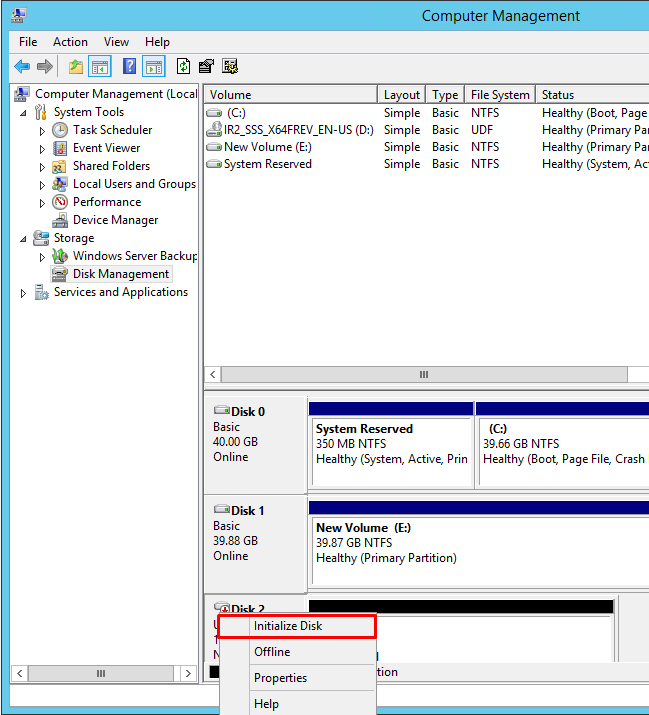
12. Right-click the disk that needs to be configured and select Online. Once the disk is brought online, it is marked as Not Initialized.
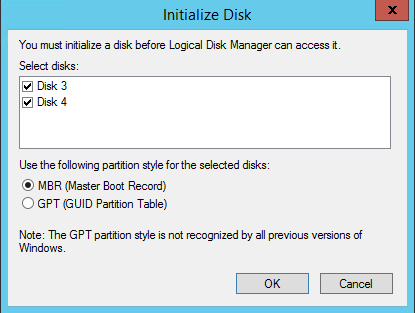
13. To initialize, right-click the disk and select Initialize Disk. The Initialize Disk dialog box will appear.
14. In the Initialize Disk dialog box, make sure that the appropriate disk is selected and choose the partition style to initialize the disk: MBR (Master Boot Record) or GPT (GUID Partition Table).
The most common partition style for disks used in SQL Server instances is MBR, which is selected by default. Click OK.
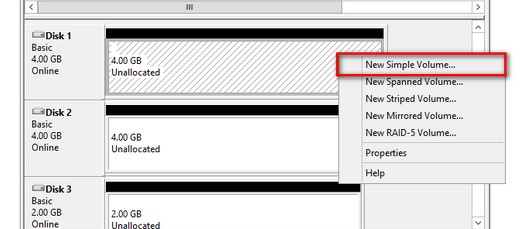
15. To create the disk partition, right-click the unallocated space and select New Simple Volume…
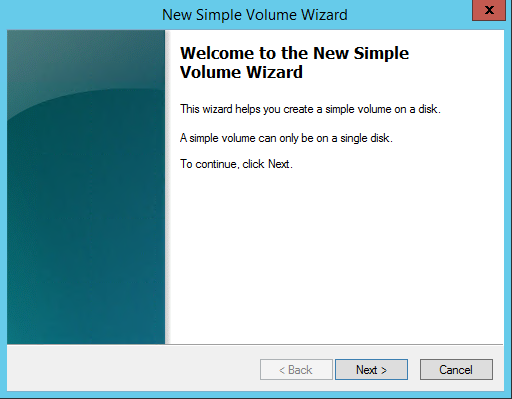
16. In Welcome to the New Simple Volume Wizard, click Next.
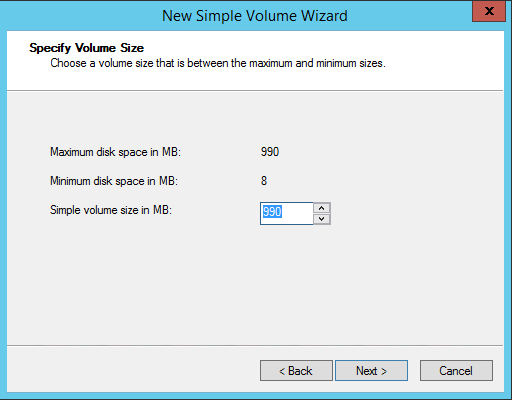
17. In the Specify Volume Size dialog box, enter the volume size and click Next.
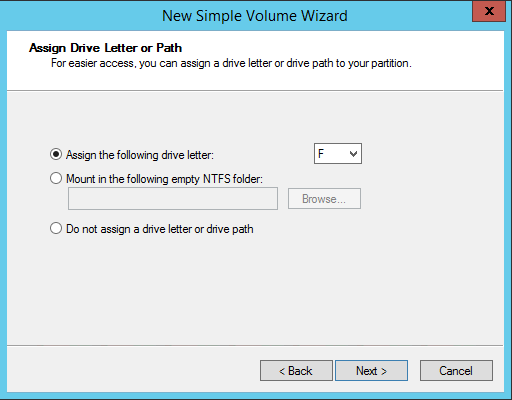
18. In the Assign Drive Letter or Path dialog box, specify the drive letter and click Next.
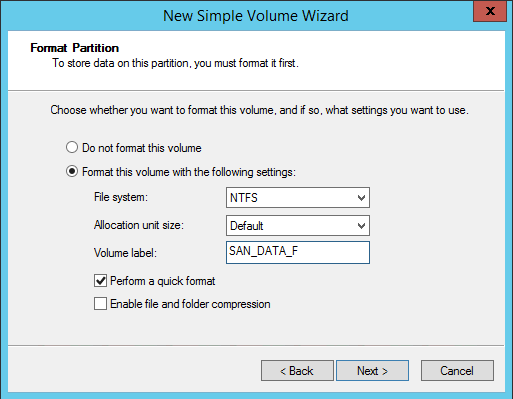
19. In the Format Partition dialog box:
- Make sure that the NTFS file system is selected.
- According to Microsoft Best Practices on allocation unit size, the unit size should be 64K.
- In the Volume label text box, enter the appropriate name.
This volume label will be used to verify the configuration on the other cluster node.
Click Next.
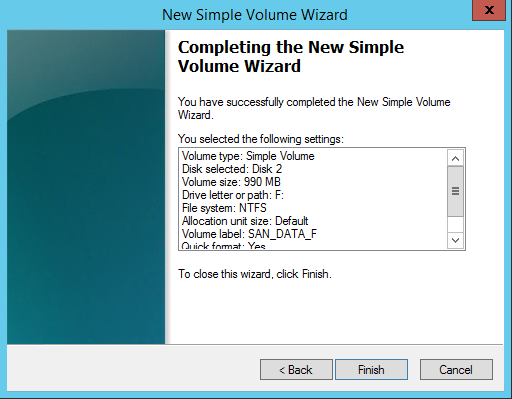
20. In the Completing the New Simple Volume Wizard dialog box, review the settings and click Finish.
21. Repeat the steps above on all disks that need to be configured as part of Windows Server Failover Cluster.
Installing .NET Framework 3.5
SQL Server 2012 requires both Microsoft .NET Framework 3.5.1 and 4.0 as parts of its prerequisite software. The .NET Framework 3.5.1 package is already a part of the Windows Server 2012 installation media, while the .NET Framework 4.0 is included in the SQL Server 2012 installation media. The installation of the .NET Framework 3.5.1 on the Windows Server 2012 machines may lead to issues in case if the Server Manager dashboard is used. For more information about possible issues and workarounds, please navigate to the Microsoft article at the following link.
The Deployment Image Servicing and Management (DISM) Command-Line tool can be used to install Microsoft .NET Framework 3.5.1 on Windows Server 2012.
NOTE: These steps must be performed on both servers that will act as nodes in the failover cluster.
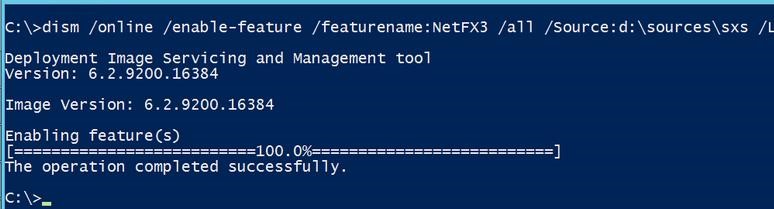
22. To install Microsoft .NET Framework 3.5.1, open the command line and type the following:
|
1 |
dism /online /enable-feature /featurename:NetFX3 /all /Source:d:\sources\sxs /LimitAccess |
Installing Windows Server Failover Clustering Feature
The Windows Server Failover Clustering feature provides high availability and scalability in many server workloads. SQL Server 2012 takes advantage of this feature and its capabilities to support Failover Cluster Instance and the AlwaysOn Availability Group feature. This guide is focused on SQL Server Failover Cluster Instances.
NOTE: These steps must be performed on both servers to act as nodes in the Failover Cluster.
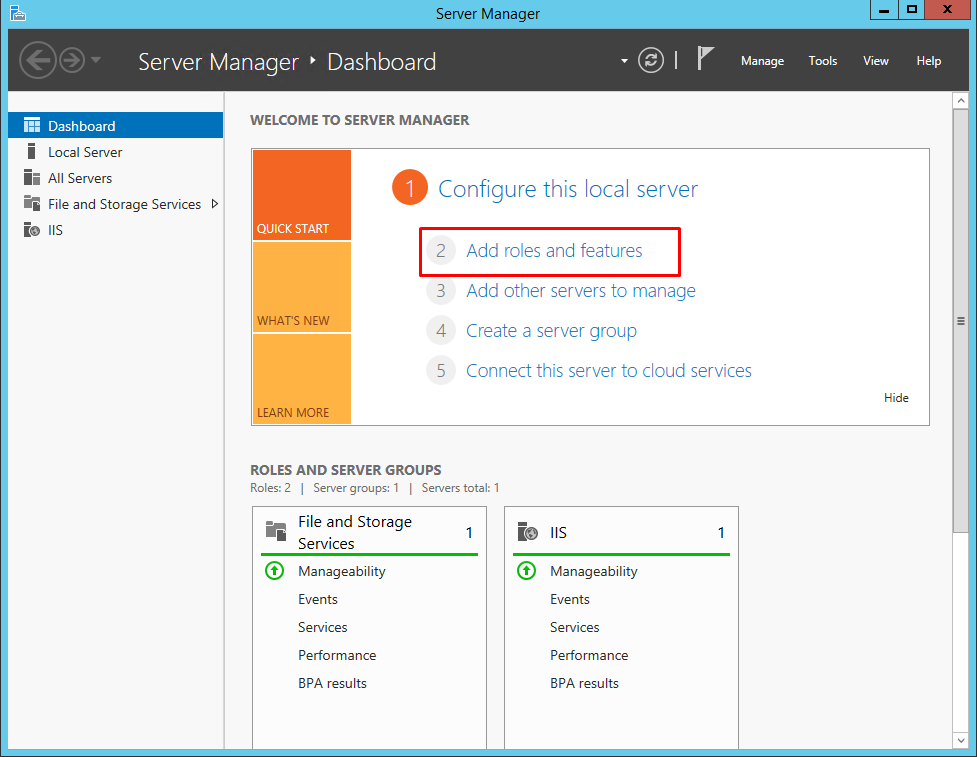
23. To add the Failover Clustering feature:
Open the Server Manager dashboard and select Add roles and features.
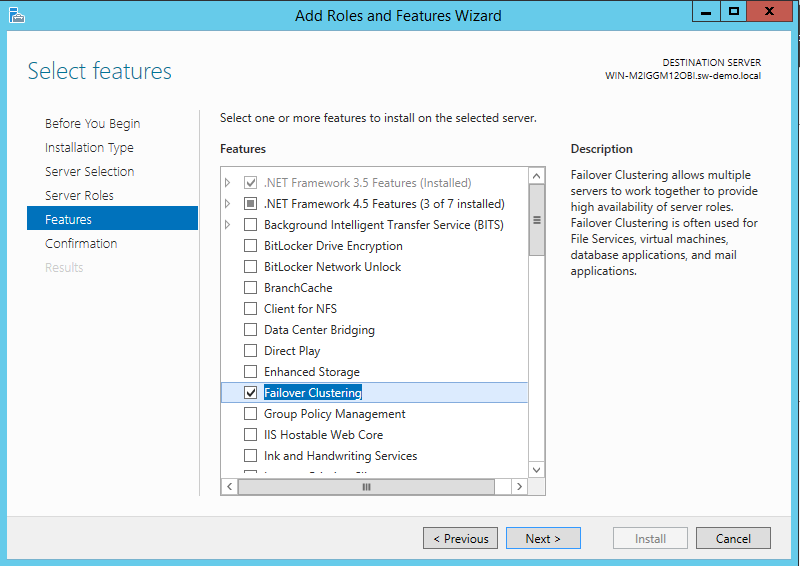
24. Click Next until reaching the Select features dialog box. Select the Failover Clustering checkbox.
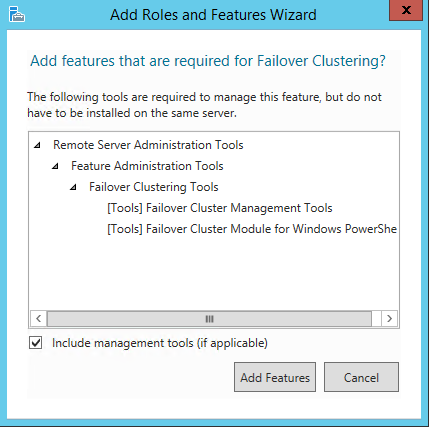
25. When prompted with the Add Roles and Features Wizard dialog box, click the Add Features button. Then click Next.
26. Click Install to set up the Failover Clustering feature.
Configuring Windows Server Failover Clustering
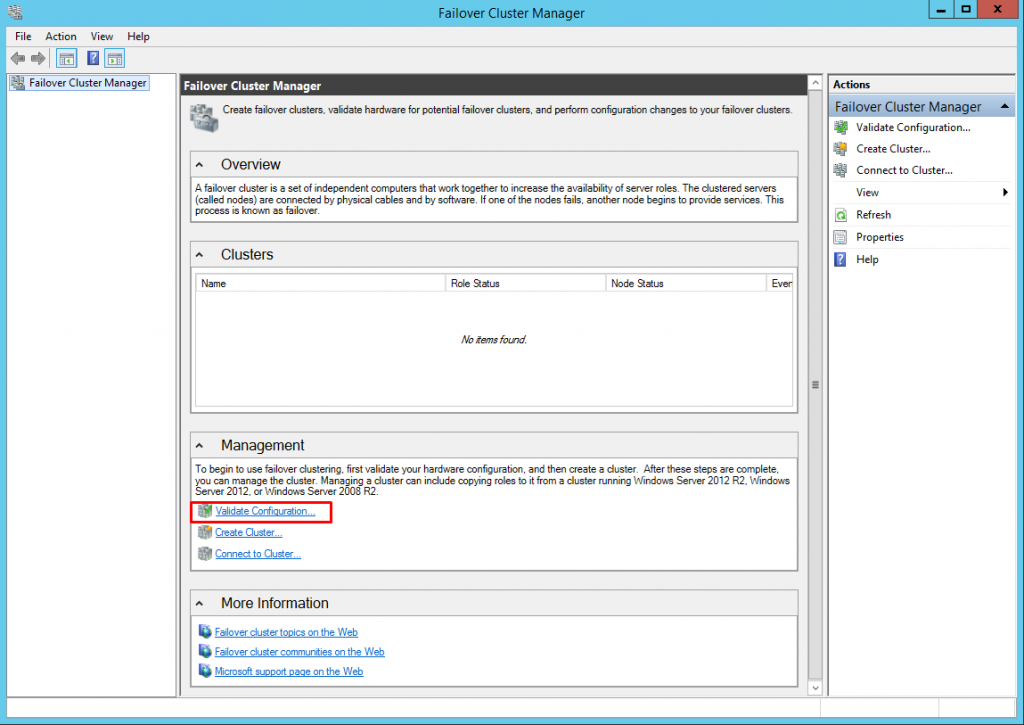
27. Once the Windows Server Failover Clustering feature is installed, proceed with the configuring of Windows Server Failover Cluster. Start with running Validate a Configuration Wizard to make sure that the cluster configuration will be officially supported by Microsoft.
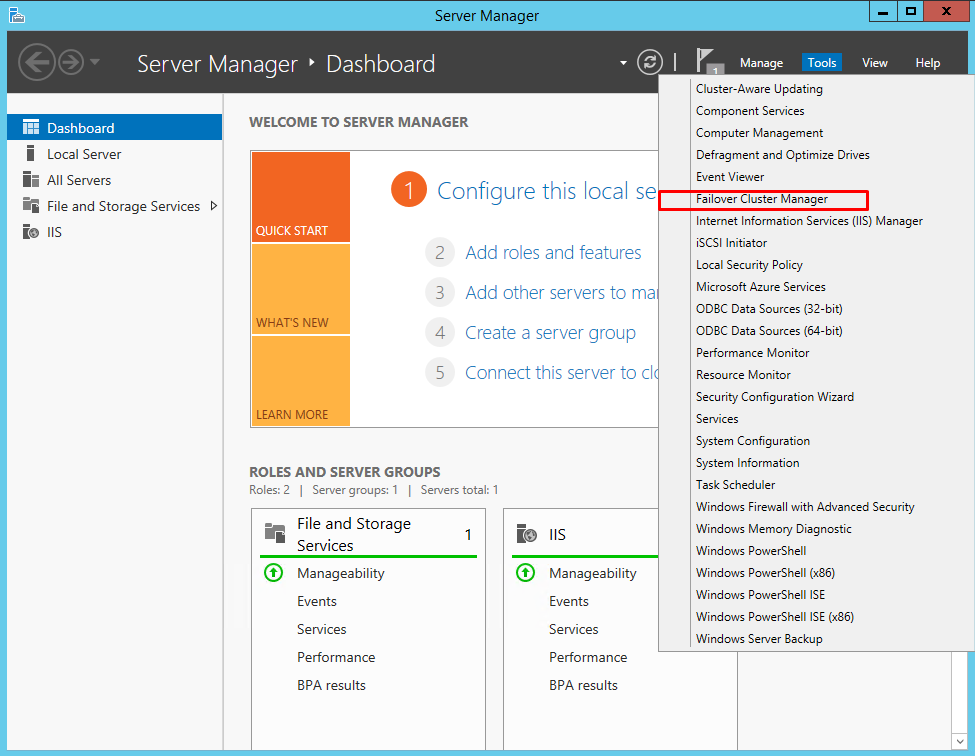
28. To configure Windows Failover Clustering: Launch Failover Cluster Manager from the Server Manager console.
29. In the Failover Cluster Manager dialog box, click on the Validate Configuration… link.
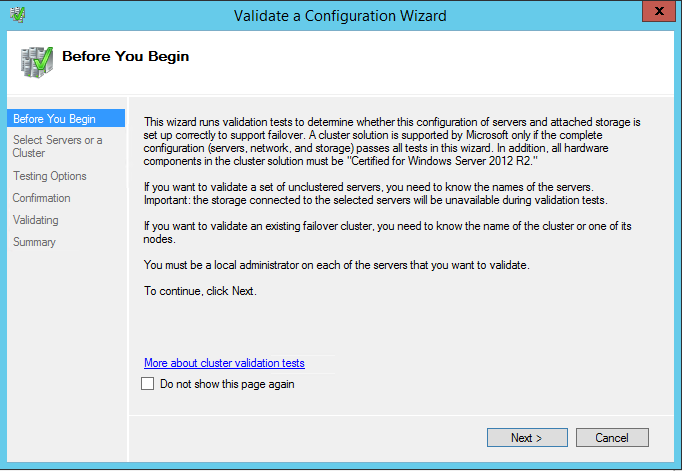
30. In the Validate a Configuration Wizard dialog box, click Next.
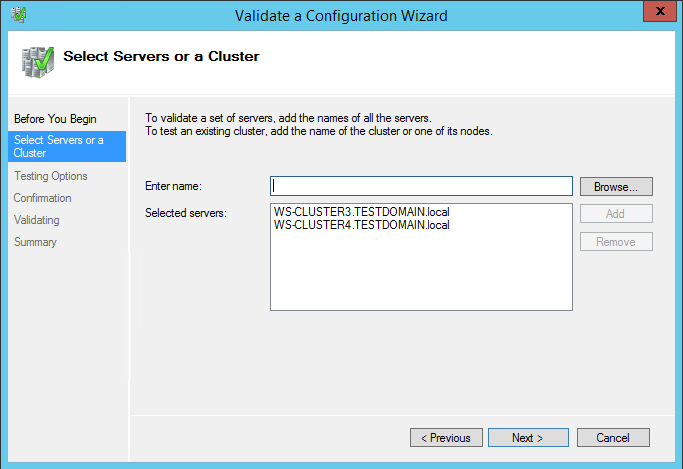
31. In the Select Servers or a Cluster dialog box, add the following server names: WS-CLUSTER3 and WS-CLUSTER4. Click Next.
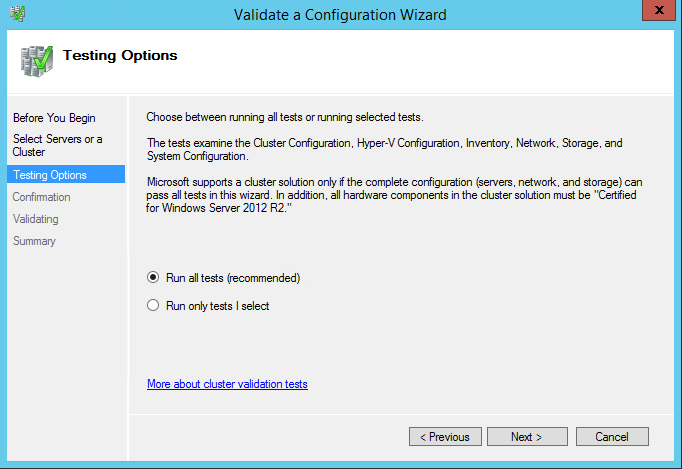
32. In the Testing Options dialog box, make sure that the option Run all tests (recommended) is selected. Click Next.
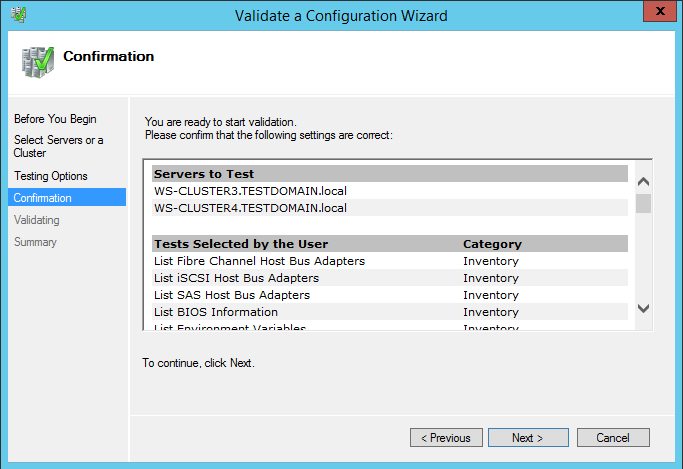
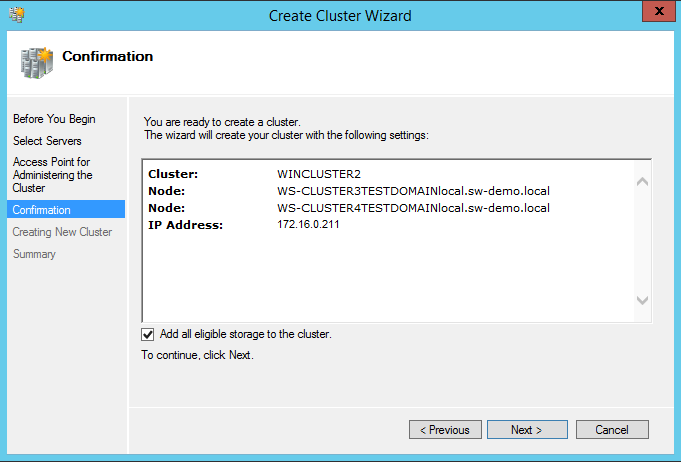
33. In the Confirmation dialog box, click Next.
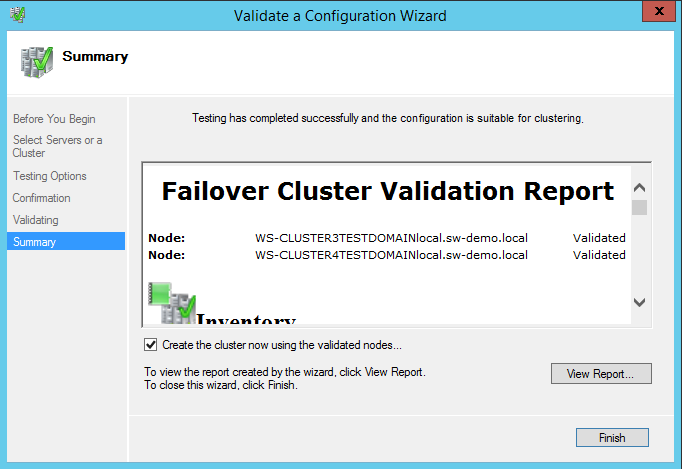
34. In the Summary dialog box, click Finish to create the Windows Server Failover Cluster.
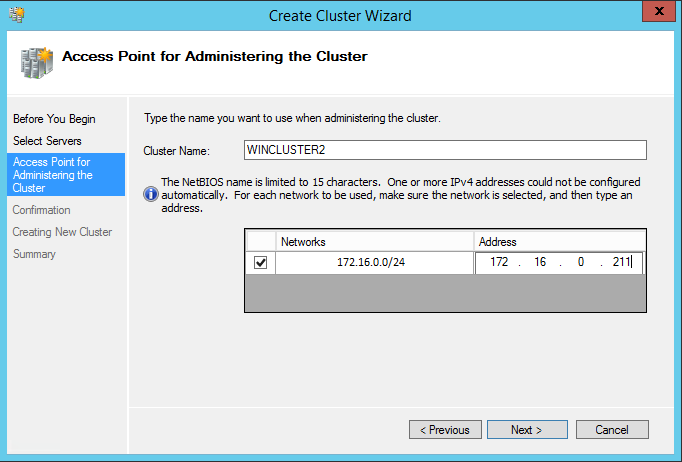
35. In the Access Point for Administering the Cluster dialog box, enter the following credentials:
Cluster Name: WINCLUSTER2
Address: 172.16.0.211
Click Next.
36. In the Confirmation dialog box, click Next. As a result, the Windows Server Failover Cluster using the servers as nodes of the cluster will be created. Add the DNS and Active Directory entries for the cluster host name.
37. In the Summary dialog box, verify that the configuration is successful and click Finish.
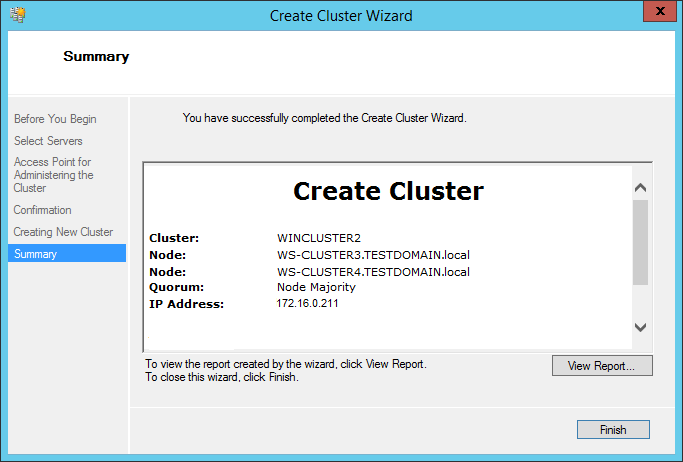
38. Verify that the cluster Quorum Configuration is using Node and Disk Majority and the appropriate drive that is configured as the quorum disk.
Installing SQL Server 2012 Failover Cluster Instance
Initial Cluster Node
Installing SQL Server 2012 Failover Cluster Instance requires appropriate permissions in the Active Directory domain and the local Administrator rights to the machines that will act as nodes in the Failover Cluster. Configuring the appropriate permissions in Active Directory is beyond the scope of this document. For more information, refer to the document Failover Cluster Step-by-Step Guide: Configuring Accounts in Active Directory.
There are two ways to install the SQL Server 2012 Failover Cluster Instance. The first one is to use the integrated failover cluster installation with the Add Node option. The second one is the Advanced/Enterprise Installation option.
The process outlined below describes the first option and the DEFAULT SQL Server instance configuration.
To install SQL Server 2012 Failover Cluster Instance:
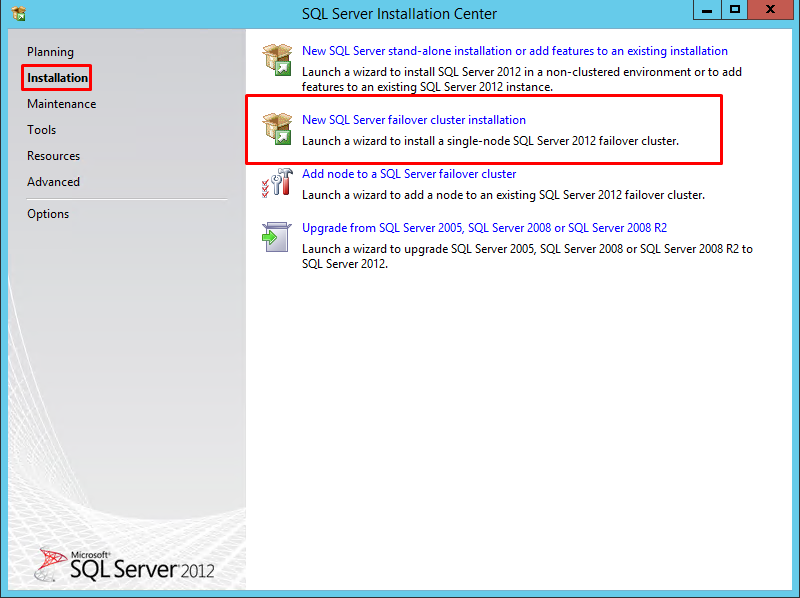
39. Run setup.exe from the installation media to launch SQL Server Installation Center. Click on the Installation link on the left-hand side.
40. Click the New SQL Server failover cluster installation to run the SQL Server 2012 Setup Wizard.
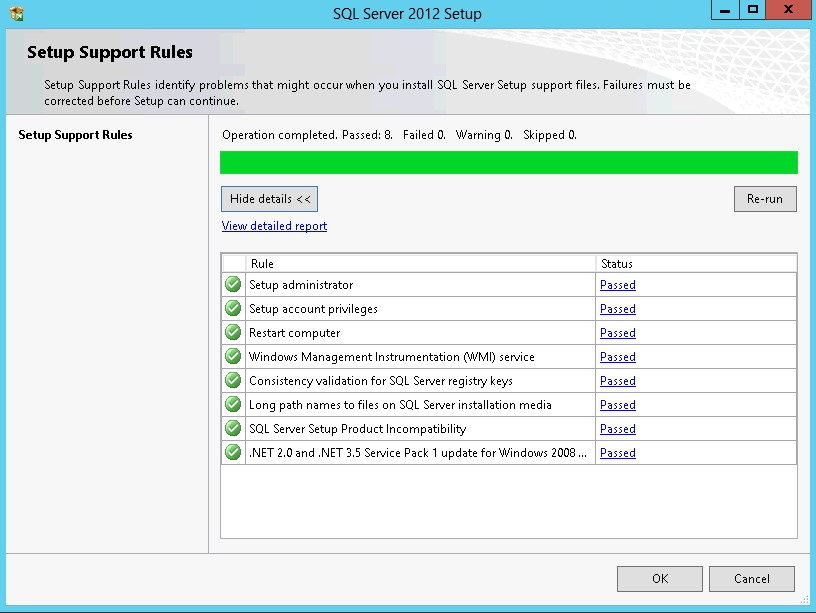
41. In the Setup Support Rules dialog box, validate that the tests return successful results and click Next.
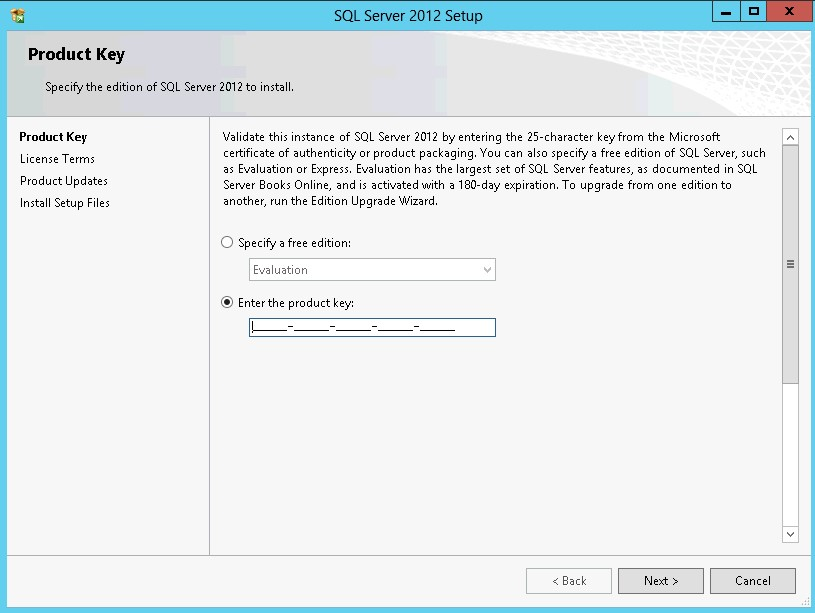
42. In the Product Key dialog box, enter the product key that came with the installation media and click Next.
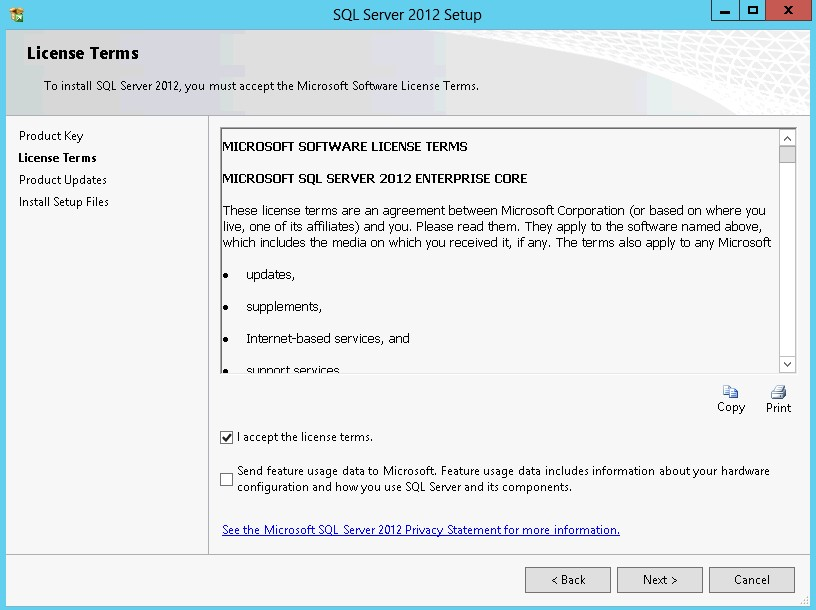
43. In the License Terms dialog box, enable the I accept the license terms and click Next.
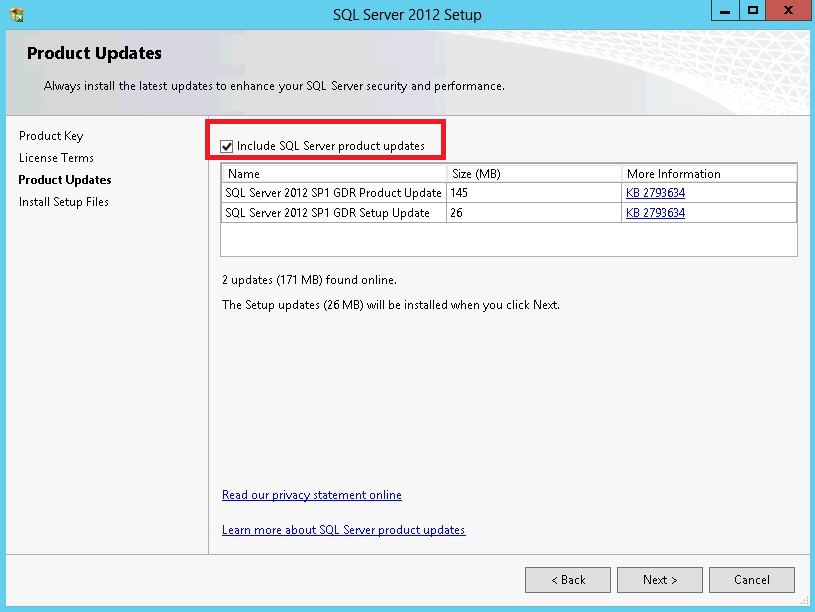
44. In the Product Updates dialog, select the checkbox to enable the Include SQL Server product updates (such as service packs and cumulative updates) option. If servers are connected to the Internet, the installation media will connect to Windows Update and check for available SQL Server 2012 updates. The detected updates can be included as a part of the installation process. Click Next.
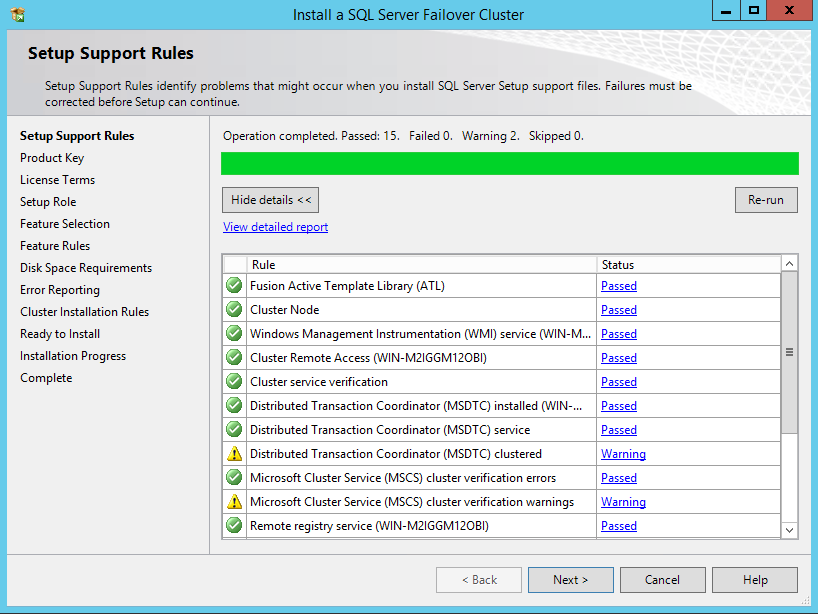
45. In the Setup Support Rules dialog box, validate that the tests return successful results. If the tests return warnings, fix them before proceeding with the installation. Click Next.
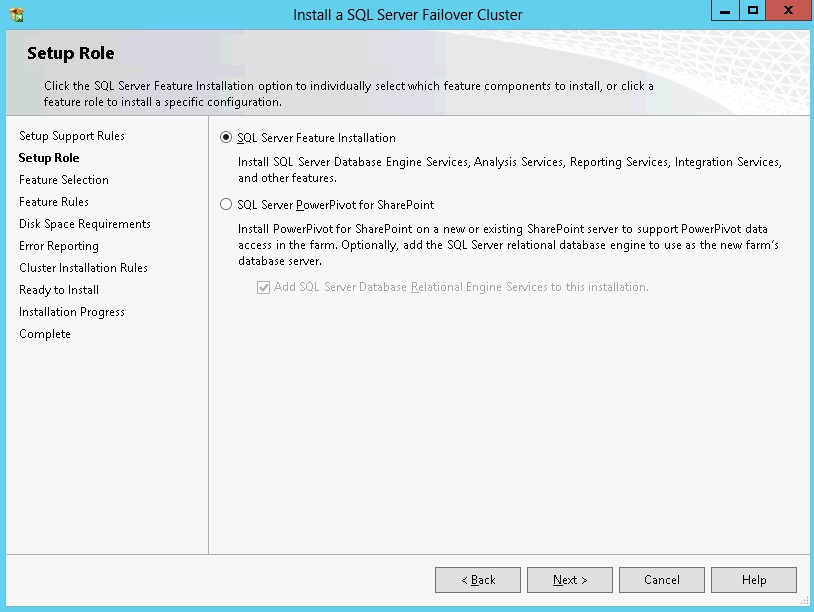
46. In the Setup Role dialog box, choose the SQL Server Feature Installation option and click Next.
47. In the Feature Selection dialog box, select the following components:
- Database Engine Services
- SQL Server Replication
- Client Tools Connectivity
- Management Tools.
Click Next.
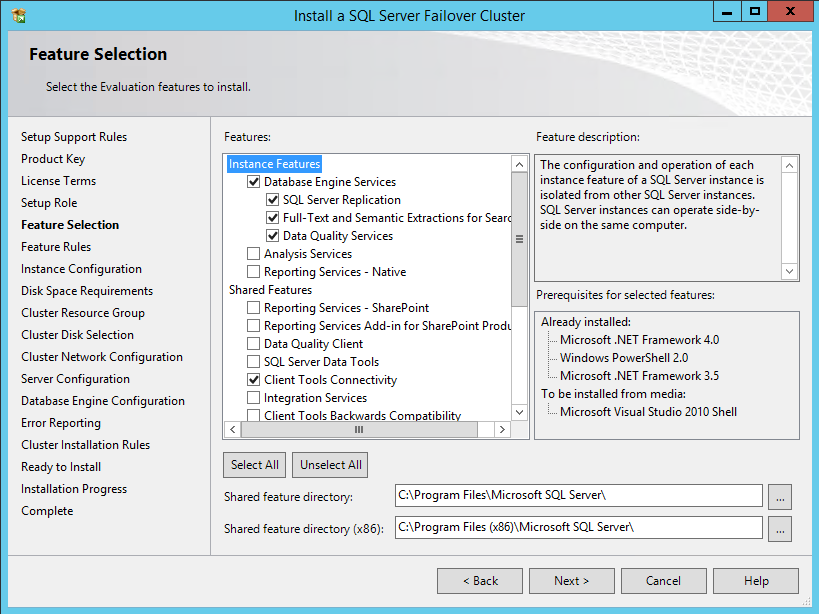
NOTE: Data Quality Services is required when installing Database Engine Services on the Failover Cluster when the installation media includes SQL Server 2012 Service Pack 1 as per Microsoft KB article 2674817.
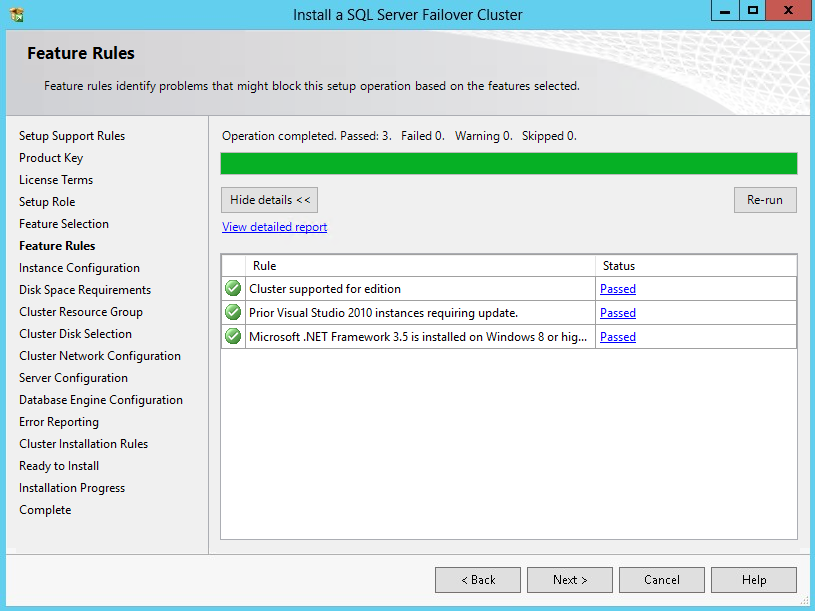
48. In the Feature Rules dialog box, verify that all the rules are passed. If the rules return warnings, fix them before to proceed with the installation. Click Next.
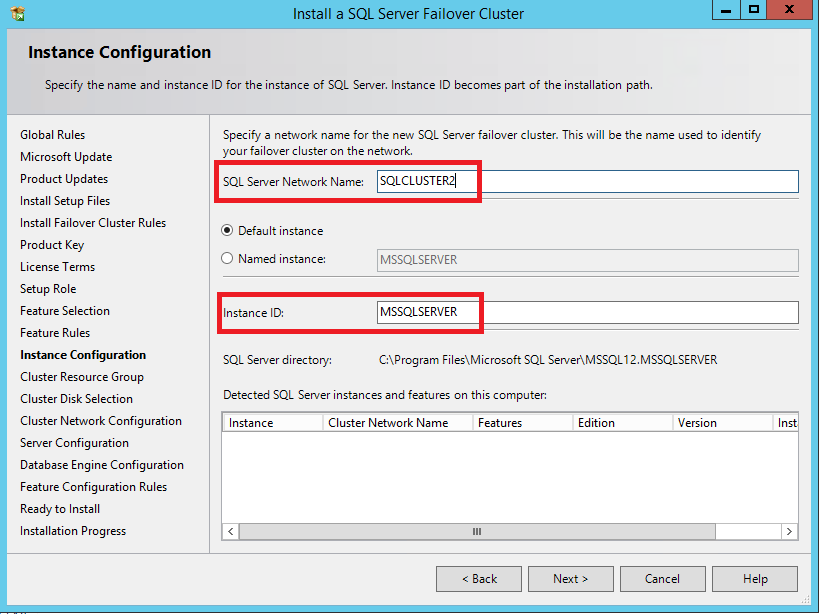
49. In the Instance Configuration dialog box, enter the following credentials:
SQL Server Network Name: SQLCLUSTER2
Instance ID: MSSQLSERVER
Click Next.
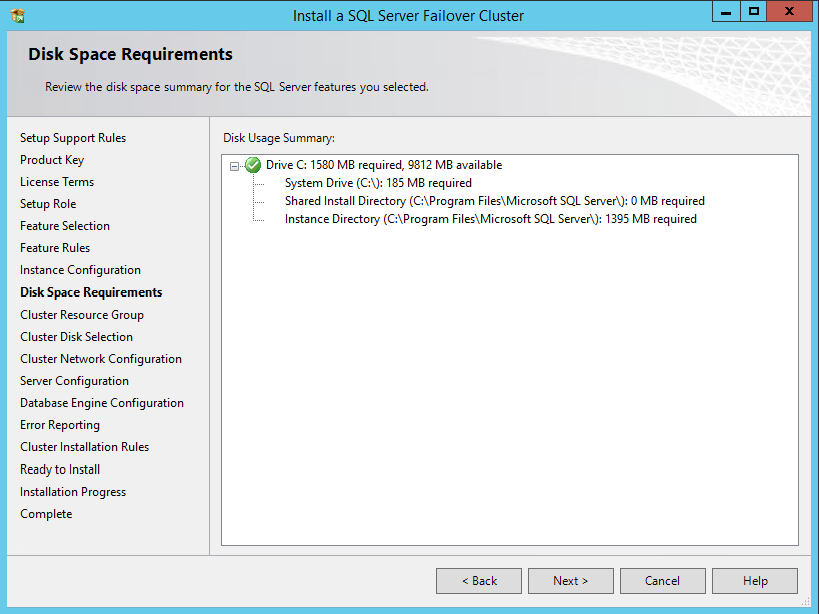
50. In the Disk Space Requirements dialog box, check that there is enough space on local disks to install the SQL Server 2012 binaries. Click Next.
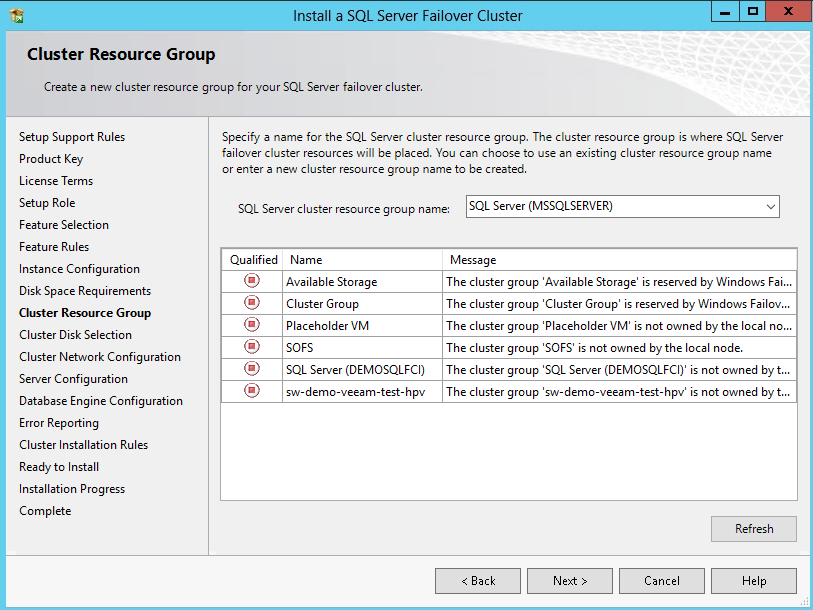
51. To make sure that a new Resource Group for the SQL Server Failover Cluster Instance can be created, check the resource availability in the Cluster Resource Group dialog box. To specify an existing SQL Server cluster resource group name, use the drop-down box or type the name of a new group to create it. Accept all the defaults and click Next.
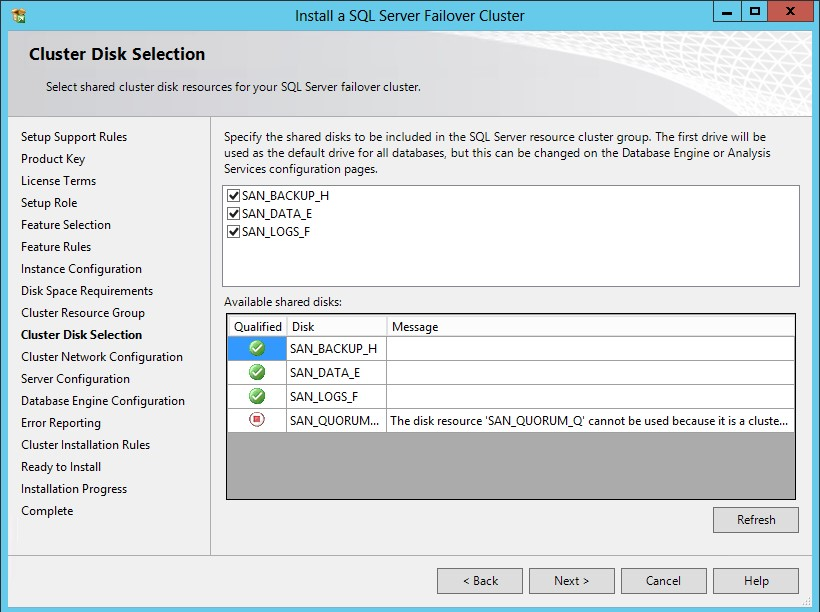
52. In the Cluster Disk Selection dialog box, select the available disk groups on the cluster for SQL Server 2012 to use. Click Next.
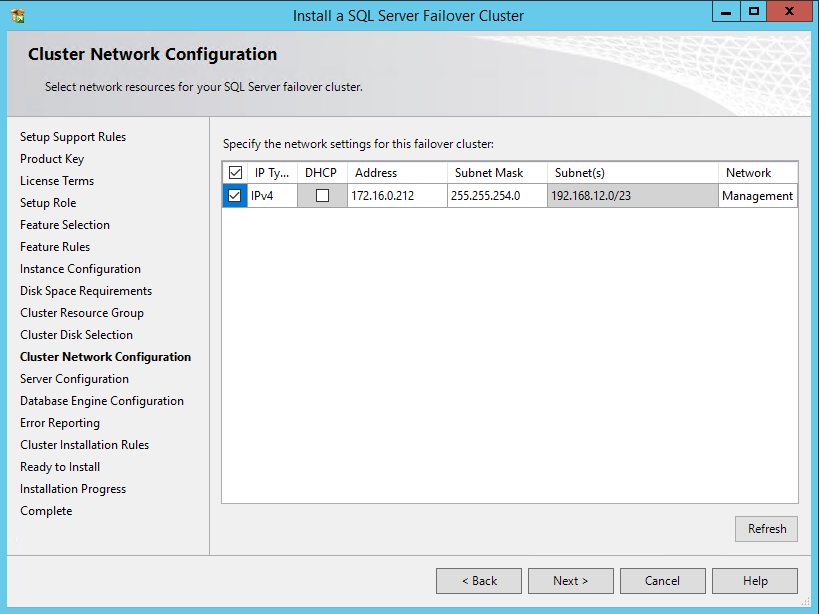
53. In the Cluster Network Configuration dialog box, enter the virtual IP address for SQL Server 2012 failover cluster to use:
IP Type: IPv4
Address: 172.16.0.212
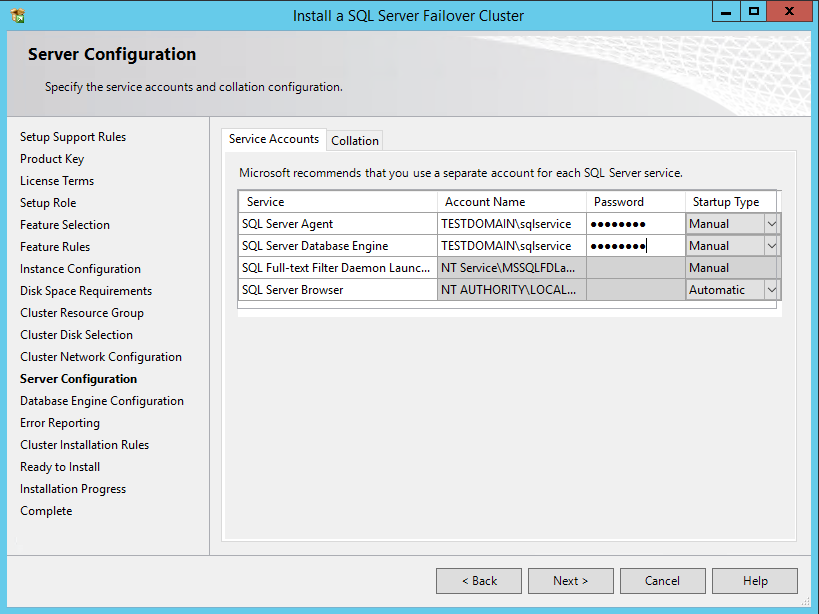
54. In the Server Configuration dialog box, use the following credentials for the SQL Server service accounts in the Service Accounts tab.
SQL Server Agent: TESTDOMAIN\sqlservice
SQL Server Database Engine: TESTDOMAIN\sqlservice
Make sure that both SQL Server Agent and SQL Server Database Engine services have the Manual Startup Type. Windows Server Failover Cluster will take care of stopping and starting the service.
Click Next.
55. In the Database Engine Configuration dialog box, select the Windows authentication mode in the Server Configuration tab. To add the currently logged on user to the SQL Server administrators group, click the Add Current User button. Otherwise, add the appropriate domain accounts or security groups.

56. In the Data Directories tab, enter the following credentials:
Data root directory: E:\
User database directory: E:\SQLSERVER\MSSQL\Data
User database log directory: F:\SQLSERVER\MSSQL\Data
Temp DB directory: E:\SQLSERVER\MSSQL\Data
Temp DB log directory: F:\SQLSERVER\MSSQL\Data
Backup directory: H:\SQLSERVER\MSSQL\Backup
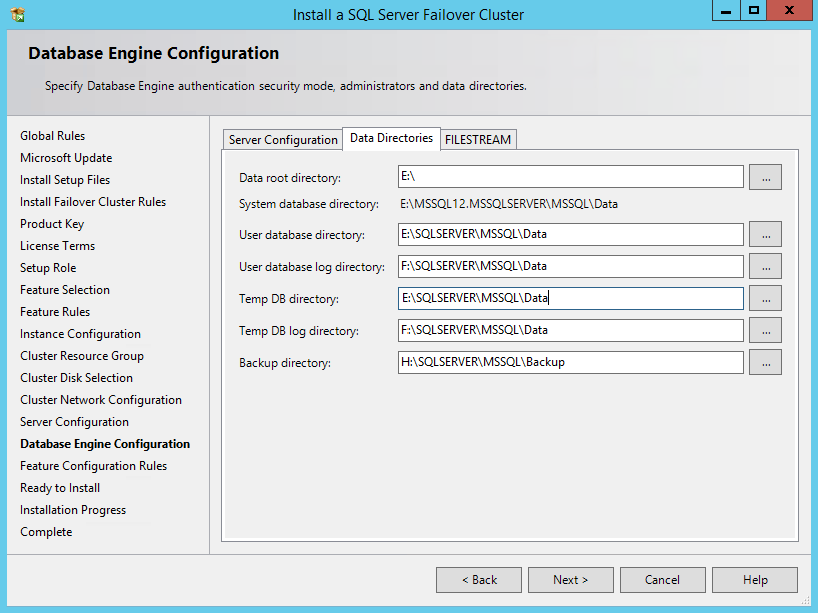
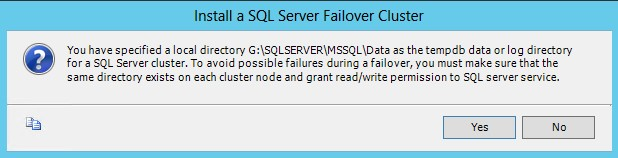
NOTE: SQL Server 2012 has the option to store the tempdb database on a local drive instead of the cluster drive. Make sure that all nodes in the cluster contain the same directory structure and the SQL Server service account has read/write permissions on those folders.
Click Yes. Then, click Next.
57. In the Error Reporting dialog box, click Next.

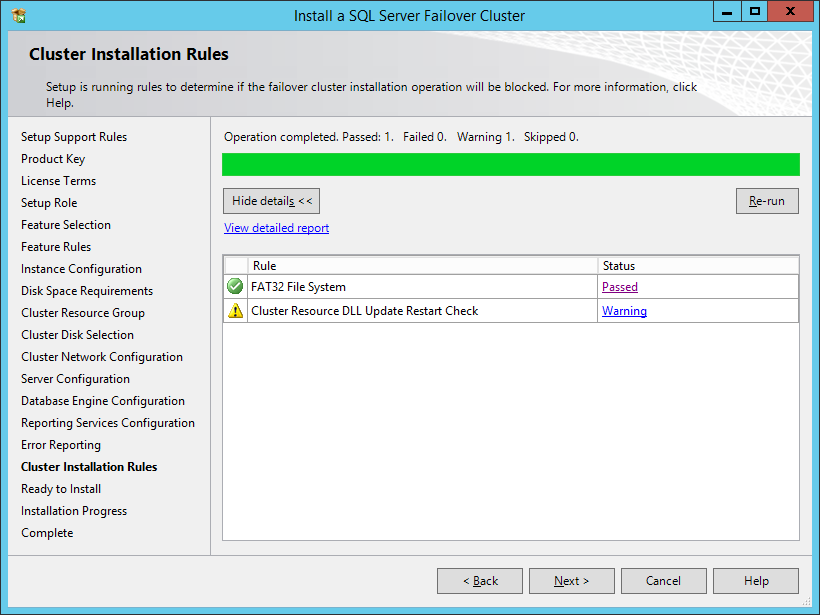
58. In the Cluster Installation Rules dialog box, verify that all tests are successful and click Next.
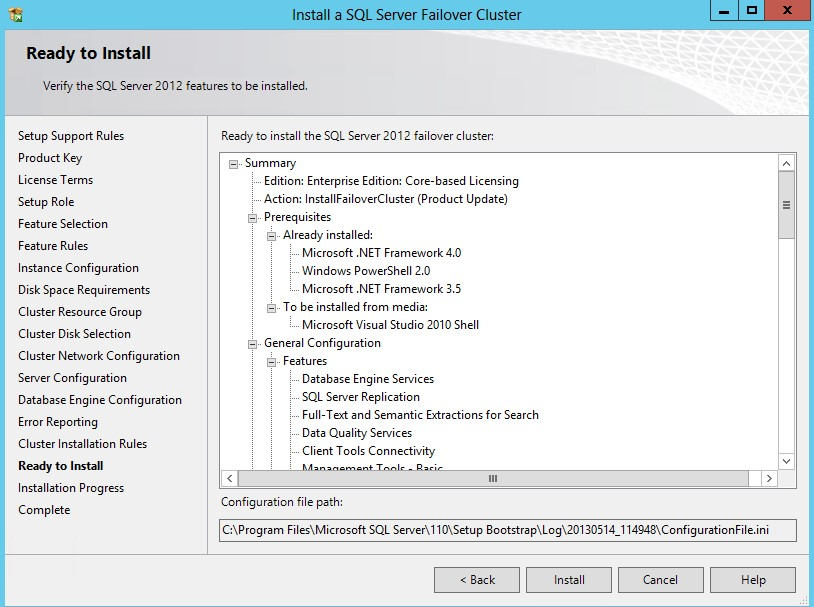
59. In the Ready to Install dialog box, verify that all configurations are correct. Click Next.
60. In the Complete dialog box, click Close. This step finishes the installation of the SQL Server 2012 Failover Cluster Instance.

Failover Cluster Node
This part describes how to make the cluster highly available by adding nodes. Most of the steps outlined below are similar to the ones described in the Initial Cluster Node part. While all the steps are still included, some screenshots have been omitted for brevity. To add a node to the SQL Server 2012 Failover Cluster Instance:
61. Run setup.exe from the installation media to launch the SQL Server Installation Center. Click on the Installation link on the left-hand side.
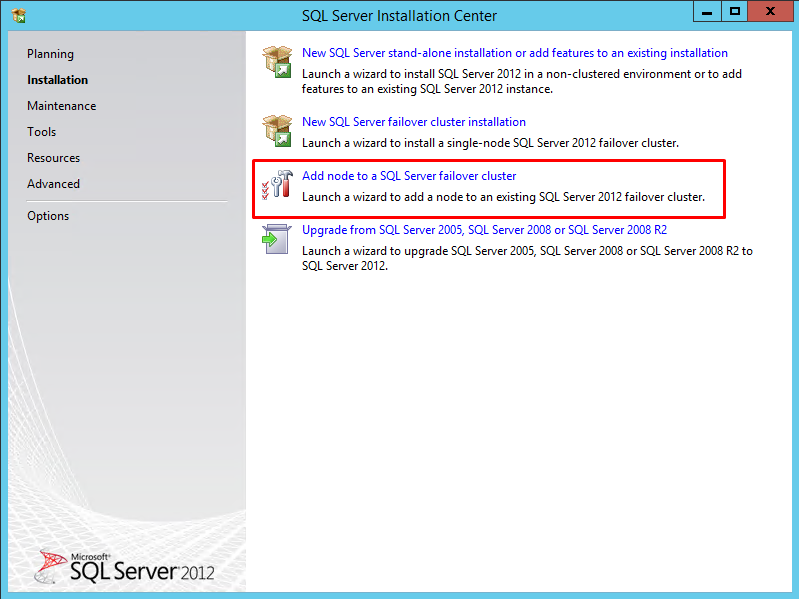
62. Click on the Add node to a SQL Server failover cluster link to run the SQL Server 2012 Setup Wizard.
63. In the Setup Support Rules dialog box, validate that the tests return successful results and click OK. Click Next.
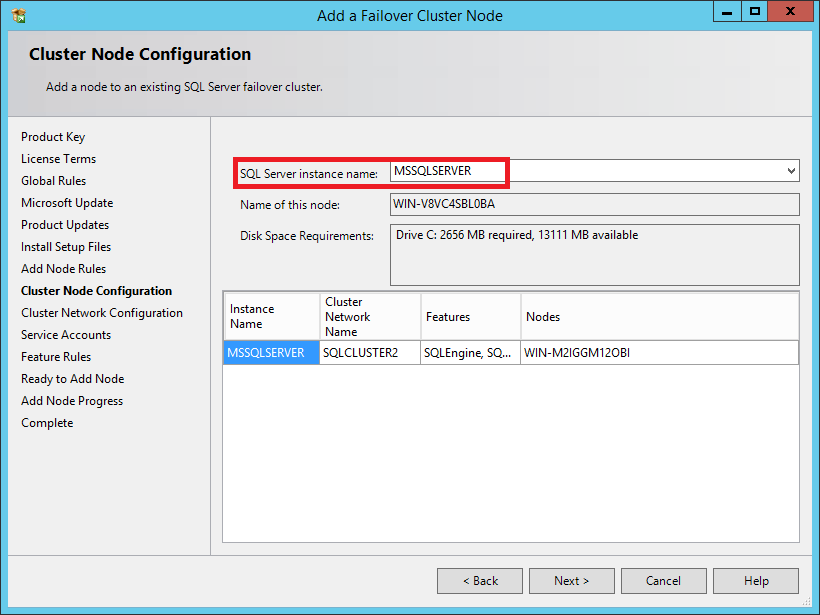
64. In the Cluster Node Configuration dialog box, check if the information on the existing SQL Server 2012 cluster is correct. Click Next.
65. In the Service Accounts dialog box, verify that the information is the same as it was used to configure the first node. Click Next.
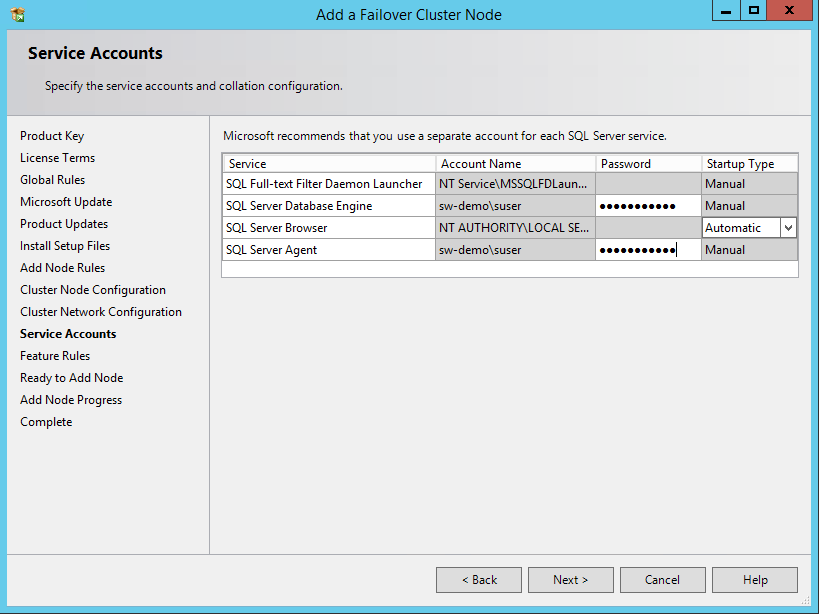
NOTE: In case of using different service accounts for the SQL Server services, make sure that the credentials provided are correct.
66. In the Error Reporting dialog box, click Next.
67. In the Add Node Rules dialog box, verify that all tests are successful and click Next.
68. In the Ready to Add Node dialog box, verify that all configurations are correct and click Install.
69. In the Complete dialog box, click Close. This step concludes adding the node to the SQL Server 2012 Failover Cluster.
70. Reboot both nodes after completing the installation to make sure that there are no pending reboot operations that may be flagged as warnings.
CONCLUSION
The steps described above allow configuring a 2-node Windows Server 2012 Failover Cluster that will host a SQL Server Failover Cluster Instance (FCI). StarWind Virtual SAN was taken as the basis for use in the Windows Server 2012 hosted storage during the implementation of a block-level replication and creating Windows Server Failover Cluster. StarWind VSAN ensures data safety of the entire system and maintains continuous application availability.
